
The D2RX is the dual-channel receiver at the heart of your THEOS 2-Channel Kit. This guide covers the physical setup: the front-panel buttons, installing the antennas and battery, mounting the belt clip and cold shoe, reading the LED indicators, and connecting the D2RX to cameras, recorders, and computers. It finishes with the recommended antenna angle for the most reliable signal.
Button Functions
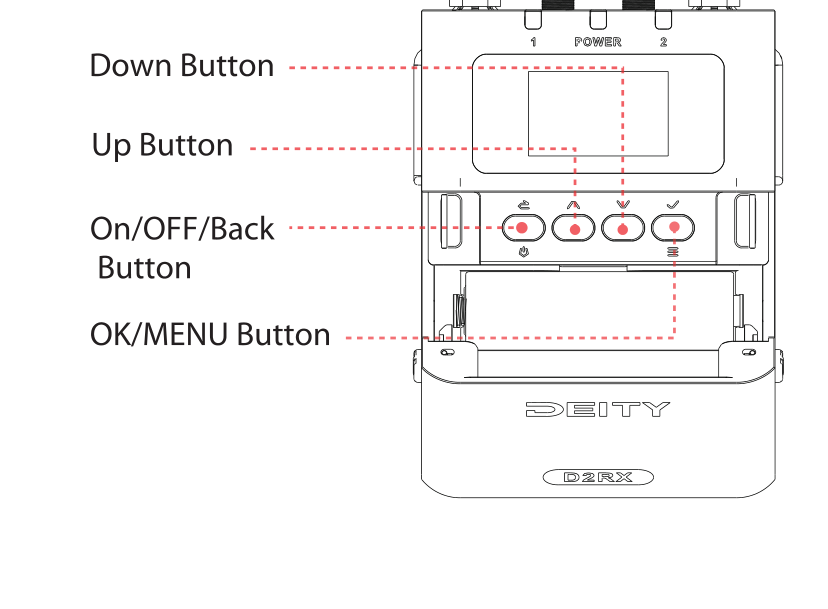
The D2RX is operated with four buttons on the front panel:
- On/OFF/Back Button: Long press to turn the D2RX on and off. It also works as a Back button while navigating the menus and setup screens, returning you to the previous screen or menu item.
- Up / Down Buttons: Select options and adjust values on the setup screens. Long press Up to enter the gain setting for channel A. Long press Down to enter the gain setting for channel B.
- OK / MENU Button: Enters the menu and selects the highlighted item.
When Out B is set to monitor mode, a short press of Up or Down directly adjusts the monitoring volume.
Antenna Installation
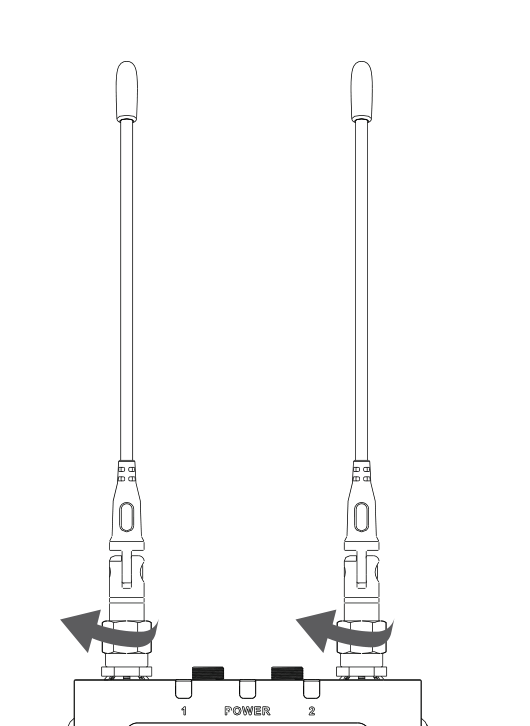
Simply screw each SMA elbow antenna into the D2RX antenna socket on the top of the receiver. Hand-tighten until snug. Do not overtighten.
The D2RX uses two antennas for true diversity reception. For the best signal, see Recommended Antenna Installation Angle below.
Battery Installation
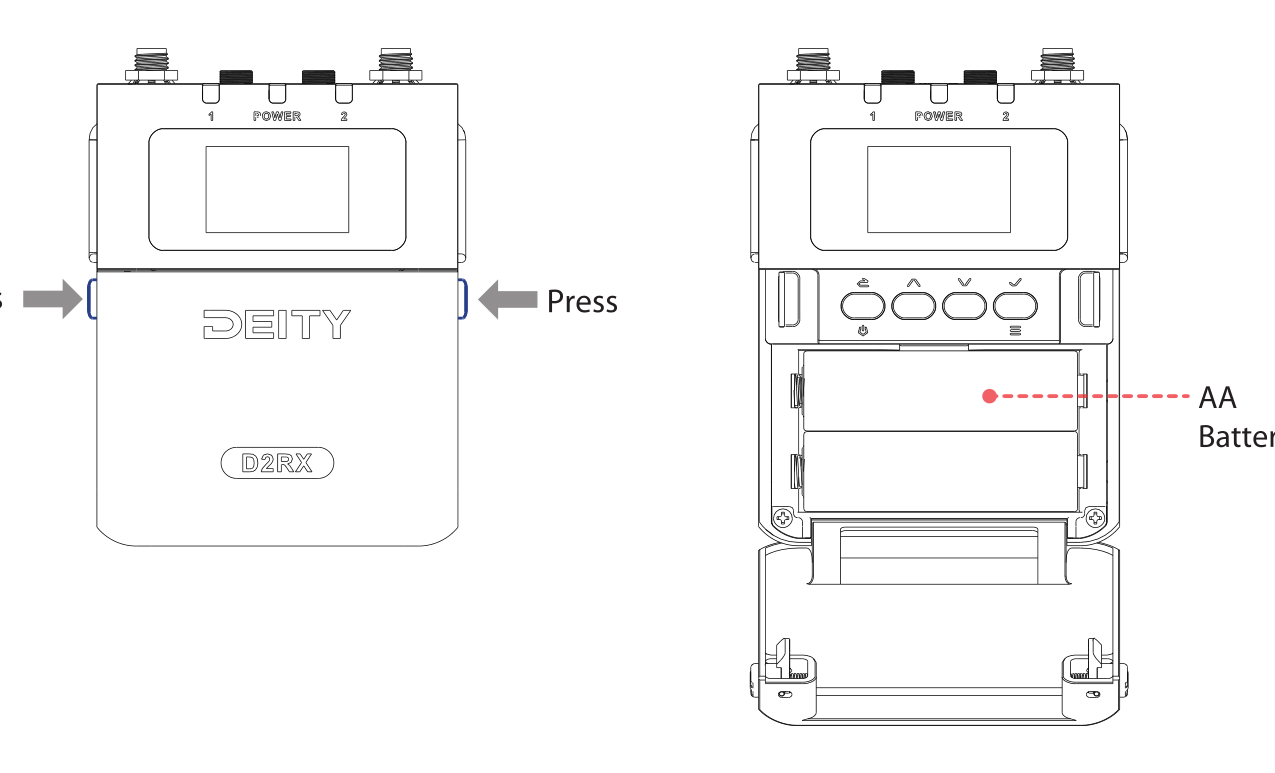
Press the battery compartment lock / unlock knobs located on both sides of the D2RX at the same time, then open the battery compartment cover. Install the AA batteries into the compartment in the correct orientation, matching the polarity markings.
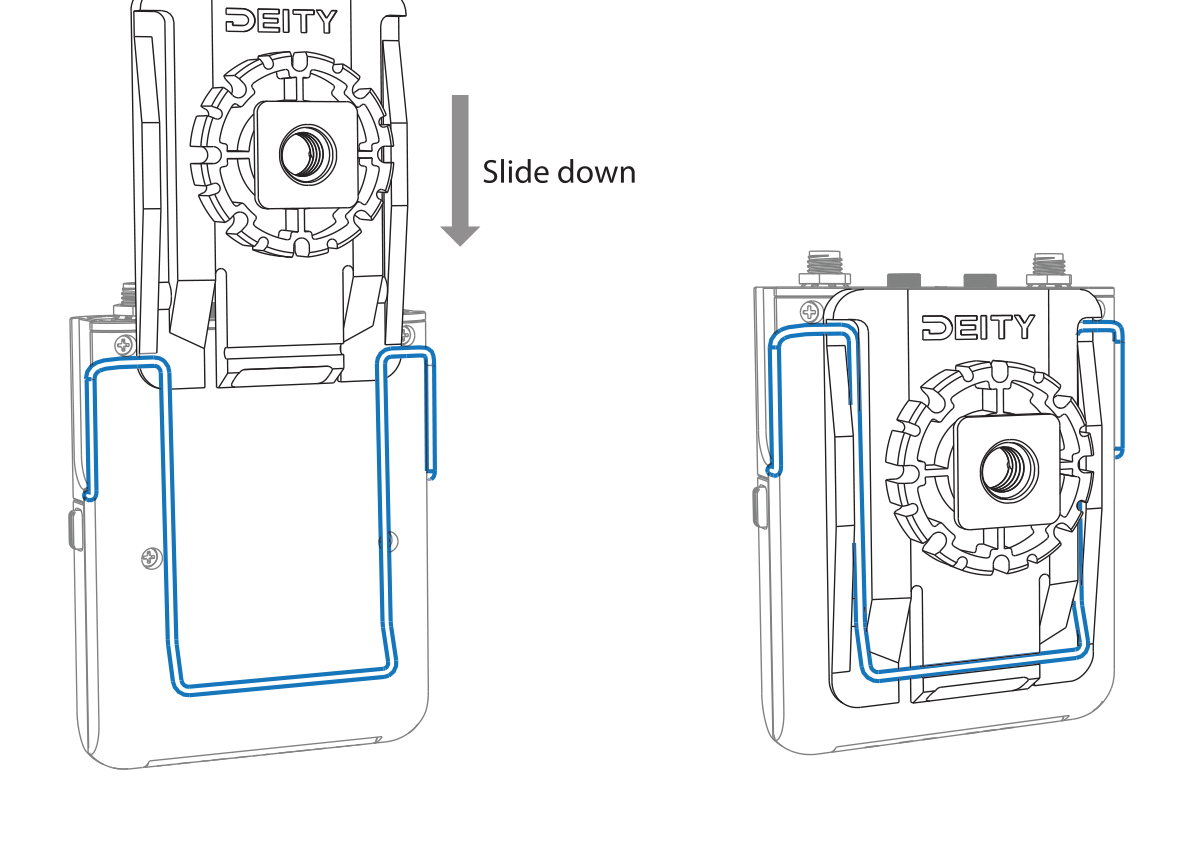
Installation Of Belt Clip
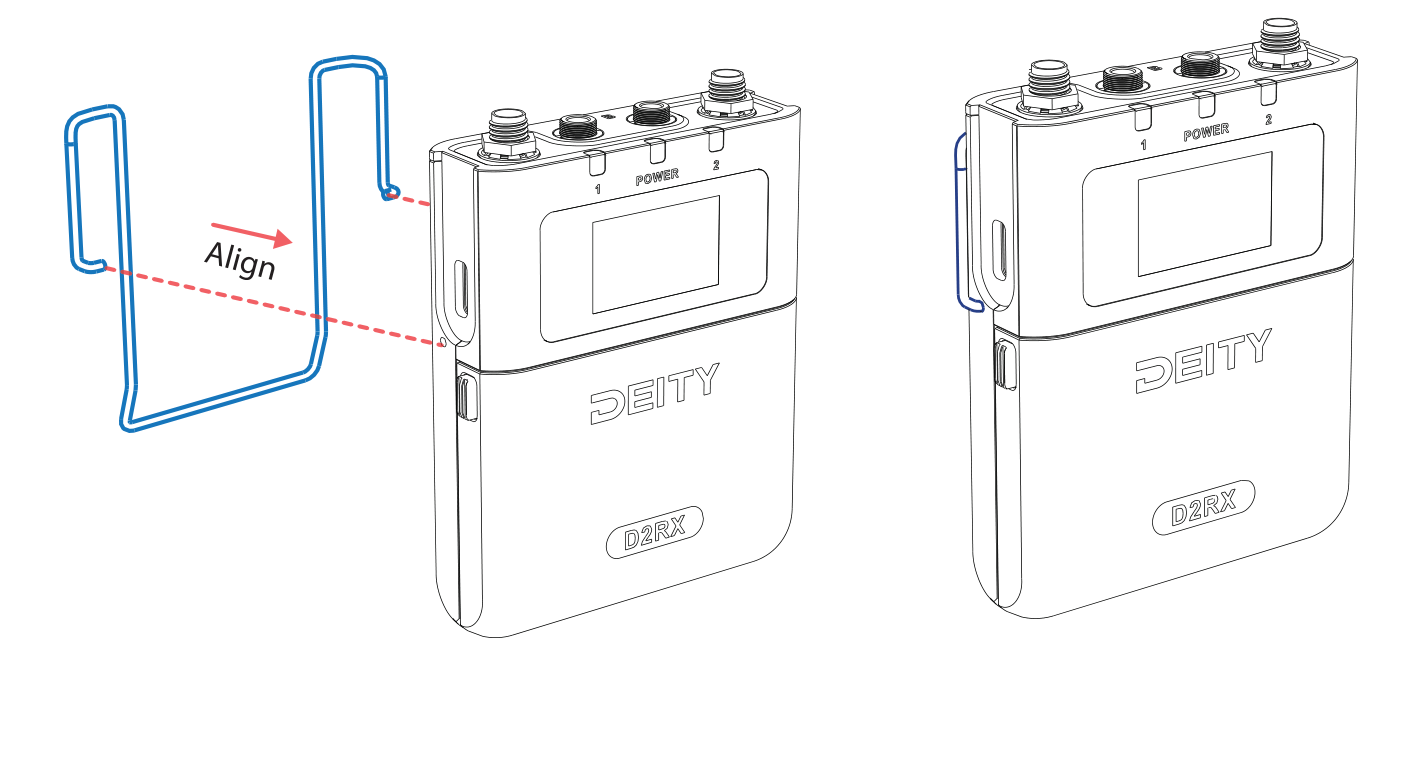
Insert the back clip into the installation holes on both sides of the D2RX. Align the clip arms with the holes, then press them in until the clip seats securely.
Installation Of Removable Cold Shoe Mount
Once the back clip is installed, slide the cold shoe mount into the back clip from top to bottom. When you hear a click, it is locked in place.
The cold shoe mount adds a standard 1/4"-20 thread, so you can attach the D2RX to a camera cage, cold shoe adapter, or stand.
Definition Of LED Indicator
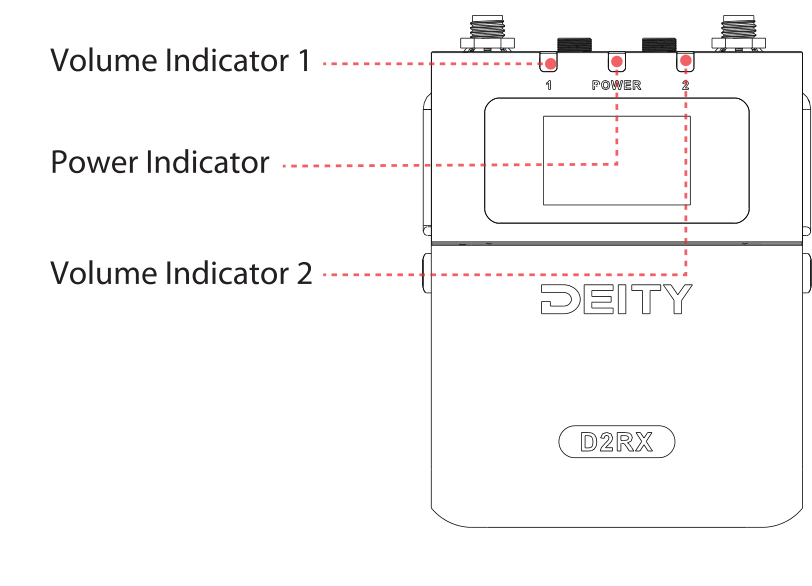
Three LEDs on the top of the D2RX report signal and power status:
- Volume Indicator (Audio): Shows the brightness and color based on the current volume of the wireless transmitter, matching the VU meter on the screen. From -40 dB to -10 dB it glows green. From -10 dB to 0 dB it glows red. When the microphone is muted, the red light flashes slowly. There is one indicator per channel (Volume Indicator 1 and Volume Indicator 2).
- Power Indicator: Glows green when the battery is good. It changes to red when about 30 minutes of operation remain.
Connecting To Recording Devices
The THEOS can be used with most recording devices: cameras, audio recorders, smartphones, and more. Use the included Deity C12 cable to connect a camera, the RX Link to connect recorders, and a USB-C to USB-C cable to connect a PC or smartphone.
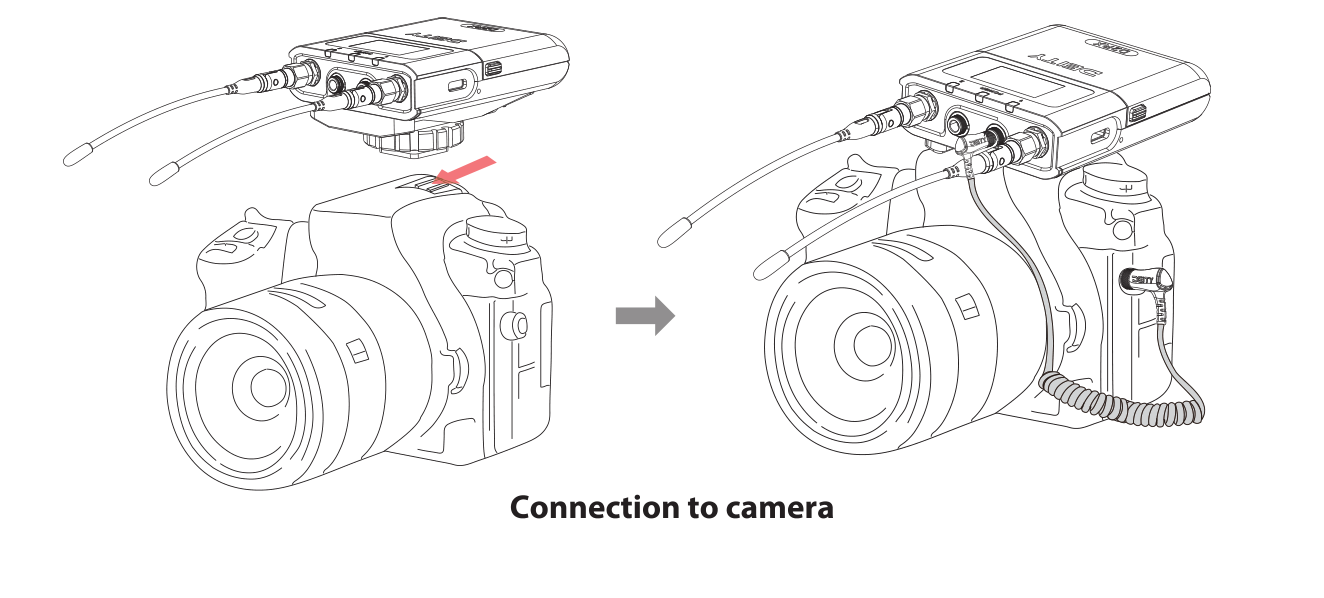
Connection to camera: Mount the D2RX on the camera cold shoe, then run the Deity C12 cable from the receiver output to the camera microphone input.
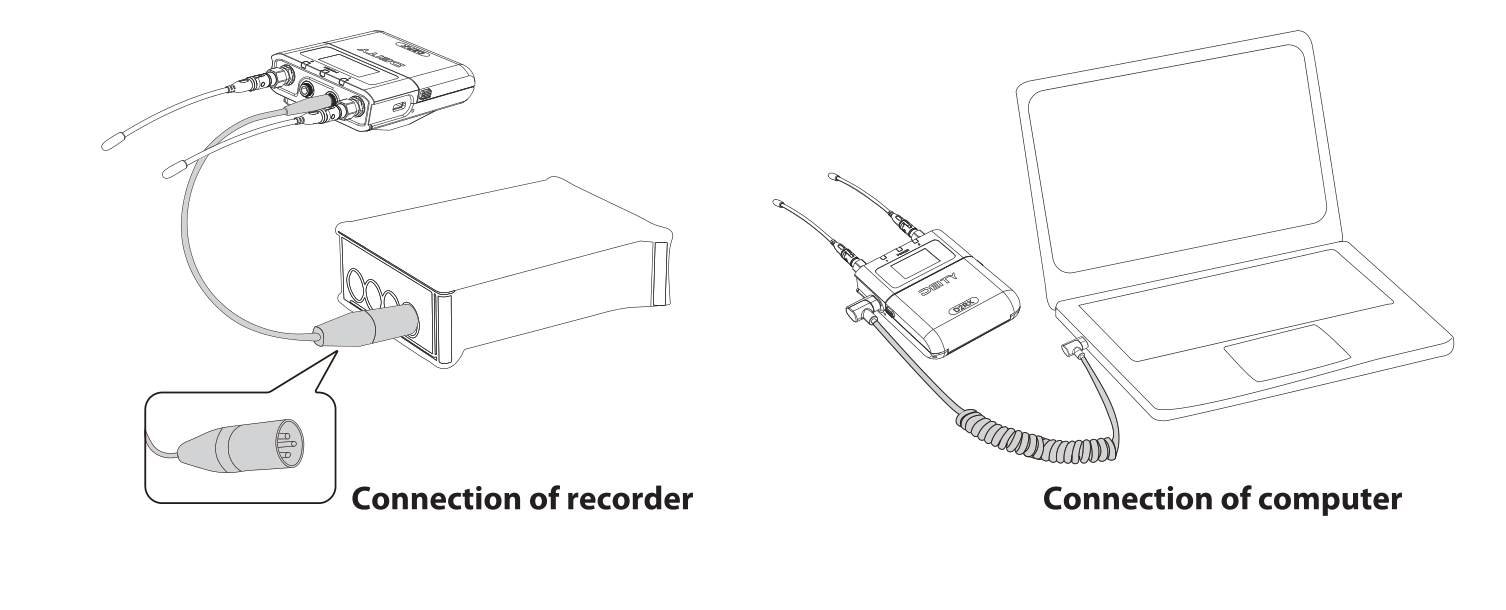
- Connection to a recorder: Use the RX Link cable to send audio from the D2RX output into the XLR input of an audio recorder or mixer.
- Connection to a computer: Use a USB-C to USB-C cable to connect the D2RX directly to a PC or smartphone as a digital audio source.
For clean levels into any of these devices, see [THEOS] Gain Staging.
Recommended Antenna Installation Angle
For the most reliable link, separate the two antennas by more than 90 degrees. This reduces interference and maintains the stability of the connection and communication.
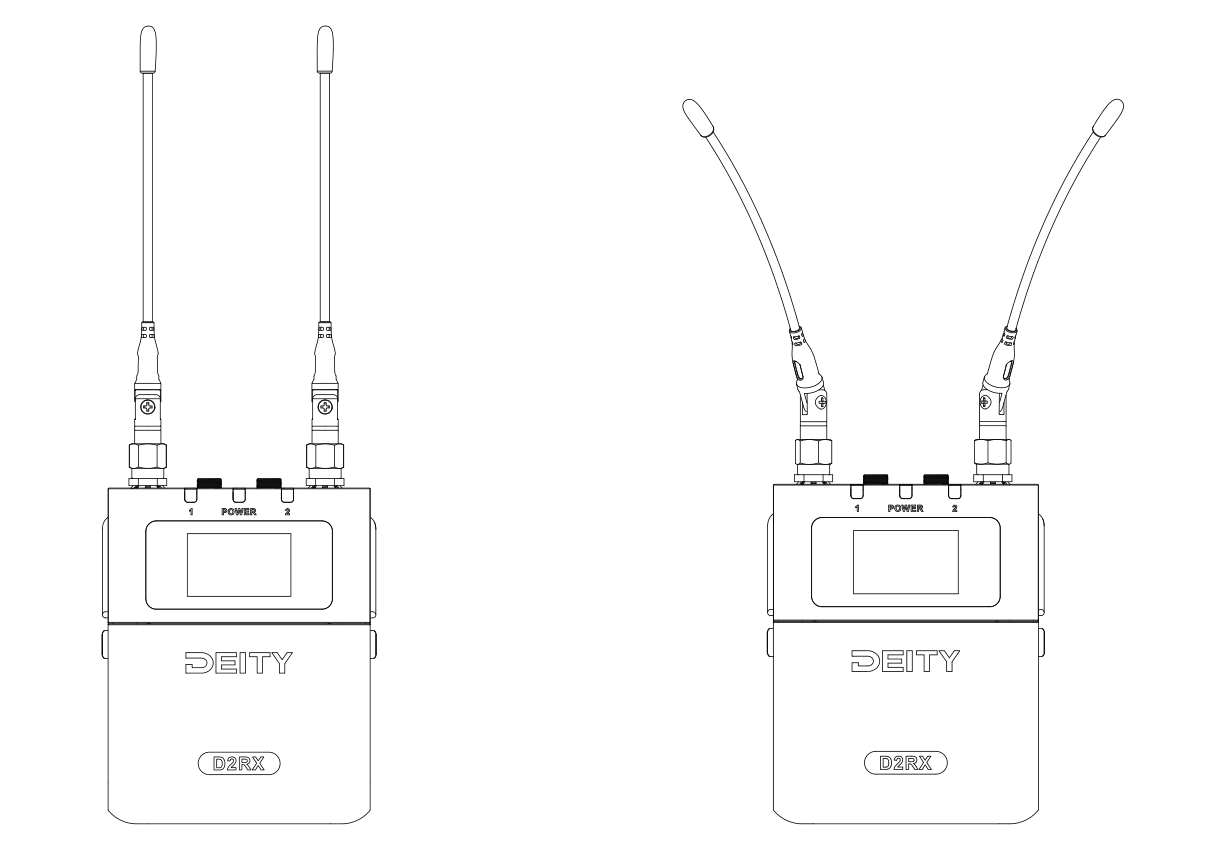
Both of the arrangements above are good: the antennas point up and outward in a wide V, keeping them well separated.
What to avoid
Do not let the two antennas run parallel or, worse, cross over each other. Antennas that sit close together or overlap pick up nearly the same signal, which defeats diversity reception and can cause dropouts.
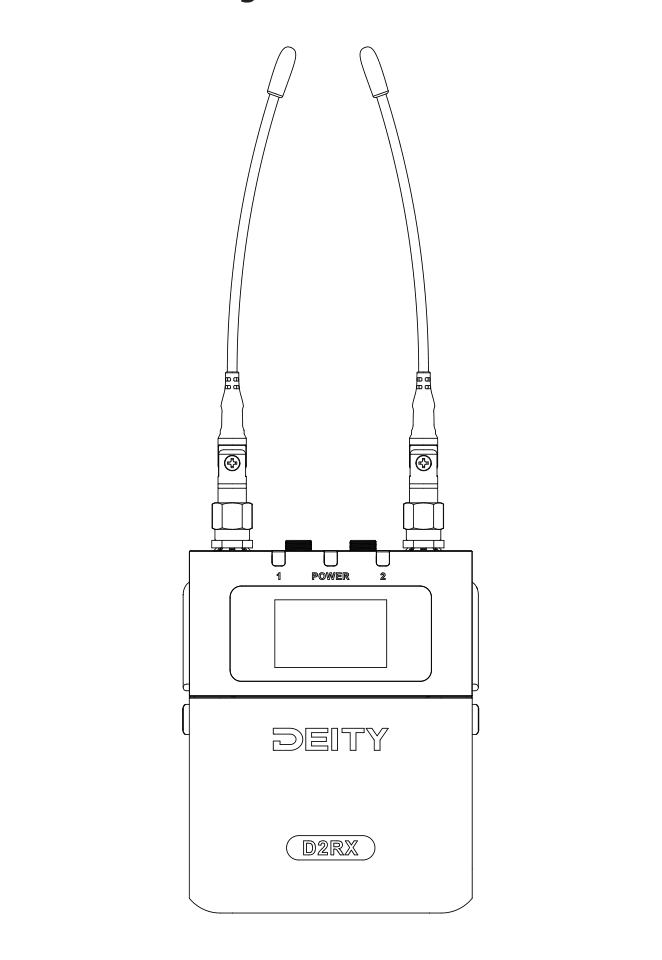
Above: an unrecommended angle. Both antennas are bent close together and nearly parallel, so they are too close for good diversity.
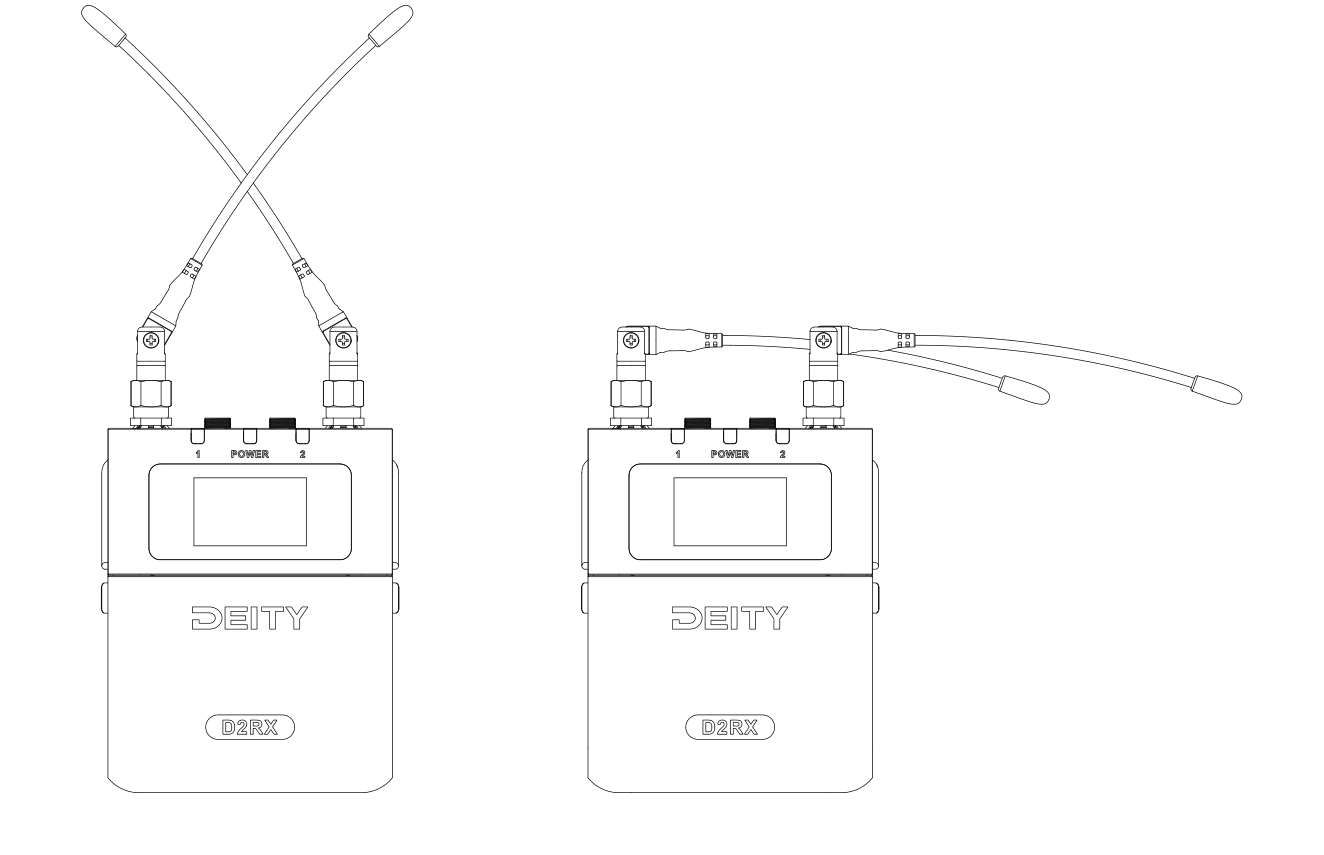
Above: the wrong way to use the antennas. Crossing the antennas or folding both flat to one side blocks the signal and should be avoided.