
This guide is a complete reference to the D2RX receiver menu. It starts with the main screen and the gain shortcut keys, then walks through every menu item in order: MONITOR, RF SET, FREQ (SCAN, SPARE, MANUAL, COLOR), OUT TYPE, LEVEL, DID, BT, BATTERY, SLEEP, and SYSTEM. For the physical buttons, antennas, and outputs, see [THEOS] Receiver (D2RX) - Buttons, Antennas & Connecting to Recorders. For the matching transmitter menu, see [THEOS] Transmitter (DBTX) Menu Reference.
D2RX Main Screen Interface
The D2RX home screen shows both receiver channels at once. The top status bar carries the shared indicators, and each channel row shows its own frequency, device name, recording status, microphone reception, timecode status, and audio level.
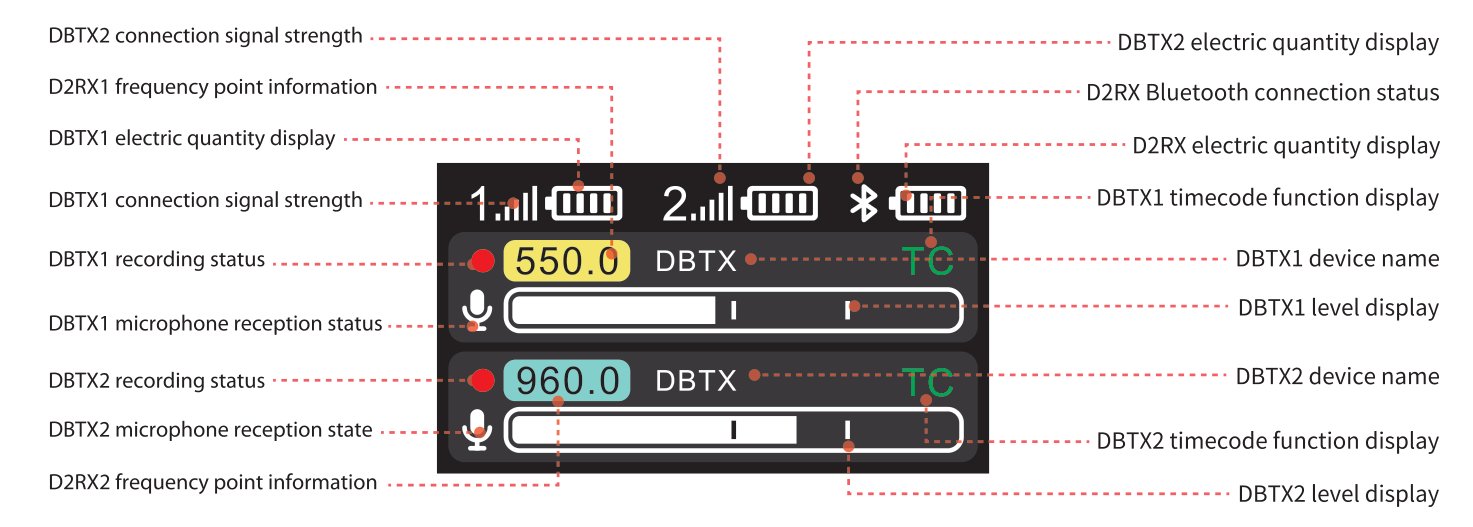
- Connection signal strength (1 and 2): link strength for each connected DBTX transmitter.
- Frequency point information: the current frequency for D2RX channel 1 and channel 2, shown on a colored tag.
- Electric quantity display: separate battery readouts for DBTX1, DBTX2, and the D2RX itself.
- Bluetooth connection status: the D2RX Bluetooth icon.
- Recording status: the record indicator for each channel.
- Microphone reception status: whether each channel is receiving mic audio.
- Device name: the name of the DBTX paired to each channel.
- Timecode function display: the TC indicator for each channel.
- Level display: the audio meter for each channel.
D2RX Gain Shortcut Key Operation
You can adjust output gain directly from the home screen without opening the menu. Both output ports have 31 gears of gain adjustment across an adjustable range of -20 to +10dB, so you can tailor the level to the scene.
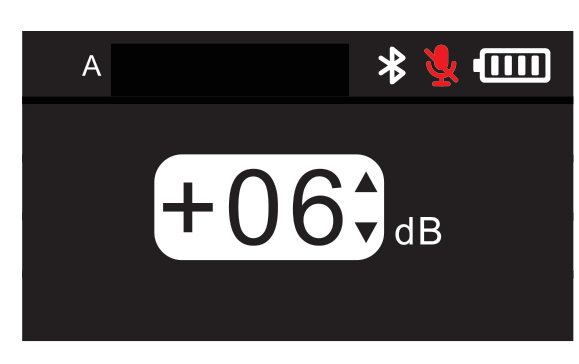
- Long press the Up direction key to enter the output gain adjustment mode for output port A, then adjust the gain with the Up and Down direction keys.
- Long press the Down direction key to enter the output gain adjustment mode for output port B, then adjust the gain with the Up and Down direction keys.
MONITOR
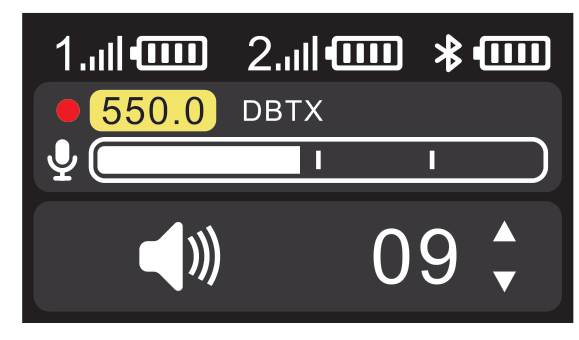
When the output mode of OUT TYPE-B is set to MONITOR, the monitor volume can be adjusted from the home screen with the Up and Down direction keys. There are 12 gears of volume adjustment, so the level can be customized to the usage scene. To set channel B to monitor mode, see [THEOS] How to Set Up Wireless IFB.
MENU
Short press the menu button to open the main menu. The items below are the full list of D2RX menu functions.
RF SET
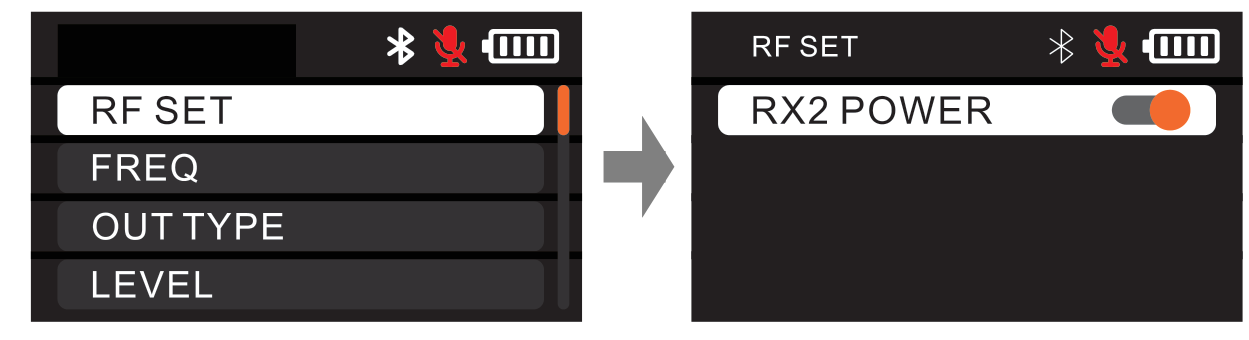
In this mode, you can control the ON/OFF state of the two RF channels. By default this function is all on. You can turn off the RF function of a channel that is not connected to reduce RF power consumption, which cuts unnecessary power waste and prolongs the service time of the device.
FREQ
Entering this mode lets you set the frequency-related functions of the device: SCAN, SPARE, MANUAL, and COLOR. For how the legal bands work, see [THEOS] Frequency Settings & Legal Bands.
SCAN
Entering this mode scans the wireless frequency points in the current environment so you can select clean frequency points with little interference. If you do not use the automatically allocated frequency point, press the back key and manually select a frequency point with the Up and Down keys to send synchronization to the TX according to the scan result. For the full walkthrough, see [THEOS] How to Scan & Pair.
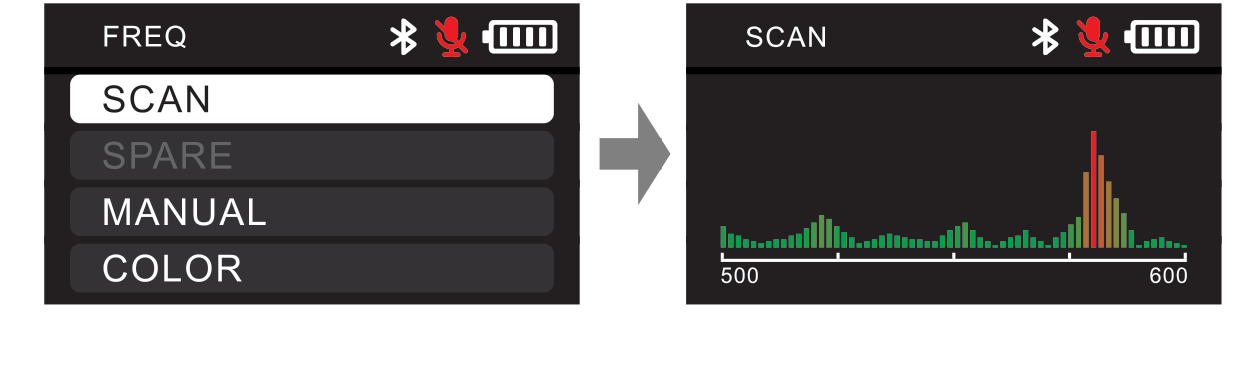
After scanning, the optimal frequency point can be distributed automatically. On the AUTO SET screen, click YES to send the synchronously scanned frequency points to the transmitter, or click NO to cancel the synchronous distribution. The receiver then prompts you to set TX1 to pair, followed by TX2.
SPARE
SPARE (TUNE) mode lists 10 clean, preferred frequency points based on the signal levels found after frequency scanning. Select a frequency point in the list and click it to send that frequency point to the TX synchronously. Each candidate is rated with a star score so you can judge quality at a glance.
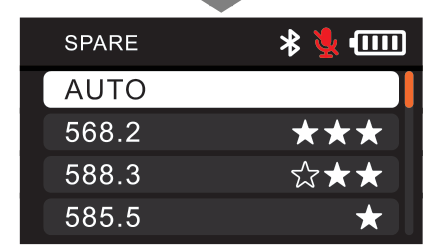
Note: If frequency scanning has not been carried out after the machine is turned on, the SPARE (TUNE) function is not selectable.
MANUAL
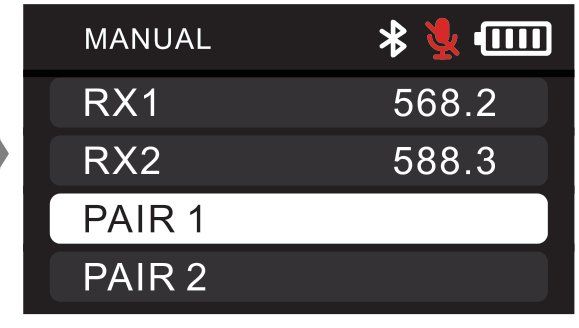
In this mode, you can manually adjust the frequency point of the corresponding RX channel to match the same frequency point as its TX transmitter. Wireless pairing requires the TX to enter the corresponding pairing interface at the same time. Selecting PAIR 1 distributes the wireless synchronous transmitter to channel A, and selecting PAIR 2 distributes it to channel B.
COLOR
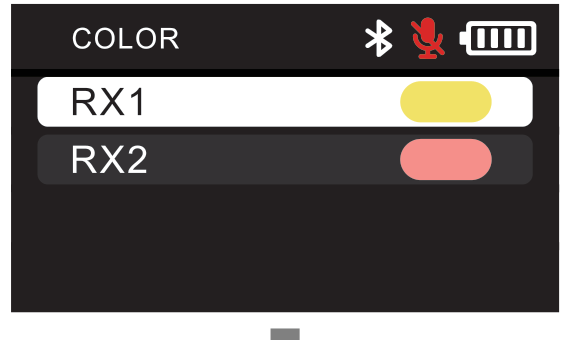
In this mode, you can select a color mark and synchronize it to the paired TX. Color marks help you distinguish the connected devices when several are used in the same frequency band. Each receiver channel (RX1, RX2) can be assigned its own color.
OUT TYPE
Enter OUT TYPE to adjust the sound mode output by the current channel. When outputting sound, channel A is the left channel and channel B is the right channel.
- Channel A can output the sound of its corresponding channel independently (RX1) or output both channels together (RX1+RX2).
- Channel B can output its corresponding channel independently (RX2), output both channels together (RX1+RX2), or be set to MONITOR output mode, in which the output audio is the same as that of channel A.
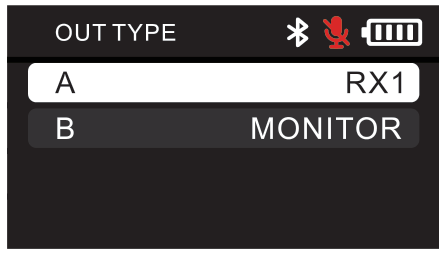
Setting channel B to MONITOR is the basis for wireless IFB. See [THEOS] How to Set Up Wireless IFB.
LEVEL
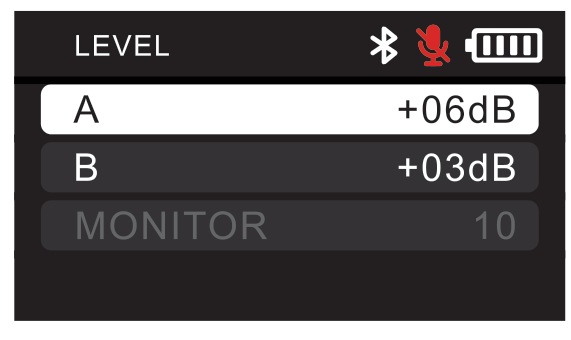
Entering this mode lets you select the gain parameters of the audio output for the corresponding channel, with a total of 10 gears to choose from. The MONITOR level can only be set when the MONITOR monitoring output mode is selected in OUT TYPE channel B. The rest of the time, MONITOR is displayed in gray, indicating that the parameter cannot be adjusted.
DID
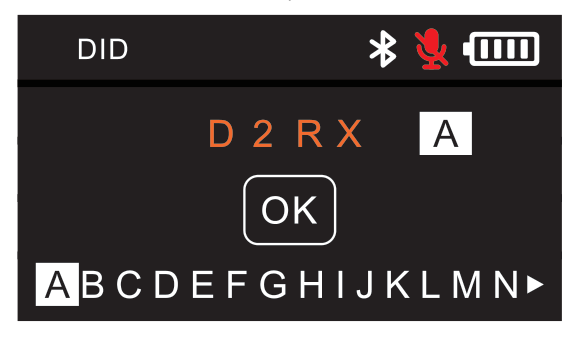
In this mode, you can change the name of the device according to your needs. Select the characters to be adjusted with the Up and Down keys, then confirm with OK.
BT
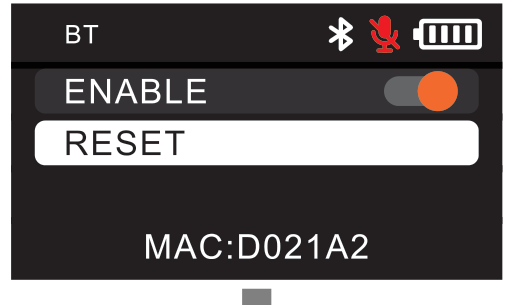
In this mode, you can turn the Bluetooth function on or off. Bluetooth is turned on by default.
- ENABLE: toggle Bluetooth on or off.
- RESET: select RESET and click YES to reset Bluetooth. When the SUCCESS message appears, the reset is complete.
- MAC: the MAC address is the Bluetooth physical address of the current device. It is the unique identification code of the device from the factory and distinguishes different devices when a phone connects over Bluetooth.
BATTERY
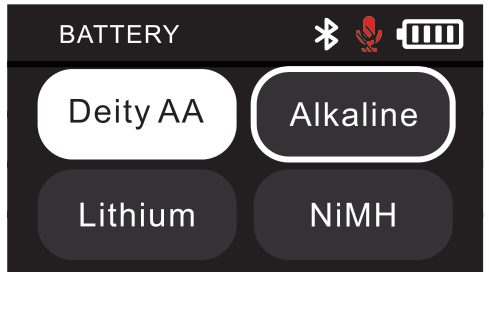
In this mode, you can choose the battery type according to actual usage so the machine can calculate the remaining battery life more accurately. There are four battery type options:
- Deity AA (DEITYAA): DEITY lithium iron battery.
- Alkaline: a popular traditional alkaline battery.
- Lithium: 1.5V stabilized lithium battery.
- NiMH: 1.2V Ni-MH rechargeable battery.
SLEEP
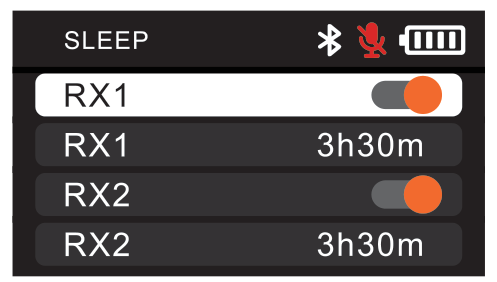
In this mode, you can set the sleep function of the connected DBTX transmitter. In sleep mode, the DBTX only keeps its Bluetooth connection, 2.4G connection, and timecode function. You can choose whether to turn on the sleep function for the DBTX controlled by RX1 or RX2 using the switch, and set a sleep timer (for example, 3h30m) for each. Exit this mode to wake up the matched DBTX immediately.
SYSTEM
The SYSTEM menu holds the device-wide settings: SCREEN, BRIGHTNESS, SYS RESET, and FIRMWARE.
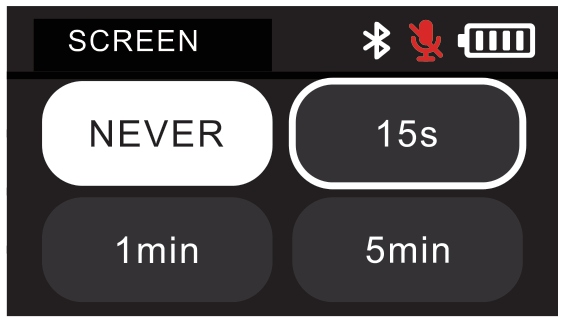
- SCREEN: set how long the screen stays lit when it is not in operation. There are four options: NEVER, 15s, 1min, and 5min. The system defaults to 15s and keeps your previous setting after the first use.
- BRIGHTNESS: adjust the brightness of the screen across five gears. By default the brightness is the brightest, 5. The system keeps your previous setting after you adjust it.
- SYS RESET: view the storage space occupied by the memory card. Select FORMAT and click YES to format the memory card. When the SUCCESS message appears, the formatting is completed.
- FIRMWARE: view the current firmware version information of the device.