
THEOS is a UHF wireless system, and every wireless channel it uses must sit inside a legal frequency band for your region. This guide explains how THEOS frequency bands work, which legal UHF bands are available, and how to select or manually set a frequency on the DBTX transmitter and D2RX receiver.
How THEOS Frequency Bands Work
Different countries and regions permit different slices of the UHF spectrum for wireless microphones. To keep you legal and interference-free, THEOS does not let you pick just any frequency. Instead, it works inside a legal frequency band that matches where you are operating.
On the THEOS global version, the band is assigned during first-time activation. When you power on the DBTX and D2RX and connect them to the Sidus Audio app, the app uses your phone's location to determine the legal band for your area and lets you confirm it. Location permission is required, without it, Sidus Audio cannot allocate a valid band and THEOS will not operate normally. For the full activation walkthrough, see [THEOS] Getting Started - What's in the Box & Device Activation.
To understand why THEOS uses UHF rather than 2.4GHz in the first place, see [How To] Why Professionals Use UHF and Not 2.4GHz.
Legal UHF Bands
During activation, Sidus Audio shows the legal bands available for your region and asks you to select one. The example below shows the bands offered for the US region.
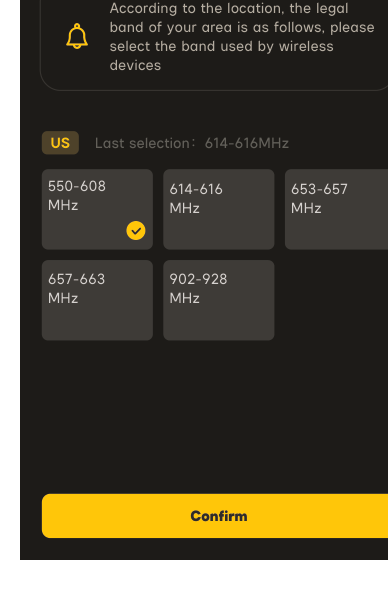
The bands shown for the US region are:
| Band |
|---|
| 550-608 MHz |
| 614-616 MHz |
| 653-657 MHz |
| 657-663 MHz |
| 902-928 MHz |
Note: The exact bands you see depend on your region, so your list may differ from the US example above. Select the band that is legal where you are shooting, then tap Confirm. From that point, all THEOS channels stay within the band you chose.
Setting a Frequency on the Device
Once a band is assigned, you set the working channels through the FREQ menu on each device. There are two ways to get a DBTX transmitter and D2RX receiver onto the same channel: automatic pairing, or a manual frequency match. Both start from the FREQ item in the device menu.
Automatic Pairing (Networking Mode I)
In this mode, the DBTX and D2RX enter pairing mode at the same time and negotiate a clean channel automatically. Both devices must be put into pairing mode together.
On the D2RX (receiver): Open the FREQ menu, choose MANUAL, then select the pair slot (PAIR 1 or PAIR 2) for the DBTX channel you want to pair. The screen shows a loading state with Please set TX1 to pair. When pairing completes, the device shows SUCCESS; if it fails, it shows FAIL, in which case re-pair or check that the antenna is installed correctly.
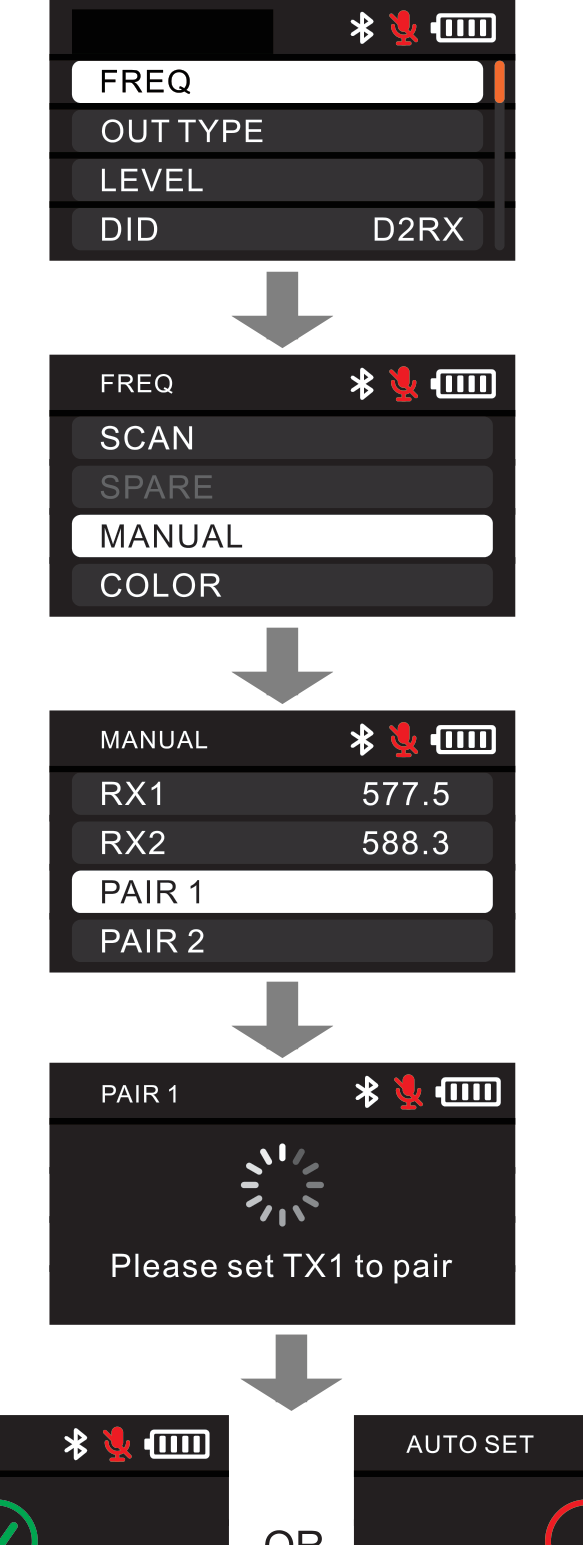
On the DBTX (transmitter): Open the FREQ menu, use the up and down keys to select PAIR, and enter pairing mode. The screen shows Please set RX to pair while it works, then SUCCESS or FAIL. Because pairing is a two-sided handshake, set the DBTX to pair while the D2RX is also in its pairing state.
Manual Frequency Match (Networking Mode II)
In this mode, you set the DBTX and the matching D2RX channel to the exact same frequency point by hand. Use it when you want to place a channel on a specific clean frequency.
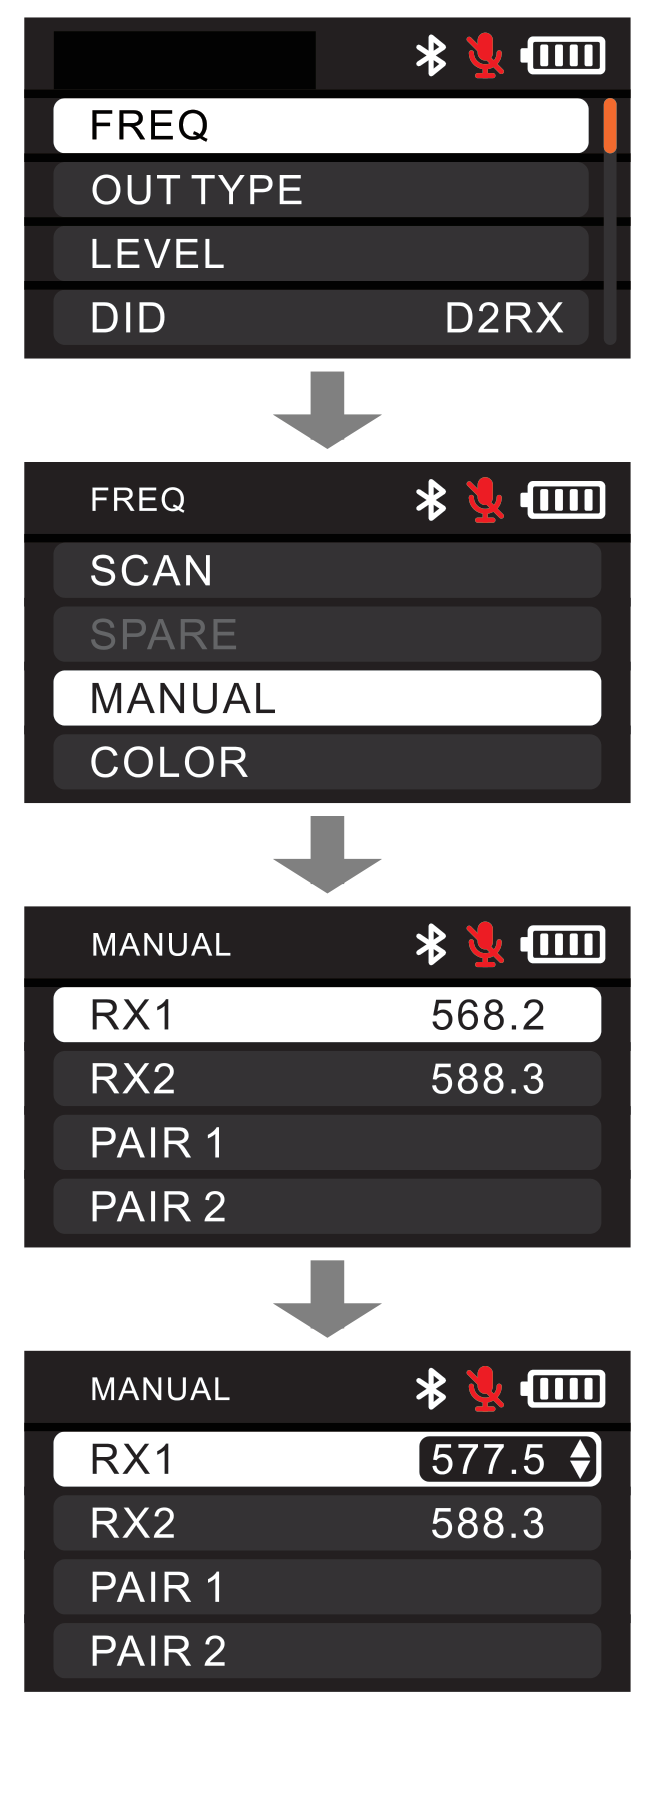
On the D2RX (receiver): Open the FREQ menu and choose MANUAL. Select the channel you want to change (for example RX1), press OK to make the value editable, then adjust it to a clean, available frequency point.
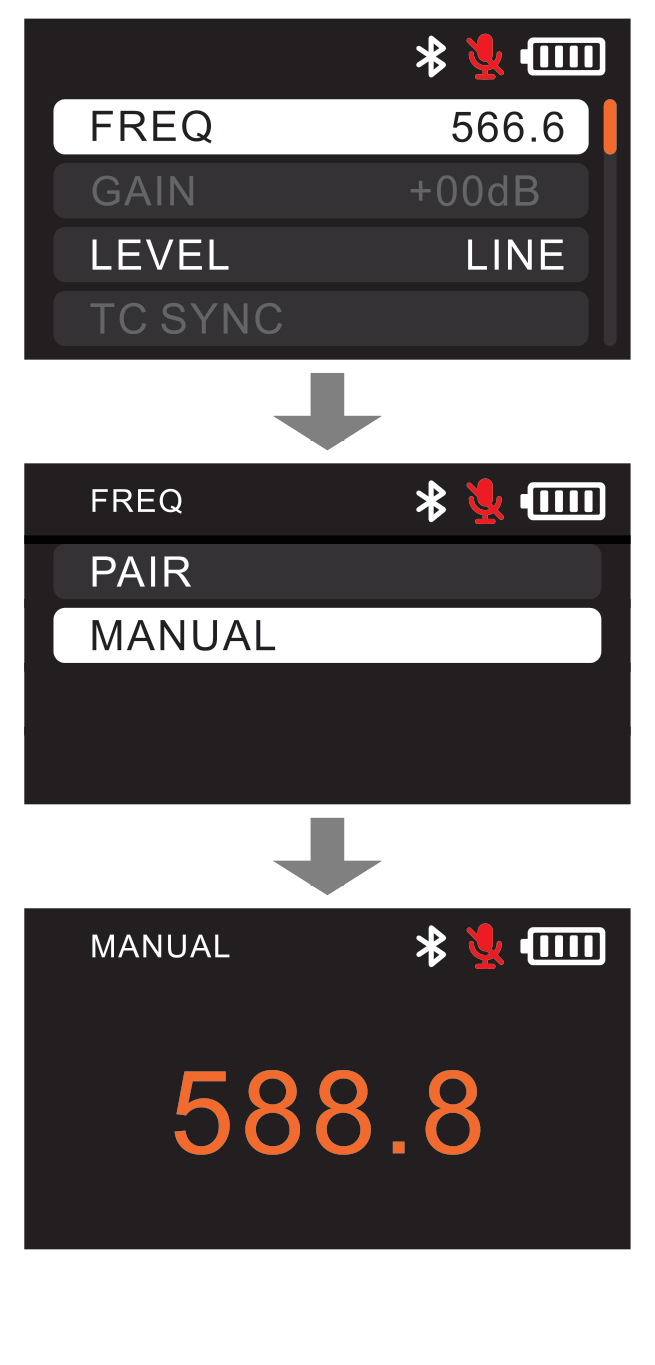
On the DBTX (transmitter): Open the FREQ menu and choose MANUAL, then adjust the value with the up and down keys:
- Short press the up or down key for fine adjustment in 0.1 MHz steps.
- Long press the up or down key to move through the frequency value quickly.
Set the DBTX to the same value as the corresponding D2RX channel to complete the match.
For a step-by-step walkthrough of getting both ends on the cleanest channels, see [THEOS] How to Scan & Pair. To browse every menu item on each device, see the [THEOS] Receiver (D2RX) Menu Reference.