
This guide walks through the physical setup of the DLTX bodypack transmitter: the four control buttons, installing the antenna and lavalier microphone, loading the battery and microSD card, and mounting the belt clip or boom pole bracket. It also explains the LED indicators and the Lemo connector pinout.
Button Functions
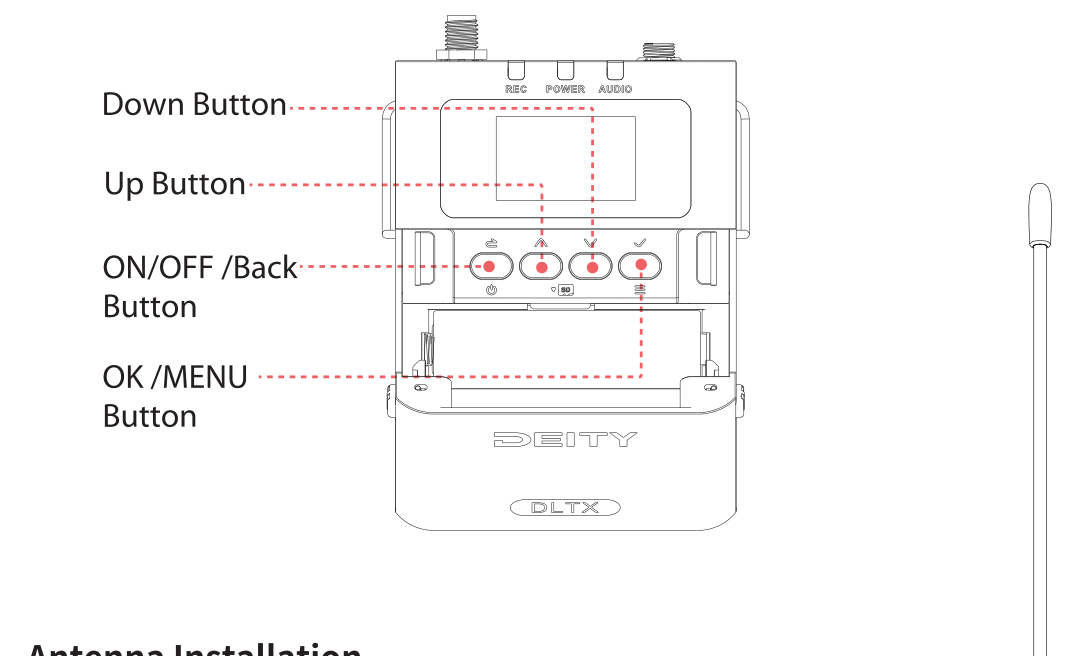
The DLTX has four buttons below the screen:
- ON/OFF/Back Button: long press to turn the DLTX on and off. It also acts as a "back" button while navigating menus and setup screens, returning you to the previous screen or menu item.
- Up / Down Buttons: select options and adjust values in the setup screens. Long press Up to enter the recording interface. Long press Down to enter the timecode setting interface.
- OK / MENU Button: enters the menu and selects the highlighted item.
Antenna Installation
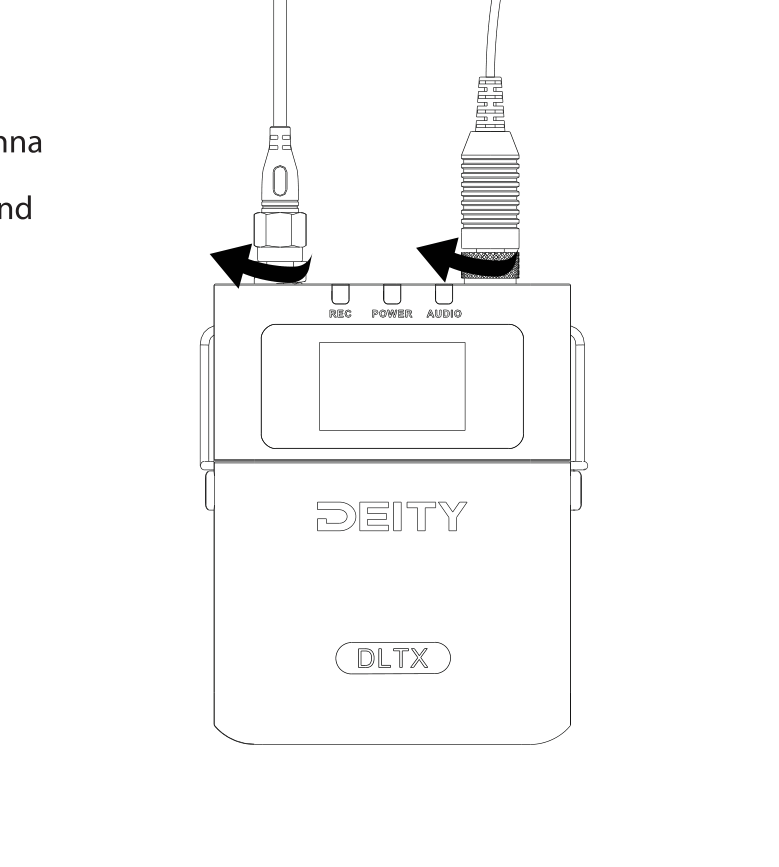
The DLTX antenna is a whip antenna with an SMA interface. Rotate and thread the matching antenna onto the antenna socket on the top of the DLTX, then tighten it to secure the antenna in place.
Lavalier Microphone Installation
The DLTX has a locking Lemo connection for audio input. Clip the lavalier microphone onto your talent, then insert its Lemo plug into the DLTX audio input and screw it in to lock it in place. Set the correct microphone power (MIC-5V, MIC-48V, or LINE) in the LEVEL menu to match your microphone.
Battery Installation
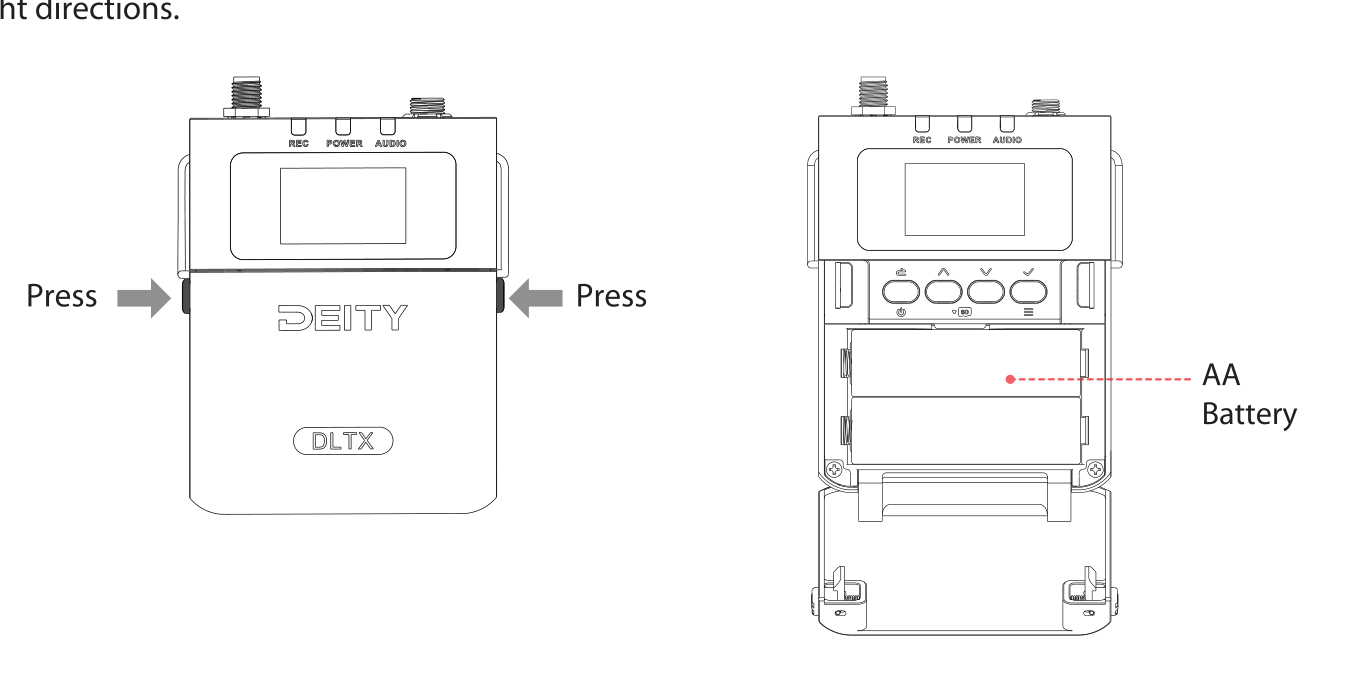
Press the battery compartment lock keys on both sides of the DLTX at the same time, open the compartment cover, and install the AA battery in the correct orientation. In the BATTERY menu, set the battery type you are using (DEITY AA, Alkaline, Lithium, or NiMH) so the transmitter can estimate the remaining runtime accurately.
Insert or Replace the Micro SD Card
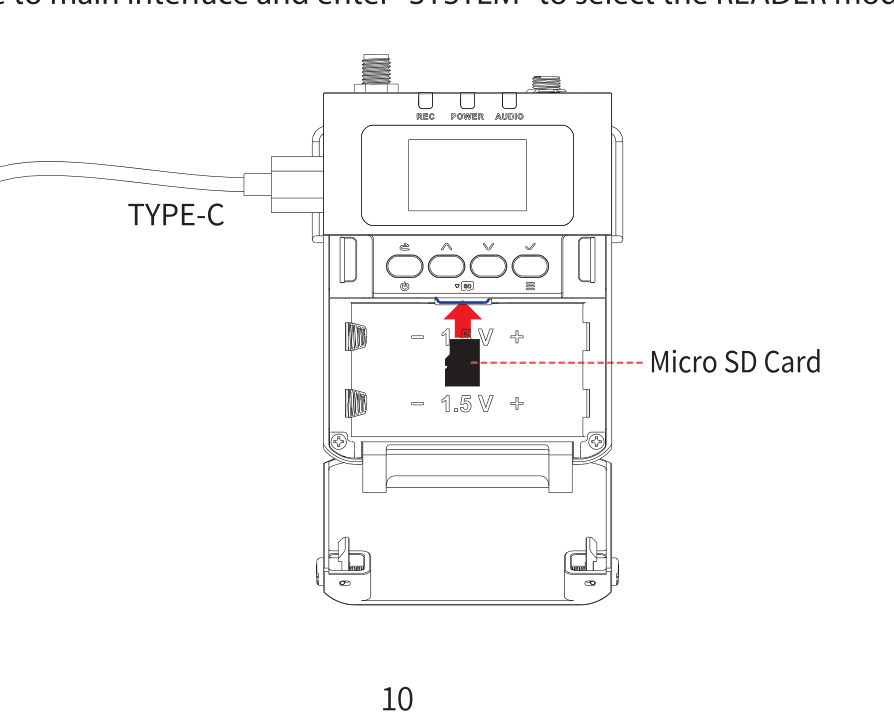
The microSD card slot sits at the upper part of the battery compartment. Open the compartment cover and insert the microSD card into the slot before installing the AA battery. If the battery is already in place, remove it first, then insert the card.
Format the card in the DLTX (SYSTEM > SD CARD > FORMAT) before first use for the most stable recording.
Transferring the Audio Files
You can power the DLTX from the USB-C port using a USB-C cable connected to a DC adapter (adapter not included). To read and download recordings from the microSD card over USB-C, go to the main interface, open SYSTEM, and select the READER mode. The DLTX then appears as a drive on your computer. See [DLTX] Menu & Interface Reference for details.
Installing the Belt Clip
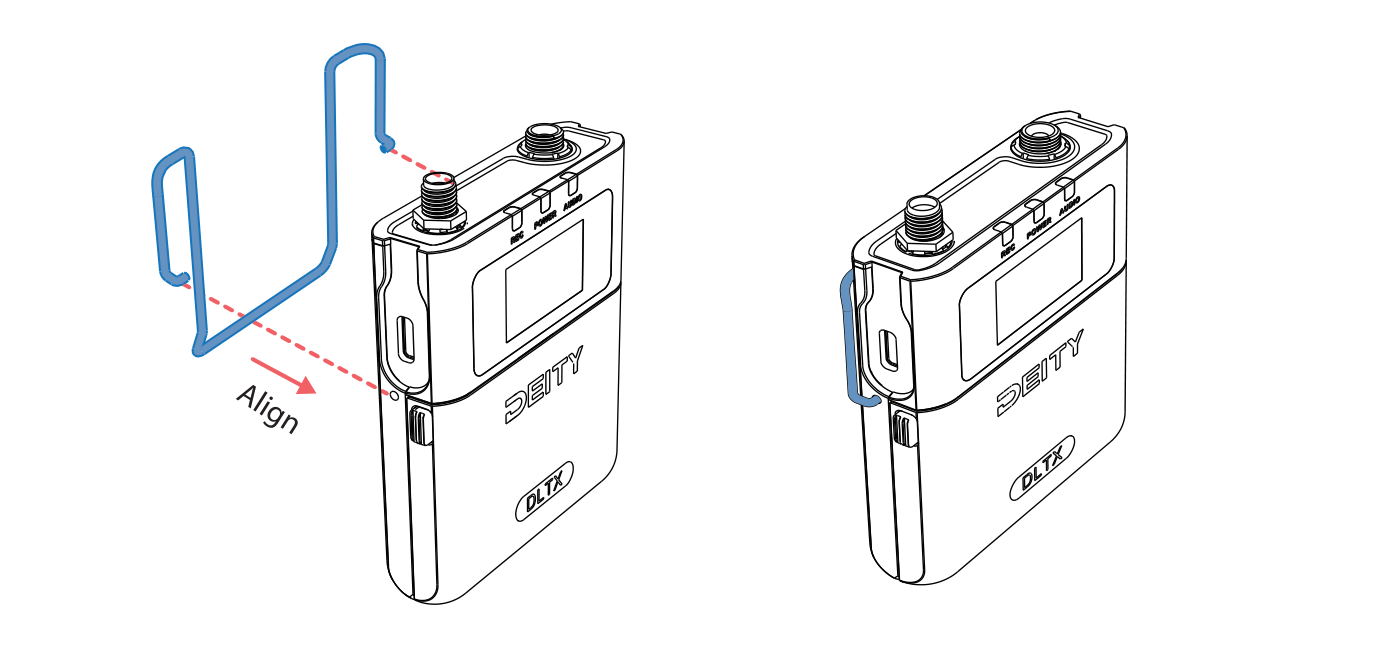
Insert the belt clip into the installation holes on both sides of the DLTX. The clip snaps into place for wearing the transmitter on talent.
Mounting on a Boom Pole Bracket
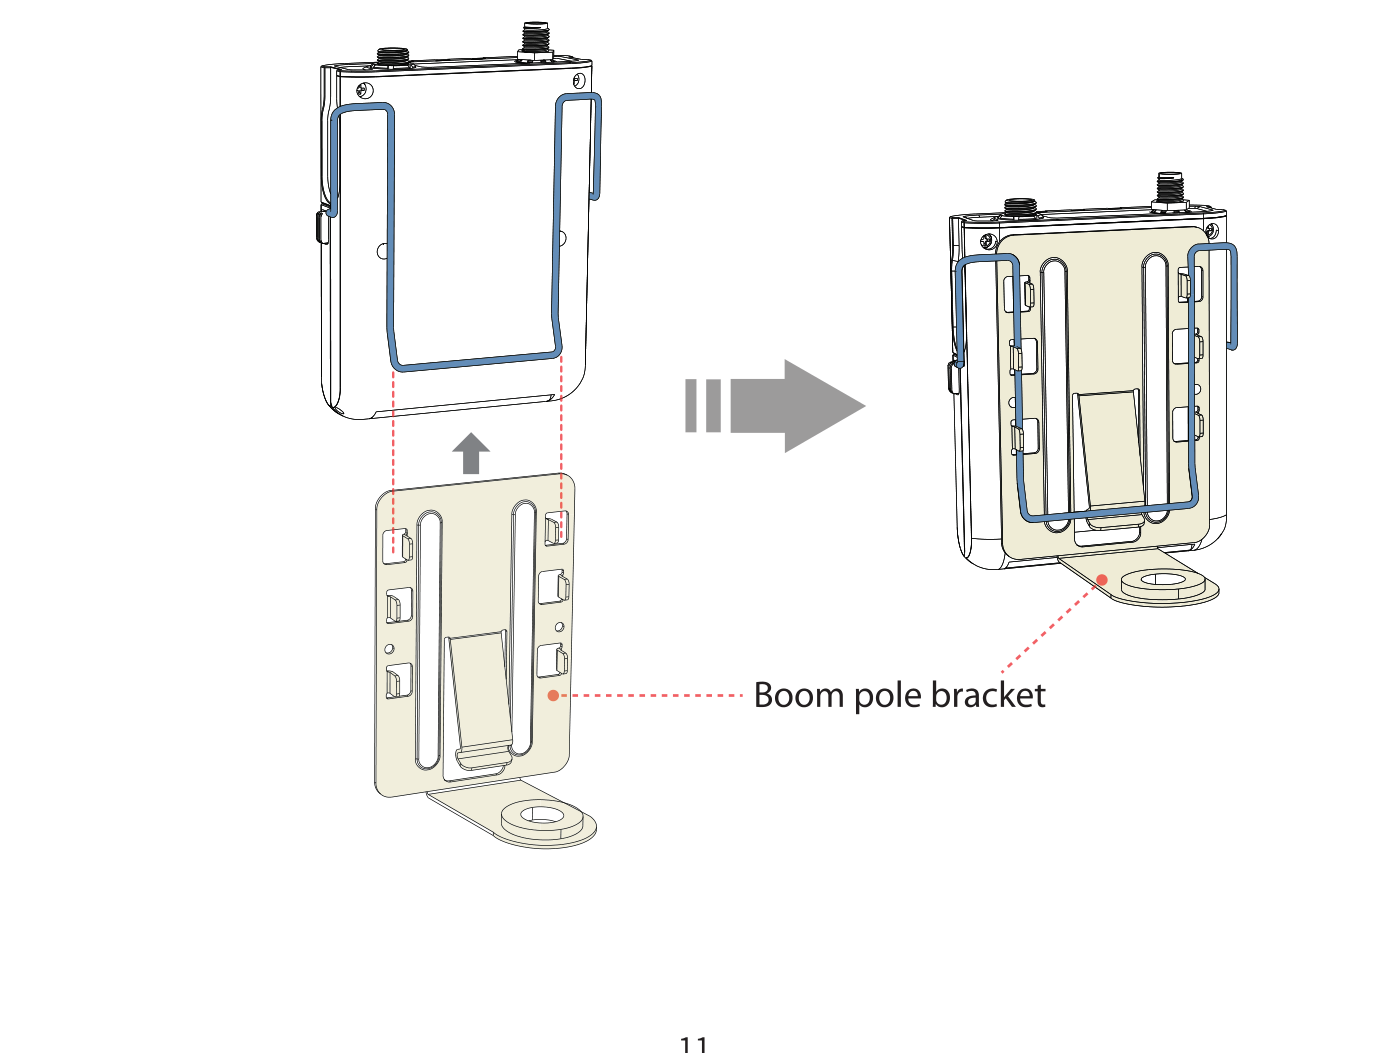
Mount the DLTX onto the boom pole bracket and secure it to the top of the boom pole, then lock the shotgun microphone mount onto the top of the pole to attach the whole boom assembly securely.
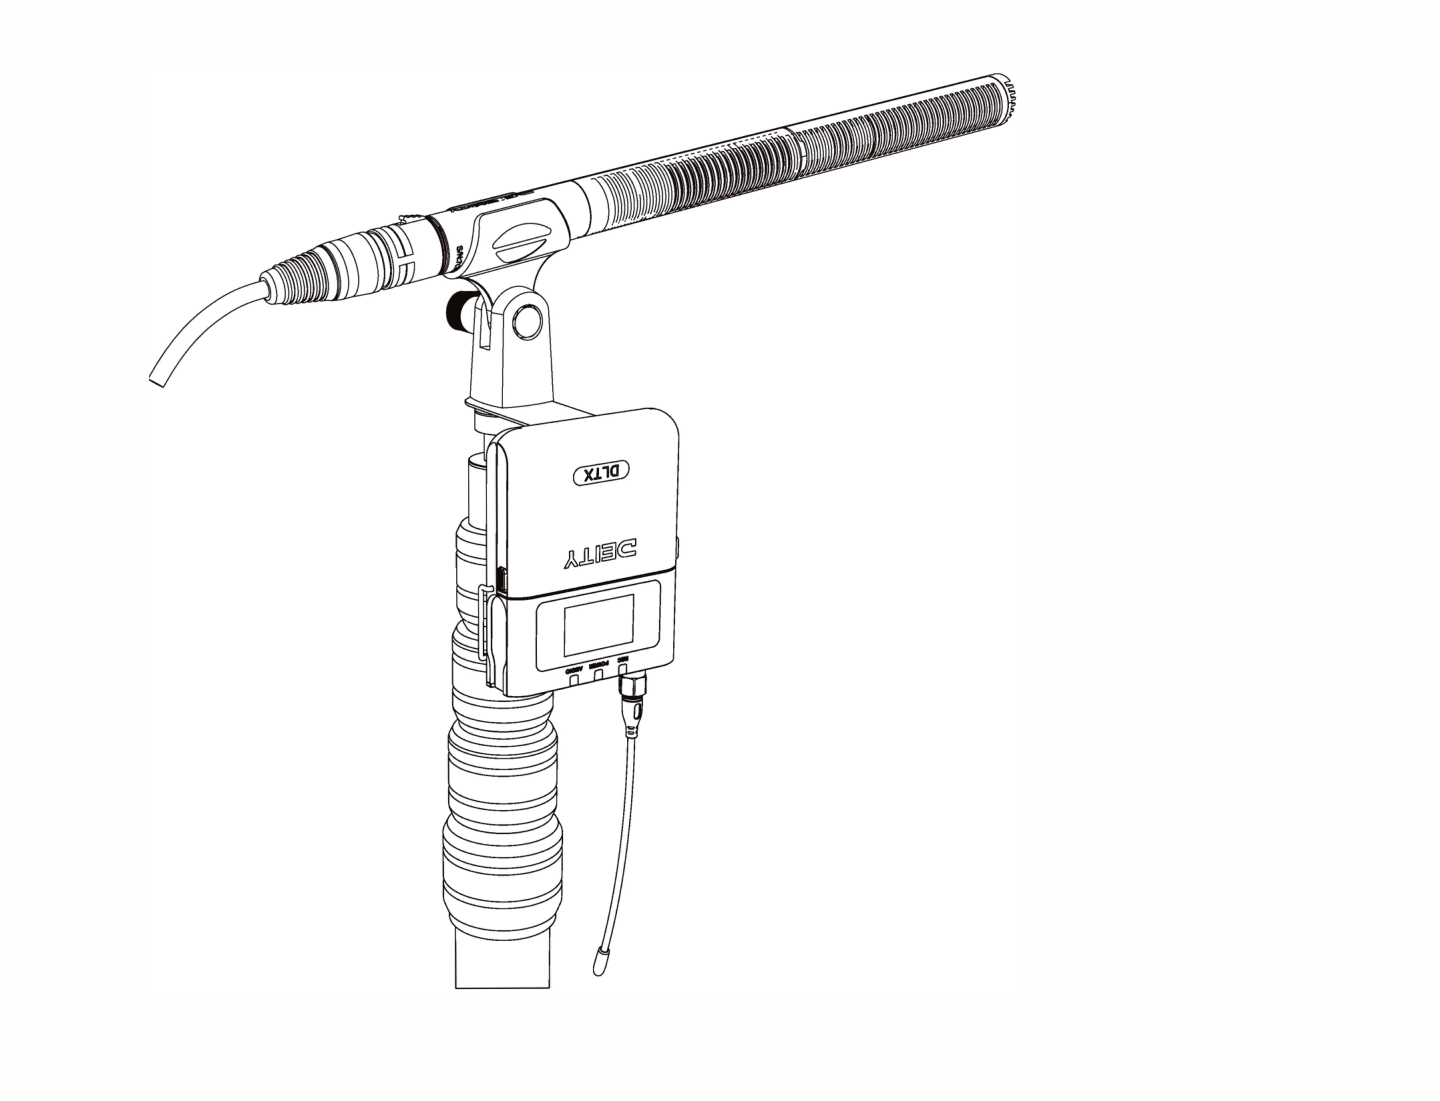
For a full walkthrough of boom pole rigging, see [DLTX] Using the DLTX on Boom Poles.
LED Indicators
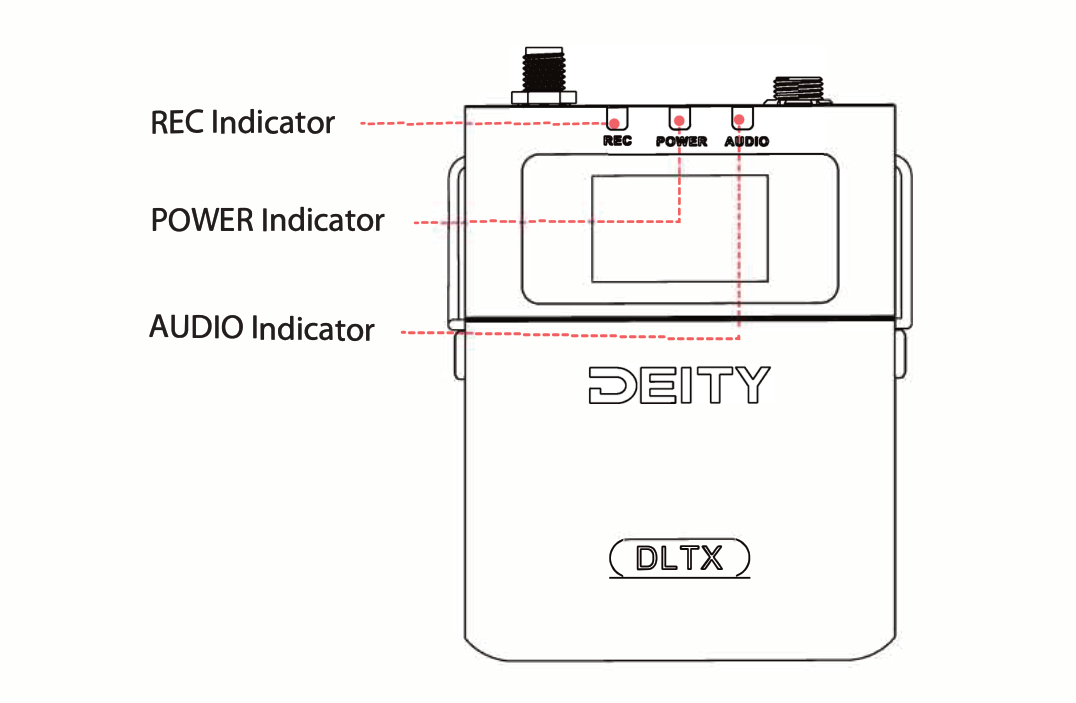
Three LEDs on the top edge report device status:
- REC Indicator: stays red while recording.
- POWER Indicator: glows green when the battery is good, and turns red when about 30 minutes of runtime remains.
- AUDIO (Volume) Indicator: matches the on-screen level meter. It shows green from -40dB to -10dB and red from -10dB to 0dB. When the microphone is muted, the red light flashes slowly.
You can turn the three LEDs on or off in the LED menu.
Lemo Connector Pinout
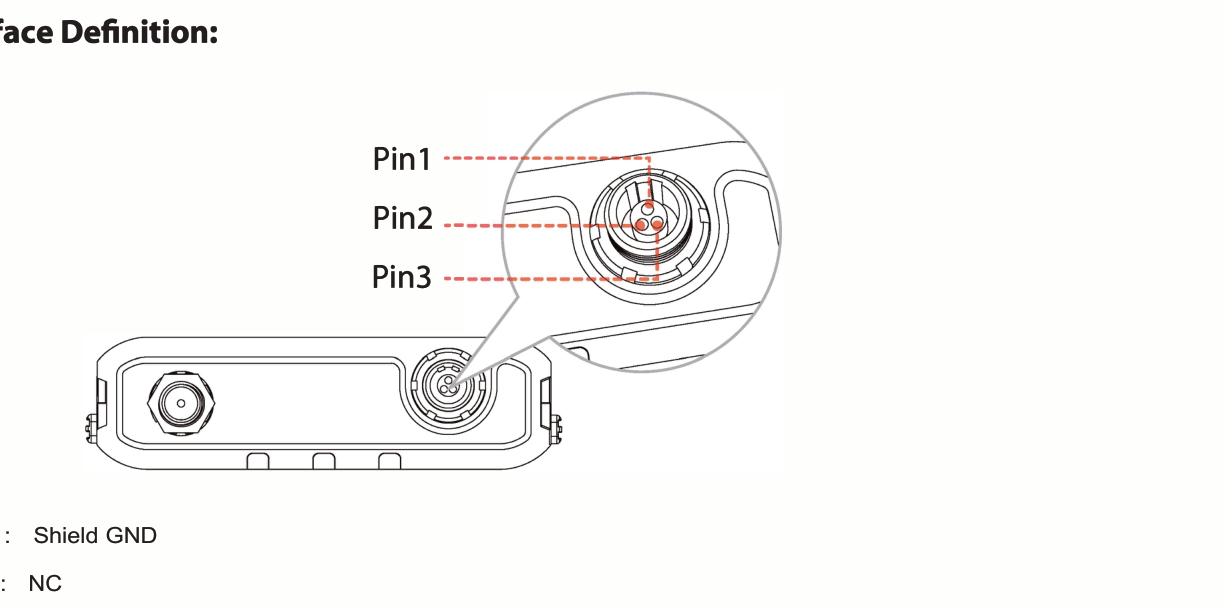
The Lemo audio input is a 3-pin connector. The wiring depends on the microphone power mode you select:
| Mode | Pin 1 | Pin 2 | Pin 3 |
|---|---|---|---|
| Mic 5V | Shield GND | NC | Red Signal + |
| Line | Shield GND | NC | Red Signal + |
| Mic 48V | Red Signal + | White Signal - | Shield + Metal Shell GND |