
This guide walks through the two devices in the Deity Connect Deluxe Kit, the BP-TRX transceiver and the DUO-RX receiver, and shows how to install the antennas, lavalier microphone, and mounts before pairing the units. Because the kit is built around the BP-TRX, the deep menu and function reference lives in the BP-TRX articles, which are linked at the end.
BP-TRX Transceiver
The BP-TRX is the heart of the kit. It has a 1.3-inch OLED display, six control buttons, and a locking 3.5mm TRS input for the lavalier. Depending on the mode you set, it acts as a transmitter, a receiver, or a stand-alone recorder.
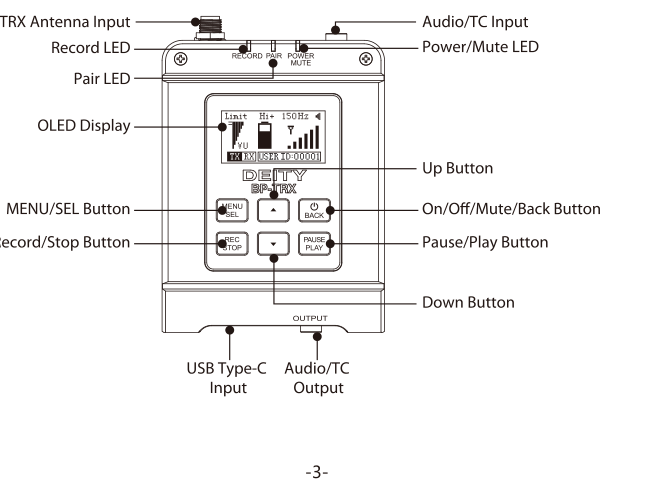
- Antenna input and Audio/TC input sit on top of the unit.
- Record LED, Power/Mute LED, and Pair LED report status at a glance.
- MENU/SEL opens the menu and selects items. On/Off/Mute/Back powers the unit (long press), steps back a screen, and toggles mute. Record/Stop starts and stops recording, and Pause/Play controls playback.
- Up and Down buttons move through options and adjust values.
- The bottom carries the USB Type-C input (charging and digital audio) and the Audio/TC output.
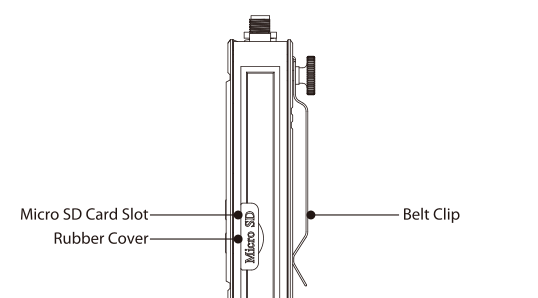
On the side of the BP-TRX, a rubber cover protects the Micro SD card slot used for internal recording. The belt clip is on the opposite face.
DUO-RX Receiver
The DUO-RX is a dual-channel receiver that pairs with up to two BP-TRX units and feeds your camera or recorder. It has two SMA antenna inputs, a status LED for each channel, and a 1.3-inch OLED display.
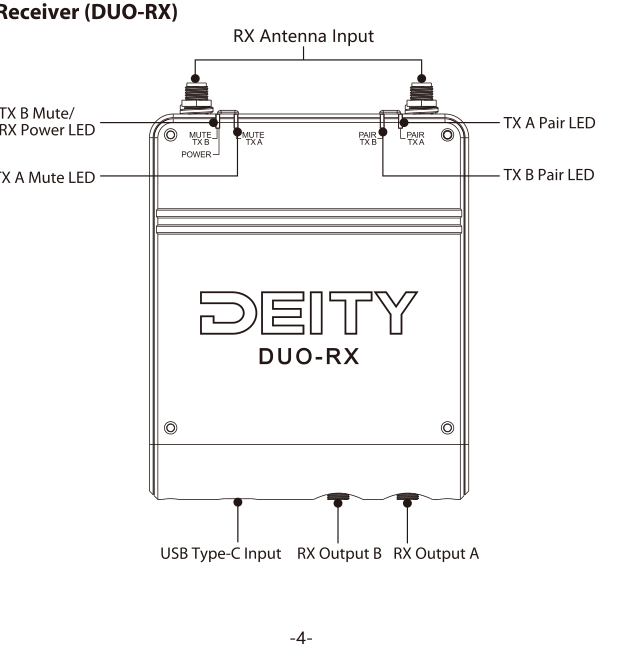
- Two RX Antenna Inputs (SMA) sit on top.
- TX B Mute / RX Power LED and TX A Mute LED are on the left, with the TX A Pair LED and TX B Pair LED on the right.
- The bottom edge carries the USB Type-C input, RX Output B, and RX Output A (locking 3.5mm TRS).
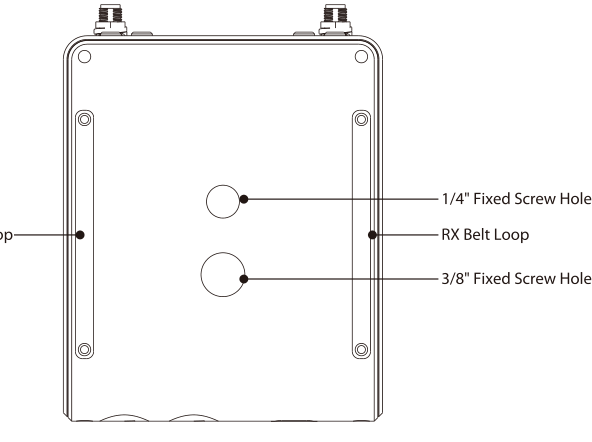
The back of the DUO-RX has two RX belt loops plus a 1/4-inch and a 3/8-inch fixed screw hole for mounting to a camera, cage, or cold shoe.
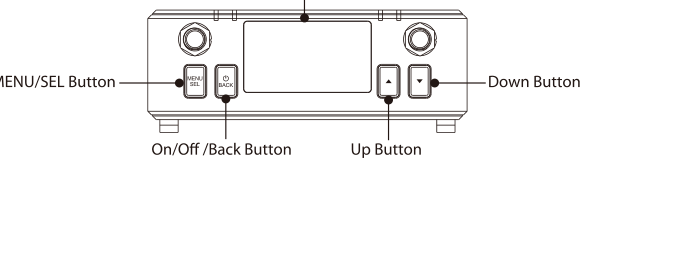
The DUO-RX front controls are the MENU/SEL, On/Off/Back, Up, and Down buttons around the OLED display.
Antenna Installation
Attach the antennas before powering the units on. The units will not link properly without them.
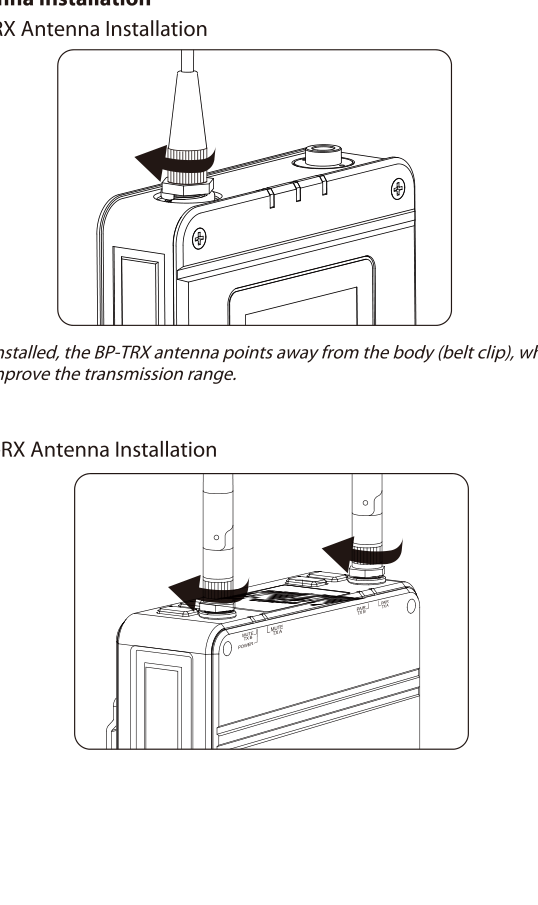
- BP-TRX: Screw the external antenna onto the top of the unit. When installed, the BP-TRX antenna points away from the body (belt clip), which helps improve transmission range.
- DUO-RX: Screw one antenna onto each of the two SMA inputs on top of the receiver.
Lavalier Microphone Installation
The BP-TRX has a locking 3.5mm TRS connection. Clip the W.Lav Pro lavalier microphone onto your clothing, then screw the connector into the BP-TRX microphone input so it cannot pull loose.
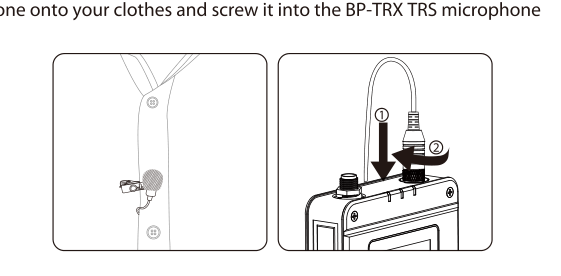
Use the included foam windscreen to reduce light wind noise, and the microphone tie clip to secure the mic head. The BP-TRX itself attaches to a belt or clothing using the built-in belt clip.
Receiver Installation
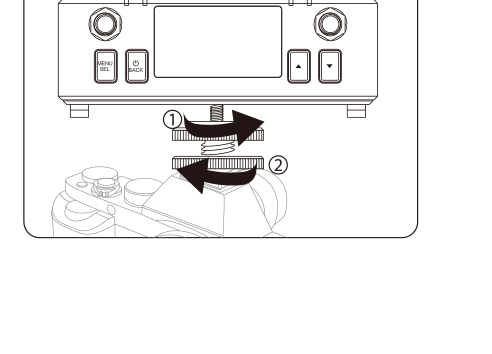
The DUO-RX can be installed in a sound bag using the included hook-and-loop strap, or mounted to a camera with the included cold shoe.
Pairing the BP-TRX and the DUO-RX
The BP-TRX uses Easy-pair technology, so pairing takes only seconds. First set each BP-TRX to TX+REC MODE and choose the DUO-RX output type you need.
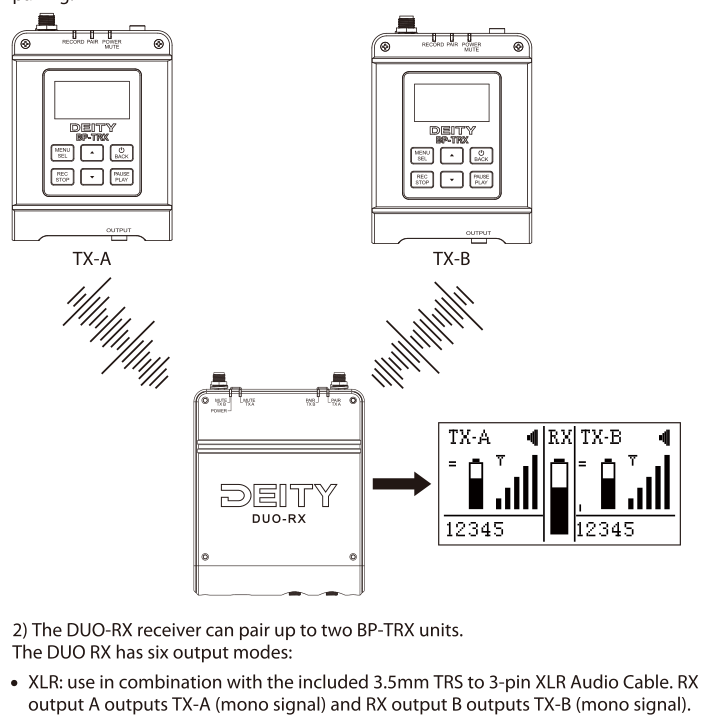
- On each transmitter, enter the menu and select PAIR, then choose YES.
- On the DUO-RX, enter the PAIR option in the receiver menu.
- The transmitter and receiver automatically finish pairing within about 15 seconds. The green Pair LEDs flash during pairing.
- When the green LEDs stay on, the pairing was successful. If they flash slowly, the pairing was unsuccessful and a pop-up will indicate the result.
The DUO-RX can pair up to two BP-TRX units, shown as TX-A and TX-B on its display. For the full menu reference, every function setting, and the pairing details shared with the standalone transmitter, see the BP-TRX articles below.