
The Deity THEOS RF Filters are UHF band-pass filters that install between your receiver and its antennas to improve RF quality within a targeted frequency band. This quick guide covers the four available bands, how to install a filter, and two ways to put them to work on set.
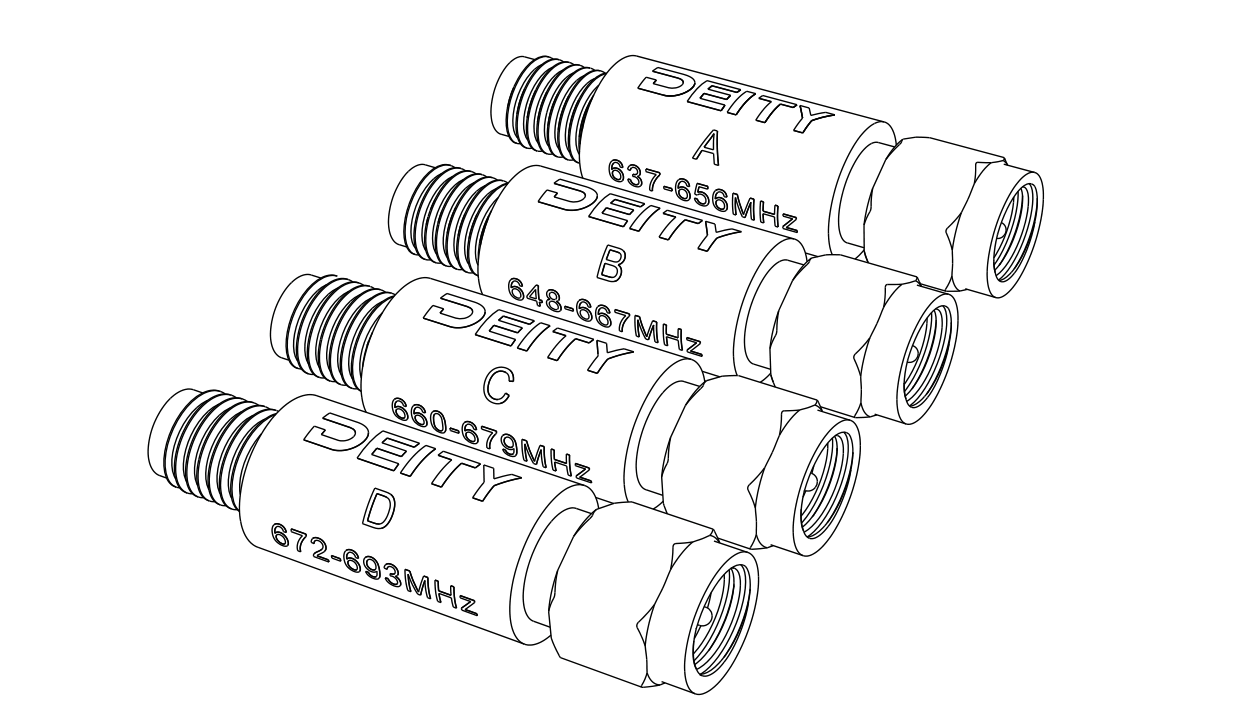
Frequency Bands
The Deity THEOS filters are divided into four frequency bands. Each filter focuses on a specific frequency range, selectively allowing target frequencies to pass through while suppressing frequencies outside of that targeted band. This enhances the RF quality within the targeted band and helps with the stability of the wireless microphone signal, ensuring optimal performance of the UHF wireless system across a range of application scenarios.
| Band A | 637-656 MHz |
| Band B | 648-667 MHz |
| Band C | 660-679 MHz |
| Band D | 672-693 MHz |
Installation Method
Install the filter by screwing the male SMA connector onto the female SMA antenna port on the UHF wireless microphone receiver. After installing the filter, attach the antenna to the female SMA port on top of the filter.
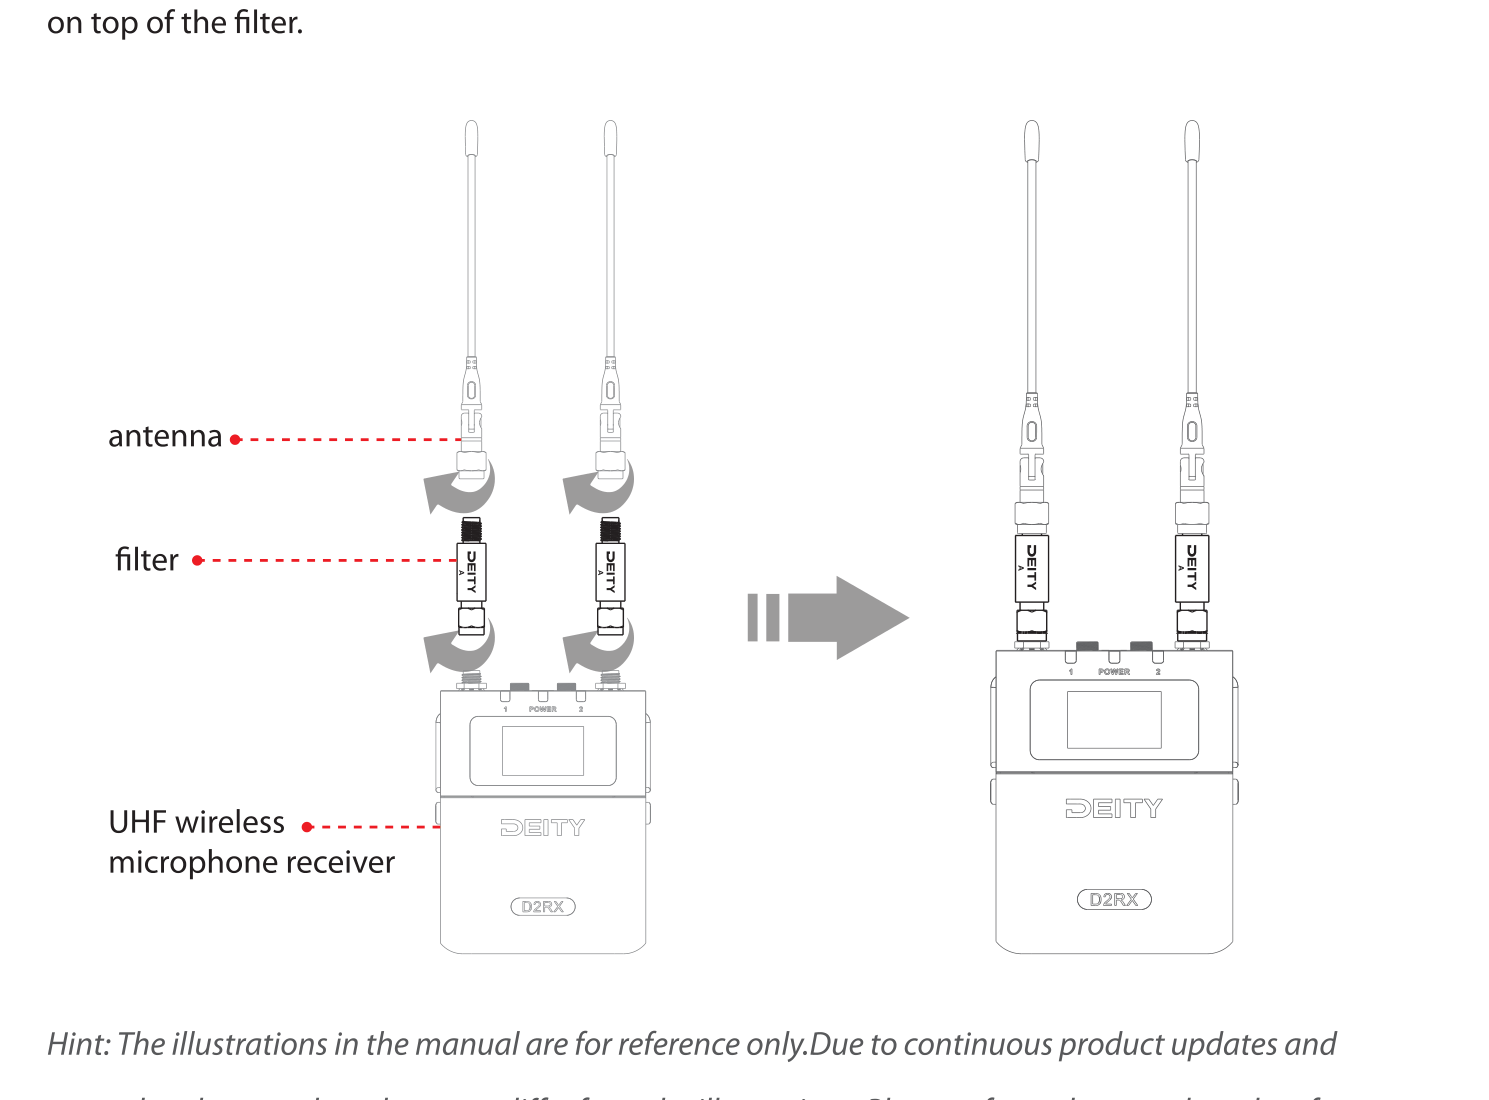
Hint: The illustrations in the manual are for reference only. Due to continuous product updates and upgrades, the actual product may differ from the illustrations. Please refer to the actual product for accuracy.
Usage Method 1
Use this method when you do not yet know which frequencies are clean in your environment.
- Without installing the filter, first attach the antenna and use the receiver's frequency scanning function to scan for optimal frequencies within the current environment. Choose the best available frequencies and assign them to the transmitter.
- Select the filter frequency band that matches the optimal frequencies scanned by the receiver. Remove the antenna, install the filter on the receiver, and then reattach the antenna on top of the filter.
Note: The two filters installed on one receiver must be of the same frequency band.
Usage Method 2
Use this method when the usable UHF frequency bands in your environment are already known.
- Select the filter that corresponds to the known usable band, install it on the receiver, then connect the antenna.
- Access the frequency range selection interface on the configured receiver, and select the frequency band corresponding to the installed filter.
- Use the frequency scanning function. The receiver will now scan only the selected frequency band and allocate the best frequencies within that band.
Note: The two filters installed on one receiver must be of the same frequency band.