
This guide explains the PR-4 home screen, the quick interfaces, and the touchscreen shortcuts, plus how to make a recording.
Main Interface
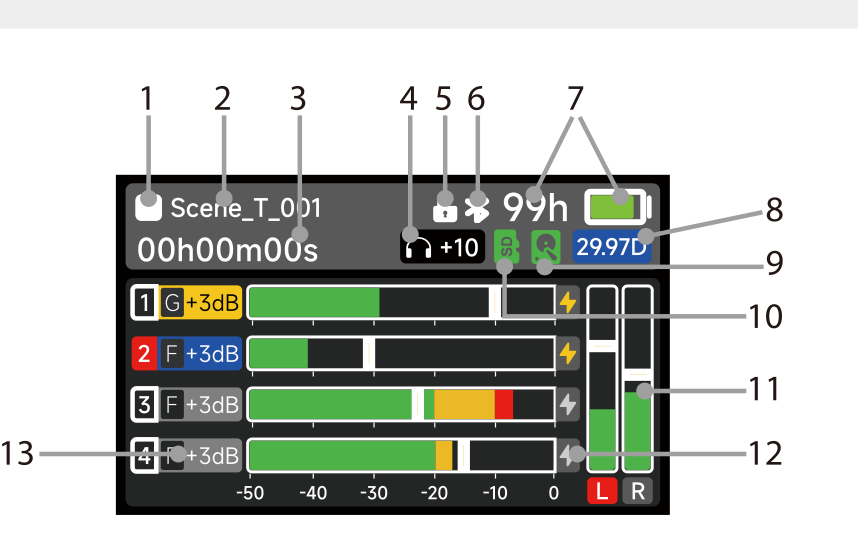
The home screen shows the status of the current recording at a glance:
- Recording status: a white square when stopped, a red dot when recording.
- File name and duration of the current or next take.
- Headphone monitoring gain, device lock, and Bluetooth status.
- Battery runtime / external power: shows estimated battery time, or the input voltage when external power is connected.
- Timecode frame rate: flashes when timecode is not synchronized.
- Internal SSD and external SD status: green for normal recording, red when less than 1 hour of capacity remains. No SD icon appears when no card is inserted.
- Channel and mix meters: peak and VU levels for each channel and the L/R mix. Armed tracks show in red.
- Channel power indicator: yellow when channel power is on (48V on 1/2, 5V on 3/4, 10V in AES42).
- Gain / fader status: yellow when the knob adjusts gain, blue when it adjusts the fader.
Quick Interface
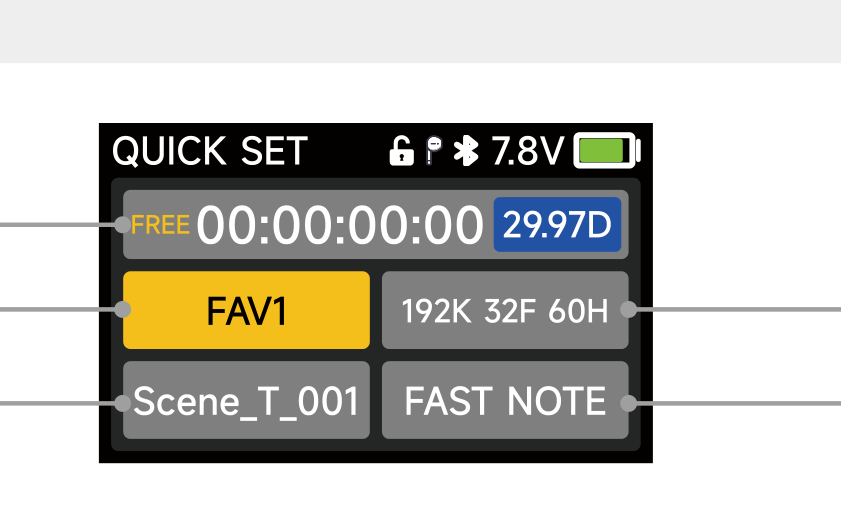
Press the Select knob on the home screen to open Quick Settings. This screen shows the timecode (view only), the monitor preset (Stereo, FAV1, FAV2, FAV3), the recording file name (tap to edit), a Quick Note selector, and the current recording parameters (sample rate, bit depth, available time).
Touchscreen Shortcuts
The touchscreen is active on the home screen only:
- Swipe left to right: Quick Recording Settings (sample rate, bit depth, pre-record, arming, format).
- Swipe right to left: Quick Timecode settings.
- Swipe top to bottom: Next Take (notes, folders, track names).
- Swipe bottom to top: Last Take (playback, notes, folders).
Make a Recording
- Set your inputs and arm the tracks you want to capture. See Input, Mix & Output and Arm Set in Files & Recording Settings.
- Press REC to start. The status indicator turns into a red dot and the duration counts up.
- Press MARK to drop a marker at any point (up to 100 per file).
- Press and hold REC for 3 seconds to stop.
Auto File Save writes the recording every 15 seconds, so a power loss or crash costs at most the last few seconds.