
This guide covers the PR-4 panels and controls, the key combinations, and how to install the storage card, battery, and microphones.
Panels and Ports
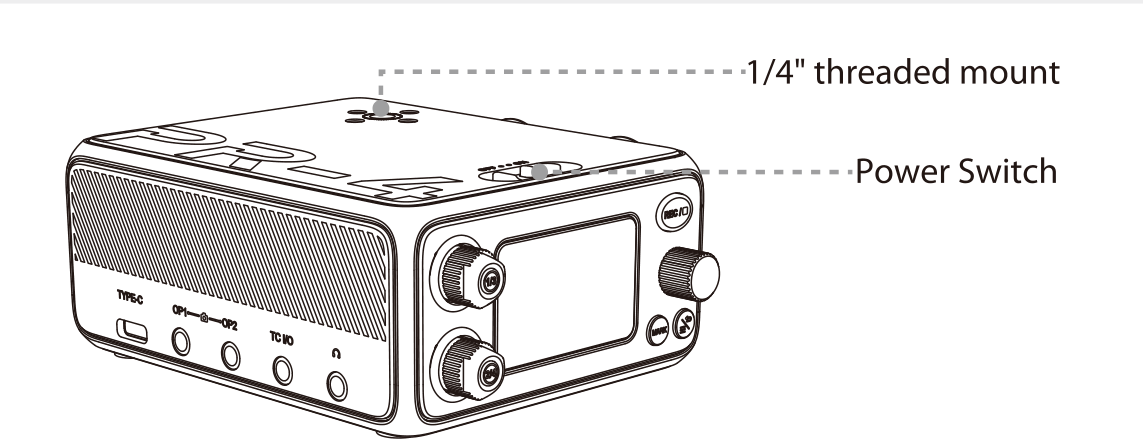
Top panel: 1/4" threaded mount and power switch.
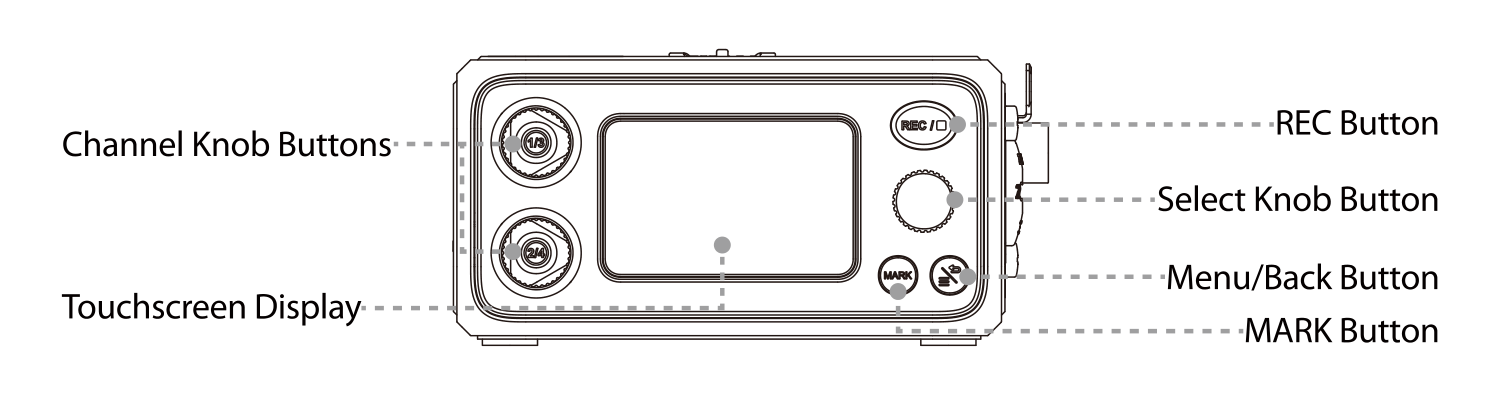
Front panel (Basic Mode).
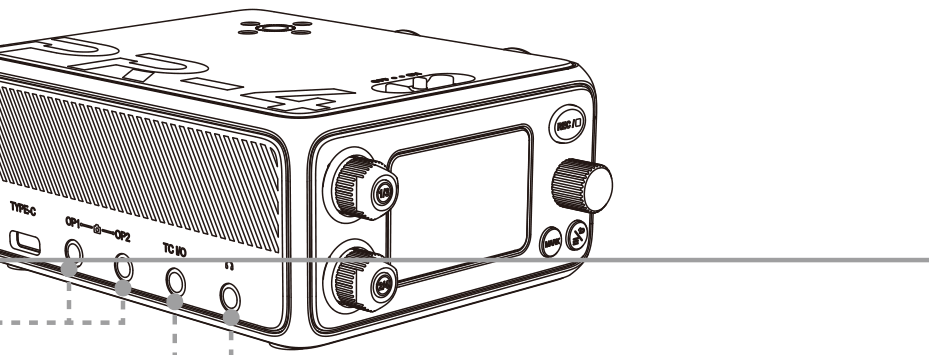
Left side: USB-C, analog outputs, TC I/O, and headphone jack.
- Top: a 1/4" threaded mount for a stand or accessory, and the power switch. Exit recording before switching the device off.
- Front: two channel knob buttons (CH 1/3 and CH 2/4), the REC button, the Select knob button, the Menu/Back button, the MARK button, and the touchscreen display.
- Left side: USB-C (power, charging, card reader, or audio interface), OP1/OP2 analog outputs, TC I/O timecode in/out, and the headphone jack.
- Rear: the XLR/TRS combo inputs for channels 1 to 4, and the battery compartment.
- Bottom: a 1/4" threaded mount for fixed installation on tripods and rigs.
Buttons and Knobs
- Channel knobs (CH 1/3, CH 2/4): press to enter that track's settings; rotate to adjust gain. In Expert mode, rotate to adjust the fader and press-and-rotate to adjust gain. Turning the knob counterclockwise quickly sets the fader to -inf.
- REC: press to start recording; press and hold for 3 seconds to stop.
- Select knob: press to open the Quick Settings screen; rotate to adjust headphone volume; press and rotate to switch headphone routing. (When HP Knob Control is set to "SET", rotation changes routing and press-and-rotate changes volume.)
- Menu/Back: open the main menu, or go back one level. Triple-click on the home screen to lock or unlock the device.
- MARK: add a marker during recording (up to 100 per file). Markers can be read by TC SYNC software.
Touchscreen Gestures
- Tap: switch the meters between channels 1/2 and channels 3/4.
- Swipe left to right: open the recording settings screen.
- Swipe right to left: open the timecode menu.
- Swipe top to bottom: open Next Take settings (or edit the current file while recording).
- Swipe bottom to top: open Previous Take settings (or Quick Notes while recording).
Key Combinations
- MARK + Menu/Back: advance the scene name by one.
- MARK + Channel Knob (1/2/3/4): arm that channel.
- Menu/Back + Channel Knob: toggle channel power. Channels 1/2 toggle 48V phantom; channels 3/4 toggle 5V; in AES42 mode this enables the 10V supply.
- Right Knob + Channel Knob (1/2/3/4): solo-monitor that channel.
Insert the Storage Card
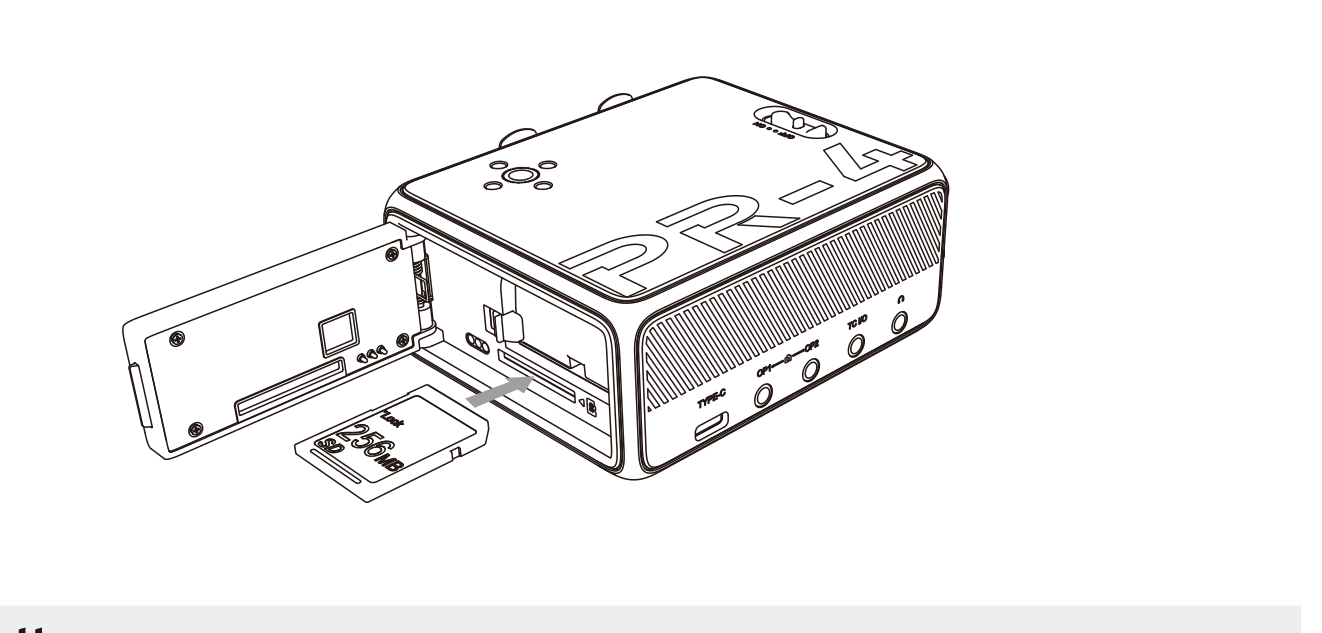
The PR-4 has a built-in 64G SSD. An external SD card (up to 1TB) installs from the rear battery compartment. For best recording stability, format the card in the device before first use.
Install the Battery
Install an NP-F550 battery into the rear battery compartment. The PR-4 can also run from USB-C or a Hirose 4-pin source. When external power and an F550 are both connected, the external source charges the battery.
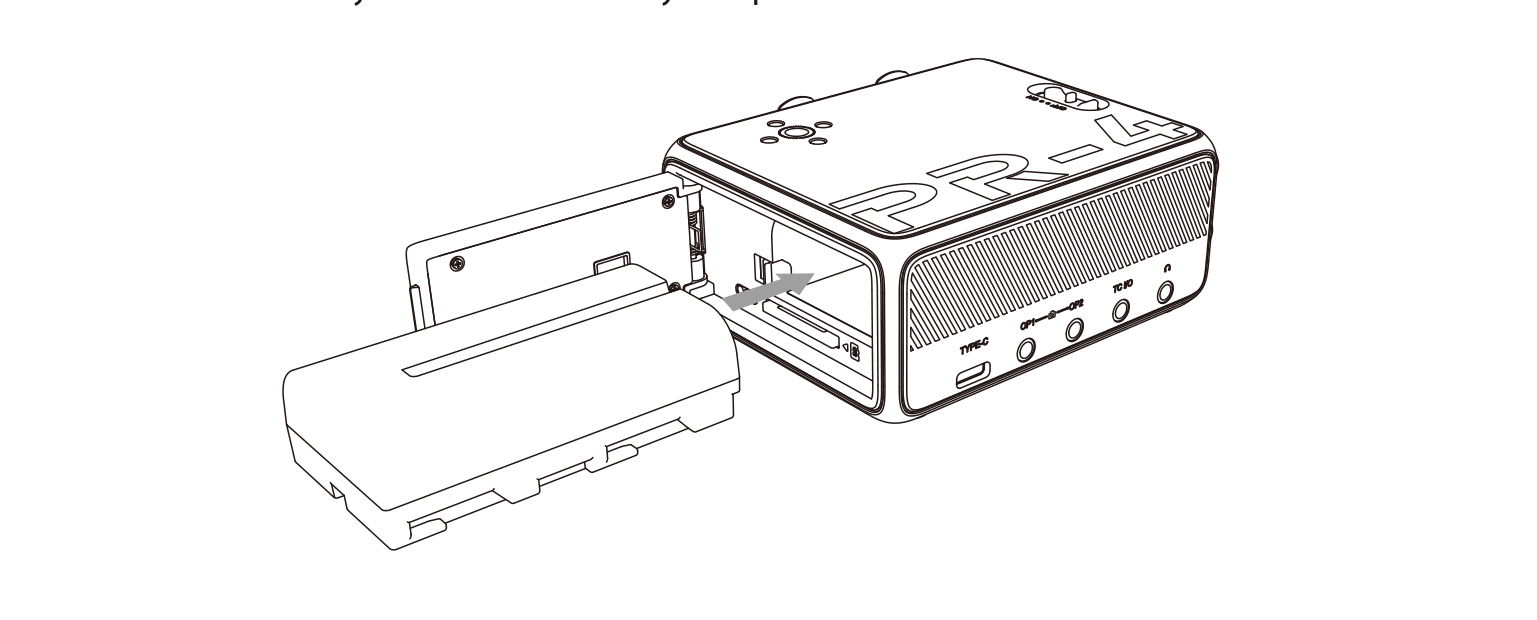
When running on an F550 battery, if the device powers off from a depleted battery, set the power switch to ON to charge it. Charging is not supported while the device is OFF.
Connect Microphones
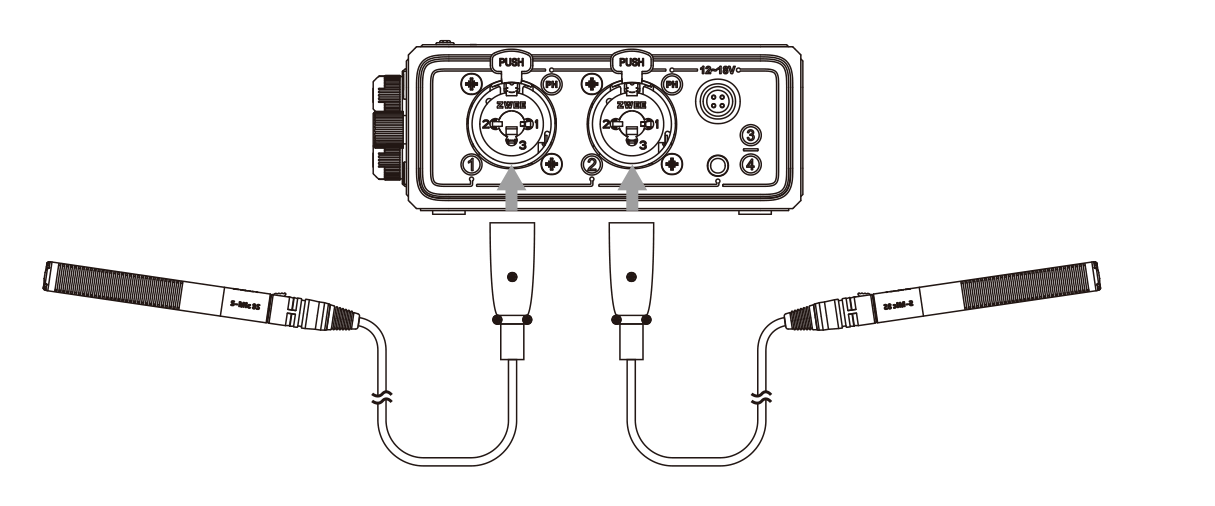
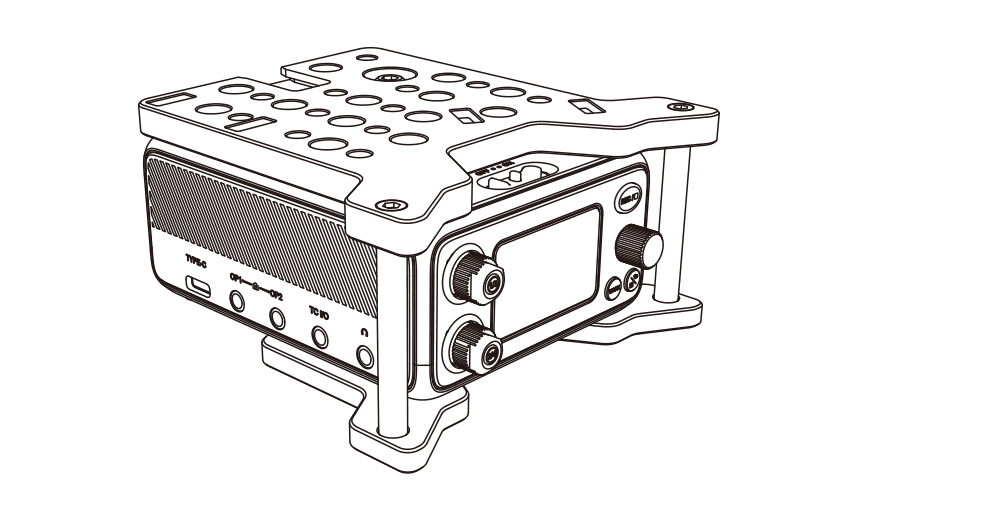
Connect microphones to the rear inputs. By default, the two XLR inputs feed channels 1 and 2, and the 3.5mm TRS input feeds tracks 3 and 4. The DEITY microphone stand accessory can be used for mic installation.
When using the 3.5mm TRS input for two channels on tracks 3/4, wire the plug as follows:
- Tip (T): Mic 1 + (Track 3)
- Ring (R): Mic 2 + (Track 4)
- Sleeve (S/G): Ground (shared)
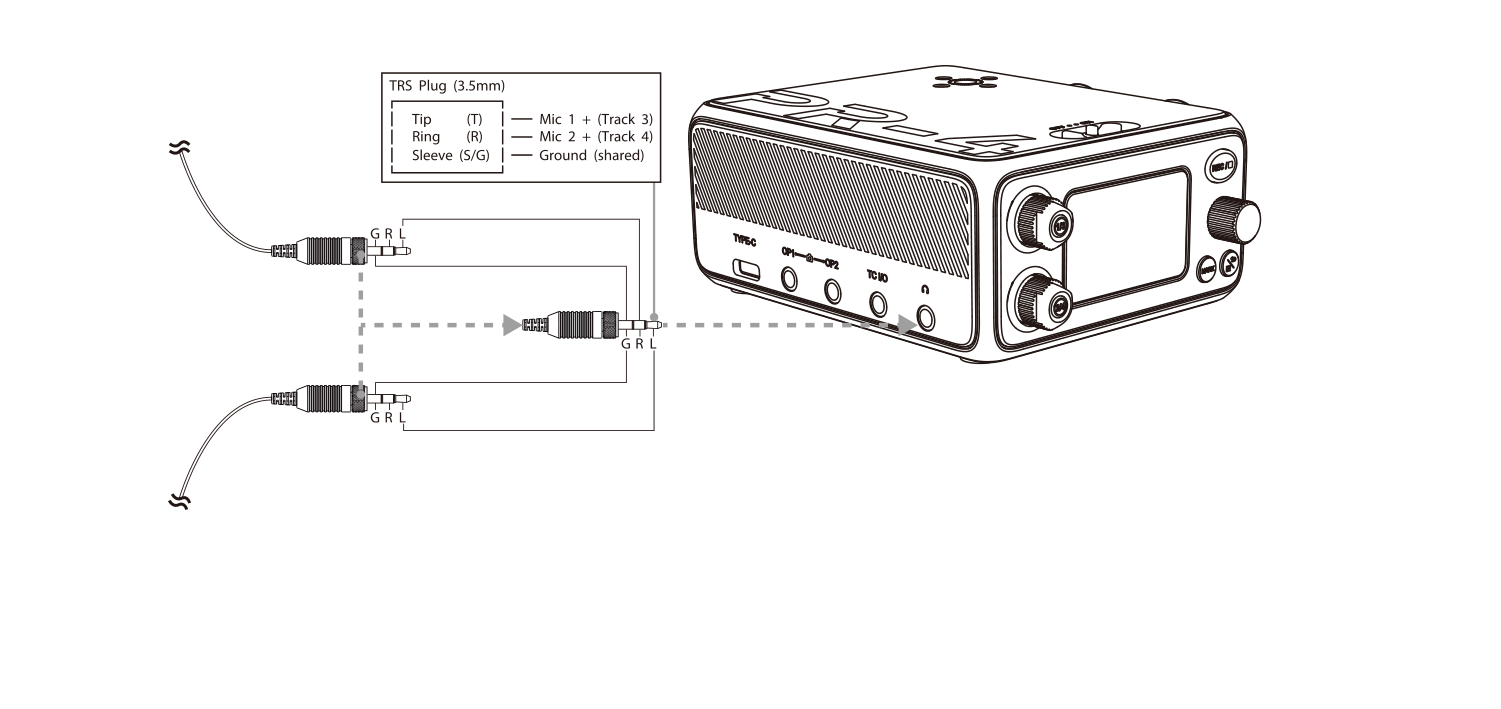
If two microphone inputs are required on the 3.5mm jack, avoid using a Y-splitter headphone adapter; wire a proper TRS pinout instead.