This guide walks you through the PR-2 hardware: the buttons, ports, and status indicators, and how to install the microphone, battery, microSD card, and belt buckle. A few minutes here will make everything in the menus feel familiar.
Get to Know Your PR-2
Inputs and Outputs
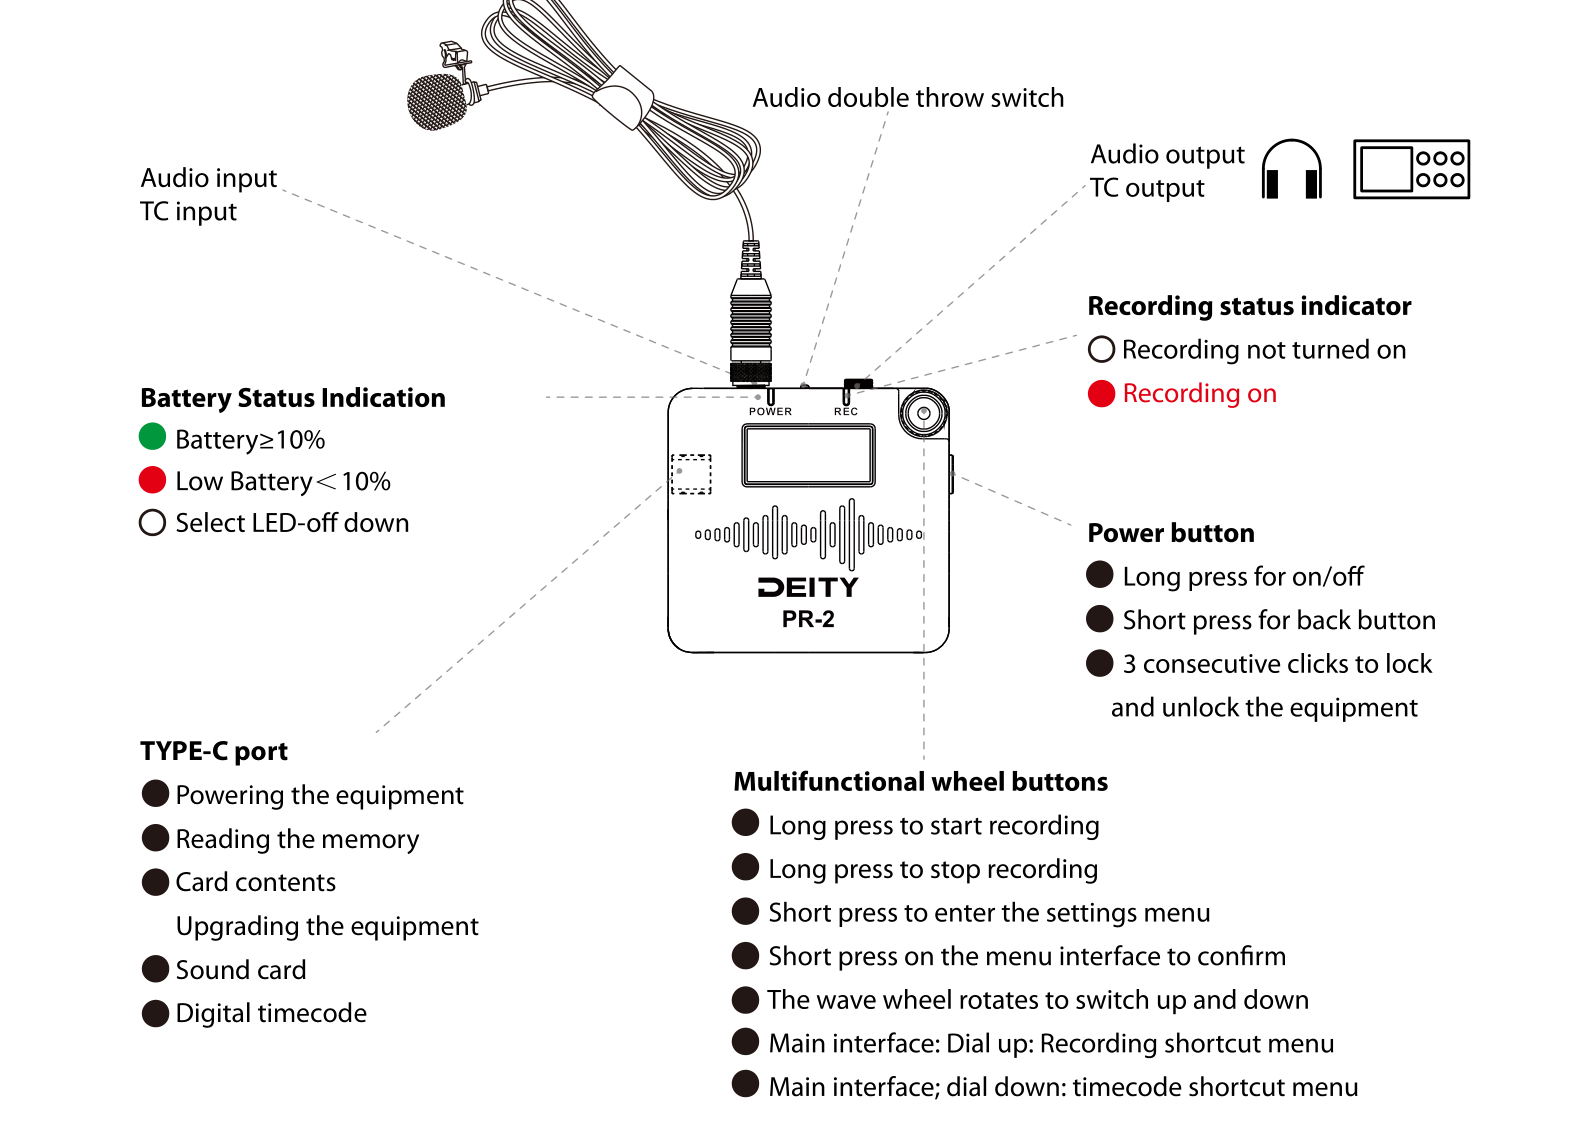
- Audio input / TC input: the top 3.5mm jack accepts a microphone or line signal, or an external timecode feed.
- Audio output / TC output: the second 3.5mm jack sends out headphone monitoring or a timecode signal, depending on the Output setting.
- Audio double throw switch: a small toggle by the input jack that changes how monitoring is routed (see the note below).
- TYPE-C port: powers the equipment, reads the memory card contents, acts as a USB sound card, carries digital timecode, and is used to upgrade the firmware.
Buttons and Wheel
The PR-2 is driven by two controls: the Power button and the Multifunctional wheel button.
Power button:
- Long press to turn the unit on or off.
- Short press to go back (acts as the back button).
- Three consecutive clicks to lock and unlock the equipment.
Multifunctional wheel button:
- Long press to start recording, and long press again to stop recording.
- Short press to enter the settings menu, and short press to confirm a selection inside a menu.
- Rotate the wheel to move up and down through options.
- On the main interface, dial up for the recording shortcut menu and dial down for the timecode shortcut menu.
Status Indicators
- Recording status indicator: unlit when recording is not turned on, and lit red when recording is on.
- Battery status indication: green when the battery is at or above 10 percent, red when the battery is low (below 10 percent). The LED can also be switched off from the menu.
Monitoring: Double Throw Switch
The audio double throw switch changes how the output port behaves. The exact behavior depends on your regional version:
- Global version, left: normal recording, monitoring is output after processing, with Mic and Line output normally.
- Global version, right: normal recording, monitoring is output directly without going through the circuit. The Line signal outputs normally and the Mic signal can be recorded, but the monitoring port has no output.
- American version, left: normal recording, no output from the output port.
- American version, right: normal recording, output port is muted.
Installing the Microphone
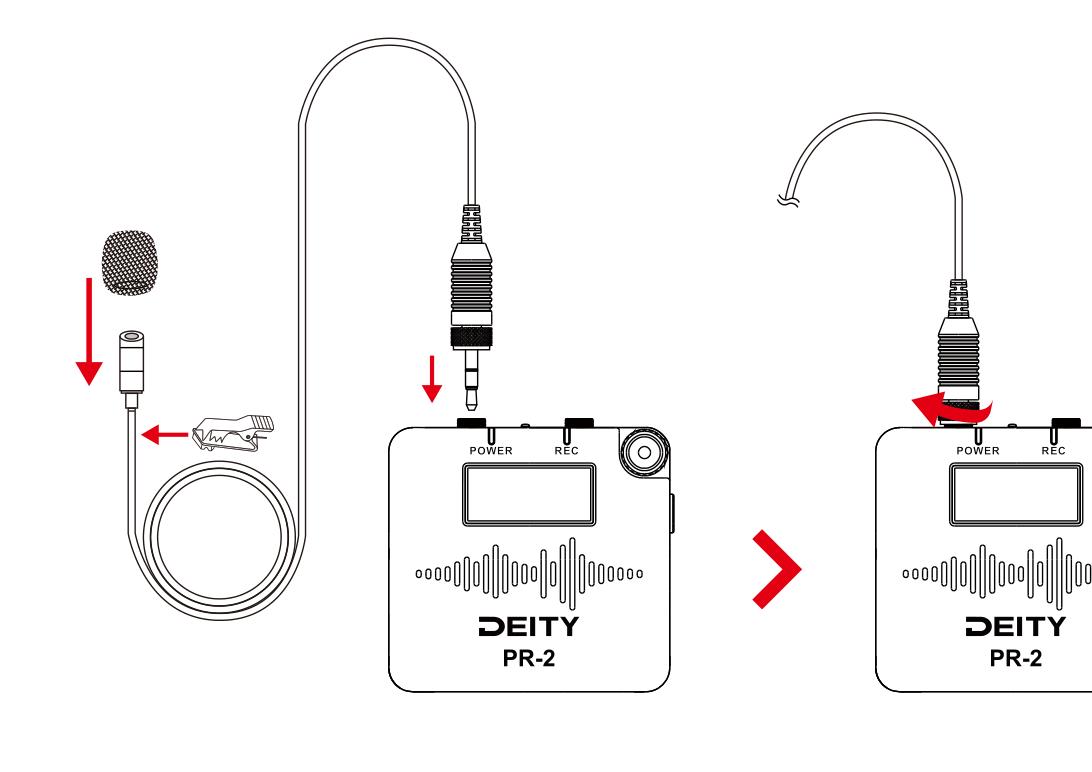
Attach the clip to the head of the W. Lav Pro lavalier, then plug the 3.5mm TRS connector firmly into the audio input jack on the top of the PR-2. Route the cable so it sits comfortably on your talent.
Installing the Battery
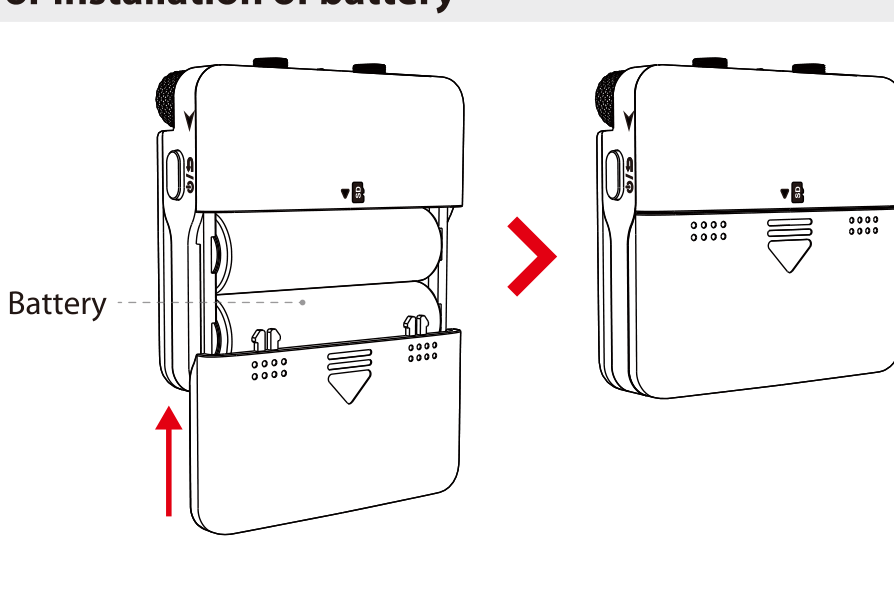
Open the battery door on the back of the PR-2, insert the two DEITY AA batteries observing the polarity markings, then close the door until it clicks. The USB-C port is used for the card reader and firmware updates, not for powering the unit.
Tip: In the menu, set the correct battery type (DEITY AA, Alkaline, Lithium, or NiMH) so the remaining battery life reads accurately. See [PR-2] Menu Reference.
Installing the Memory Card
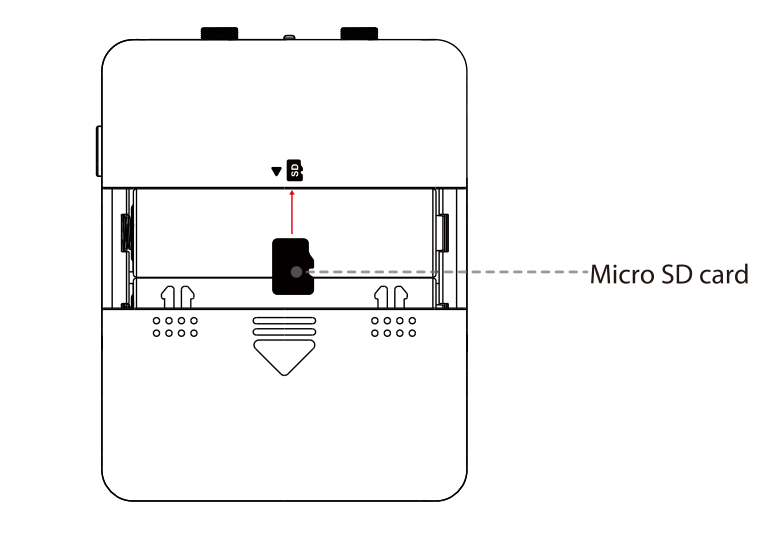
Open the battery door to reach the microSD slot. Insert the card with the contacts facing the arrow marking until it seats. The PR-2 supports cards up to 128GB. For the most stable recording, format the card in the PR-2 before your first shoot.
Installing the Belt Buckle
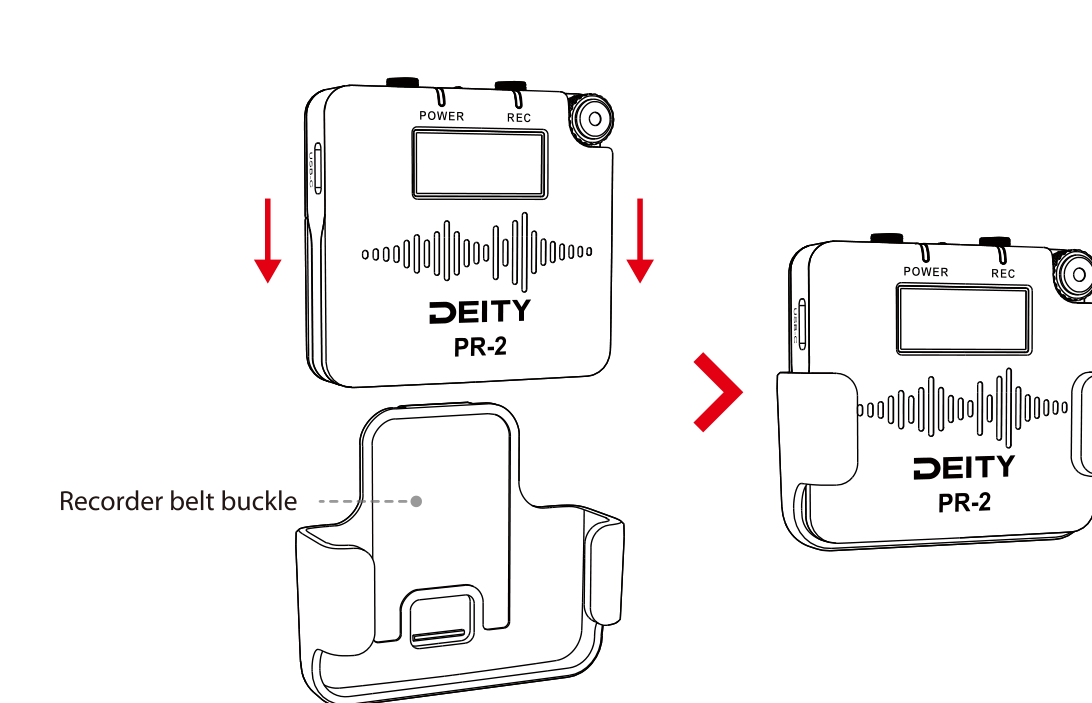
Slide the PR-2 down into the recorder belt buckle until it locks into place. The buckle lets you clip the recorder to a belt, waistband, or bag strap for hands-free capture.