
This guide explains how to read the PR-2 screen and how to start and stop a recording. Once you know the main interface and the two shortcut screens, capturing a clean take is just a long press away.
Main Interface
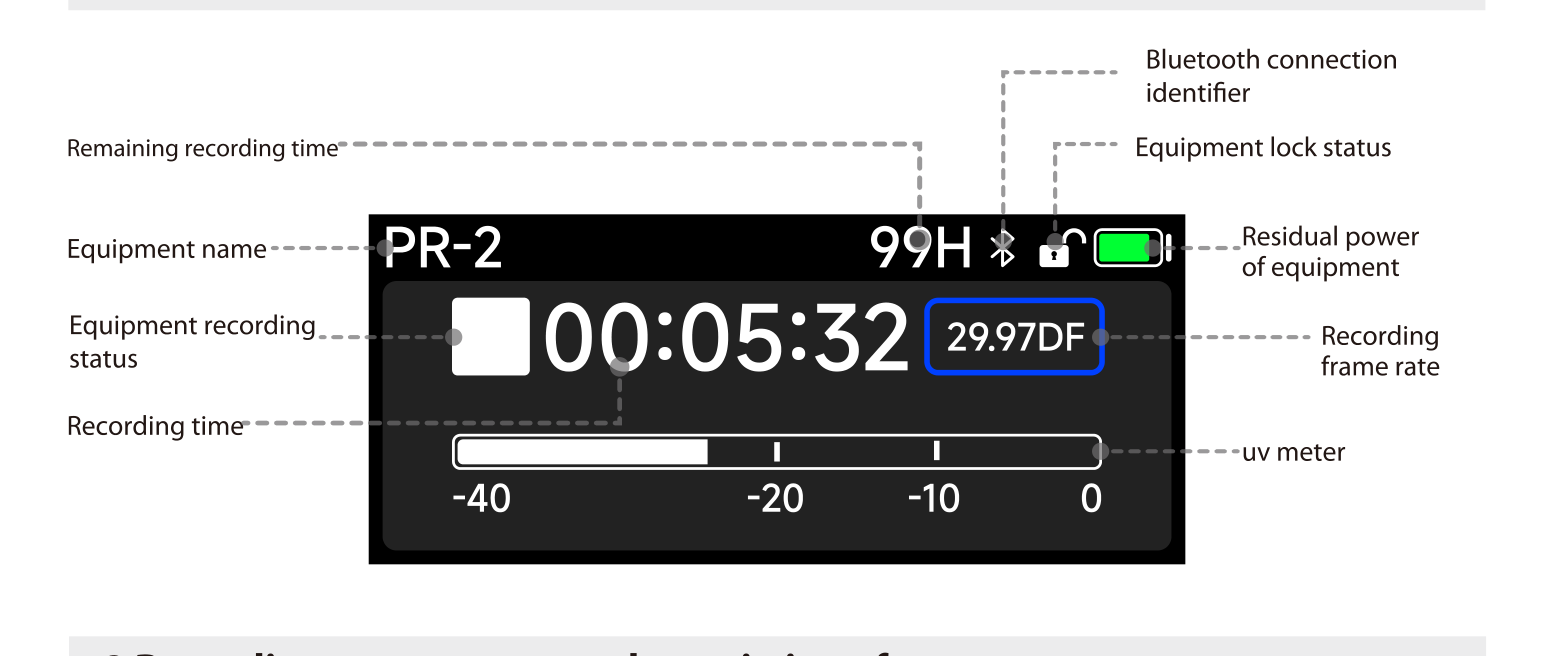
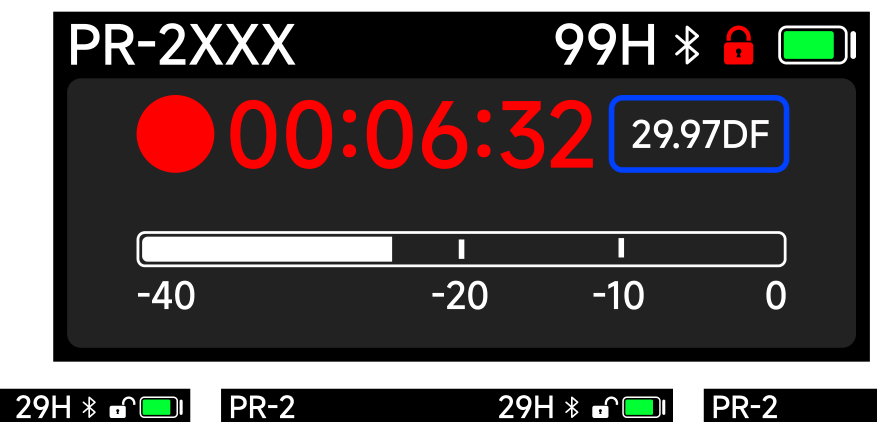
The main interface shows everything you need at a glance:
- Equipment name: the device name (editable as the DID in the menu).
- Remaining recording time: how much record time is left on the card, shown top center (for example, 99H).
- Bluetooth, lock status, and battery: status icons in the top right.
- Equipment recording status: a square icon when stopped, a red dot when recording.
- Recording time: the elapsed or standby timer.
- Recording frame rate: the current timecode frame rate (for example, 29.97DF), boxed on the right.
- UV meter: the input level meter, scaled from -40 to 0.
Recording Parameters Shortcut
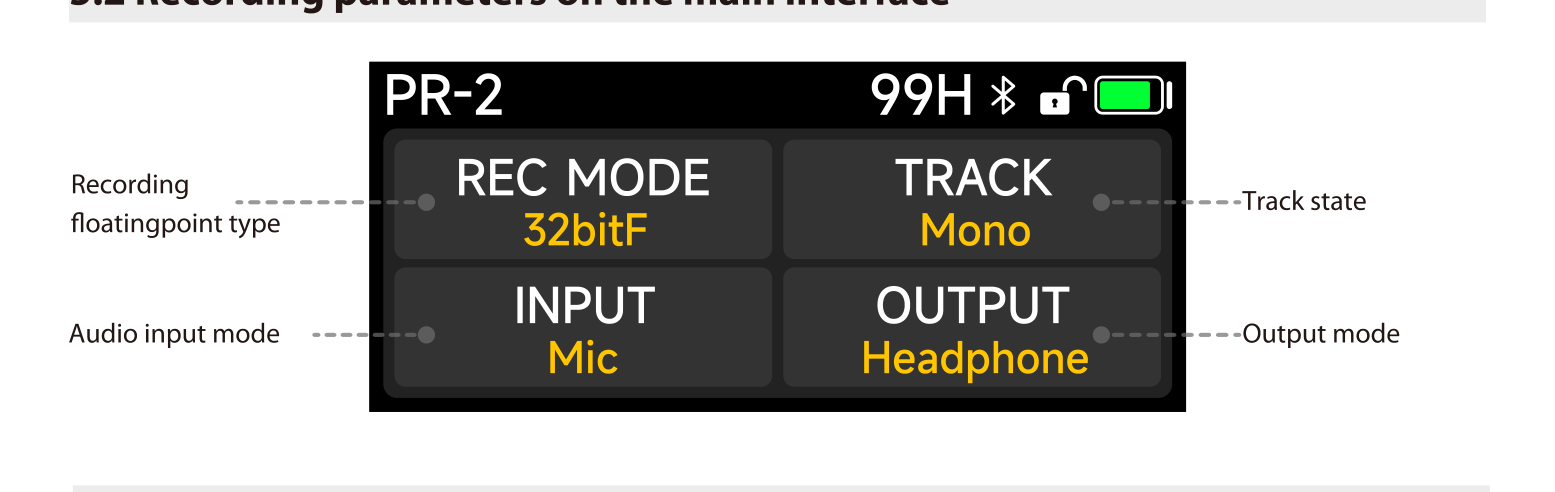
From the main interface, dial the wheel up to open the recording shortcut. It shows the four settings you change most often:
- REC MODE: the recording floating-point type, such as 32bitF.
- TRACK: Mono or Stereo track state.
- INPUT: the audio input mode, Mic or Line.
- OUTPUT: the output mode, such as Headphone monitoring.
Timecode Status Shortcut
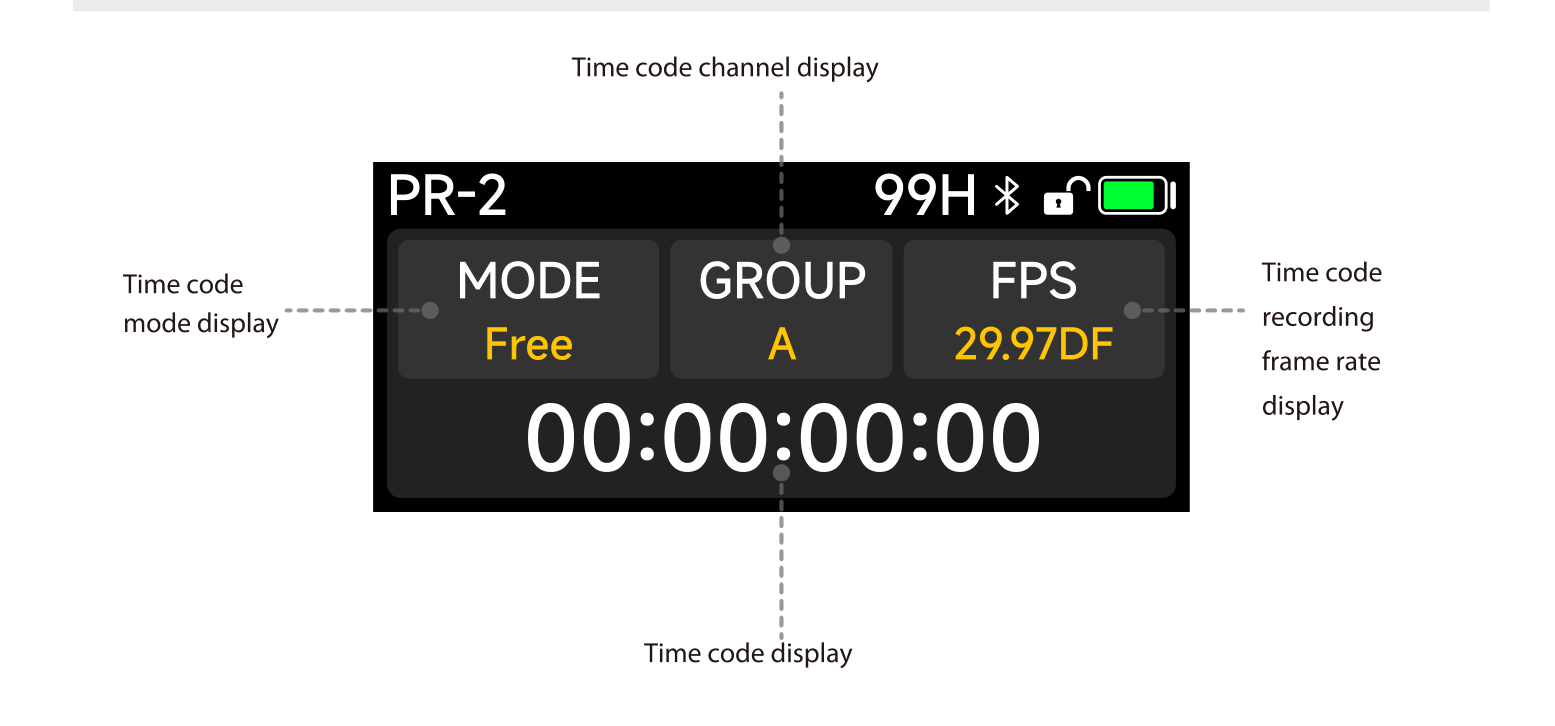
From the main interface, dial the wheel down to open the timecode shortcut. It shows:
- MODE: the timecode mode (Free, Auto, Once, or Rec).
- GROUP: the sync group channel, A to H.
- FPS: the timecode frame rate.
- Timecode display: the running timecode value along the bottom.
For the full explanation of these options, see [PR-2] Timecode Settings.
Start Recording
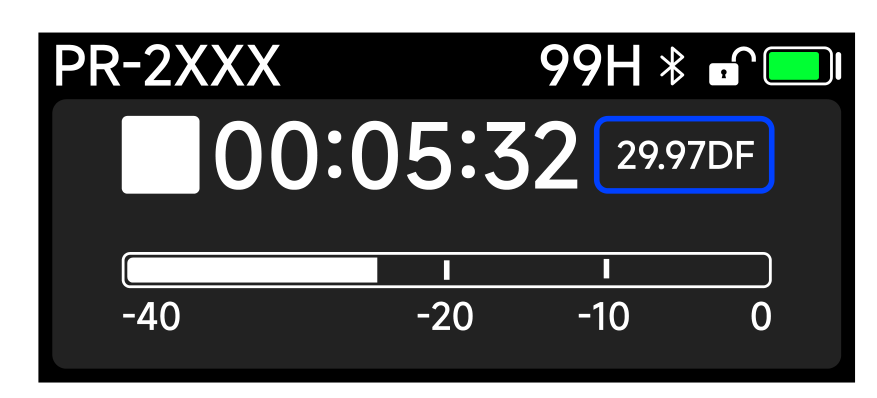
With the equipment unlocked, press and hold the multifunctional wheel button and wait for the progress bar to complete. Recording then begins and the status indicator lights red.
Stop Recording
To stop, make sure the equipment is unlocked, then press and hold the multifunctional wheel button again and wait for the progress bar to complete. The recording stops and the file is saved to the card.
Note: If you long press the power button while recording, the screen prompts Shut down while recording? If you confirm the shutdown, the recording file is saved automatically before the unit powers off.
Playing Back a Clip
You can browse and play recordings directly on the PR-2 from the PLAYBACK menu, choosing the date folder and then the file. See [PR-2] Menu Reference for the playback controls.