
The DXTX display has three working screens: the main screen, the recording interface, and the timecode interface. This guide explains what each screen shows and how to move between them.
Main Screen
The main screen is your at-a-glance status view. It shows the device name, timecode, frequency, mic levels, gain, and system icons.
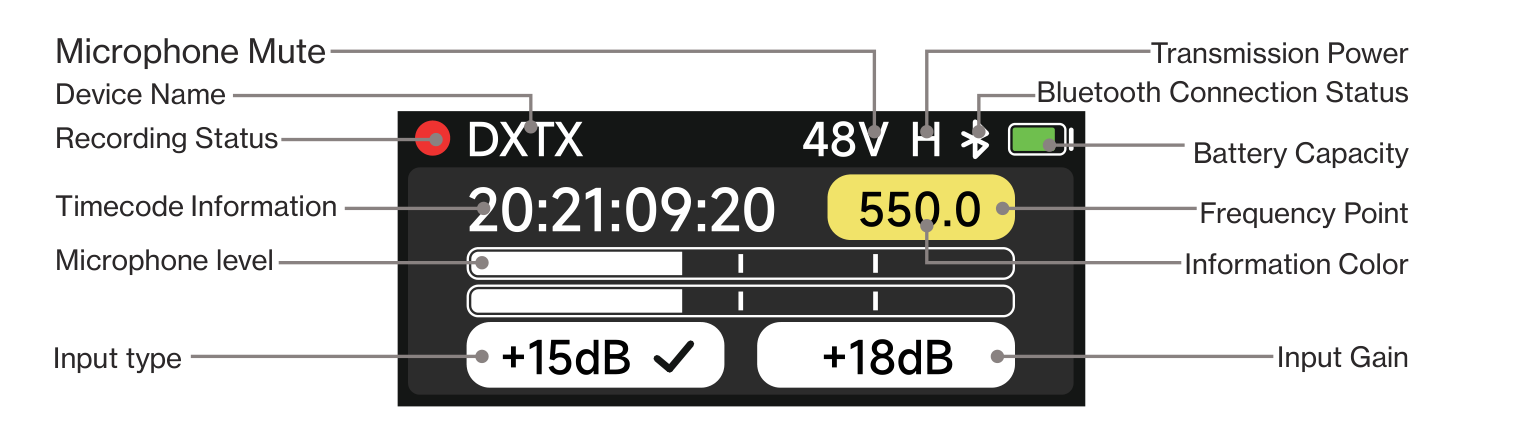
| Recording Status | A red dot appears when the DXTX is recording. |
| Device Name | The name you set under DID (default "DXTX"). |
| Microphone Mute | Indicates the audio is muted. |
| Transmission Power | Current mic power / voltage (for example 48V). |
| Bluetooth Connection Status | Shows whether Bluetooth is connected. |
| Battery Capacity | Remaining battery level. |
| Timecode Information | The running timecode. |
| Frequency Point | The transmit frequency in MHz (for example 550.0). |
| Microphone Level | Live input meters (two meters when using the 5-pin stereo input). |
| Input Type / Input Gain | The active input channel (marked with a check) and its gain value. |
Recording Interface
Long press the Up Button to open the recording interface. Press OK to start recording audio to the microSD card. While recording, press OK again to bring up a confirmation prompt, then choose YES to end the recording.
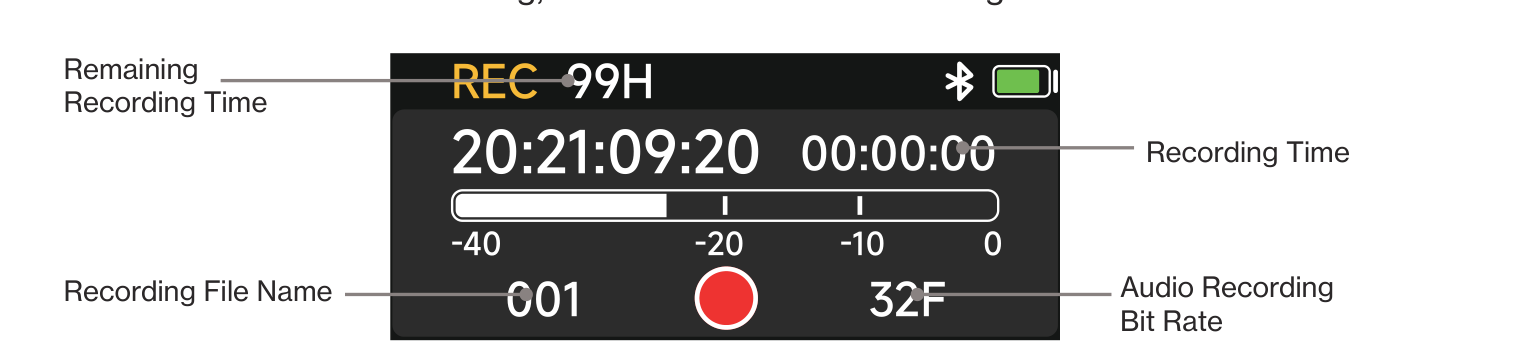
The screen shows the remaining recording time (top left), the running recording time, the current recording file name, and the audio recording bit rate (for example 32F for 32-bit float).
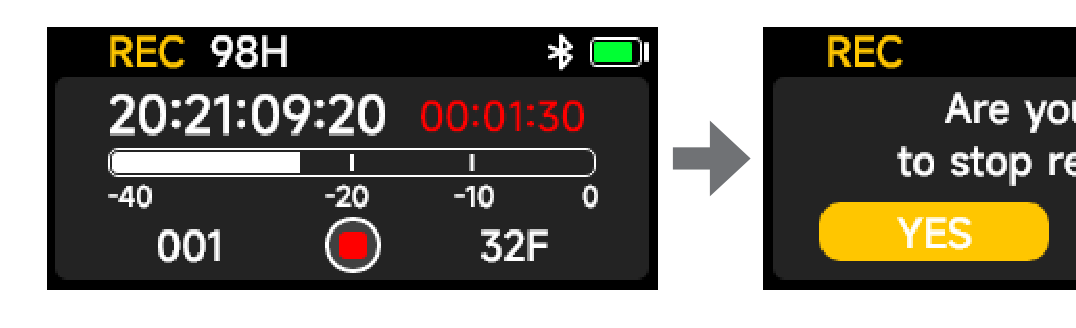
You can set the bit rate (24-bit or 32-bit float) and the default recording behavior under REC MODE. See [DXTX] Menu Reference.
Timecode Interface
Long press the Down Button to open the timecode interface. Here you set the timecode MODE, frame rate, sync group, and starting value. The INT row shows the internal timecode, and the EXT row shows external timecode data when an external timecode device is connected.
Mode
Under MODE you can choose how the timecode runs.
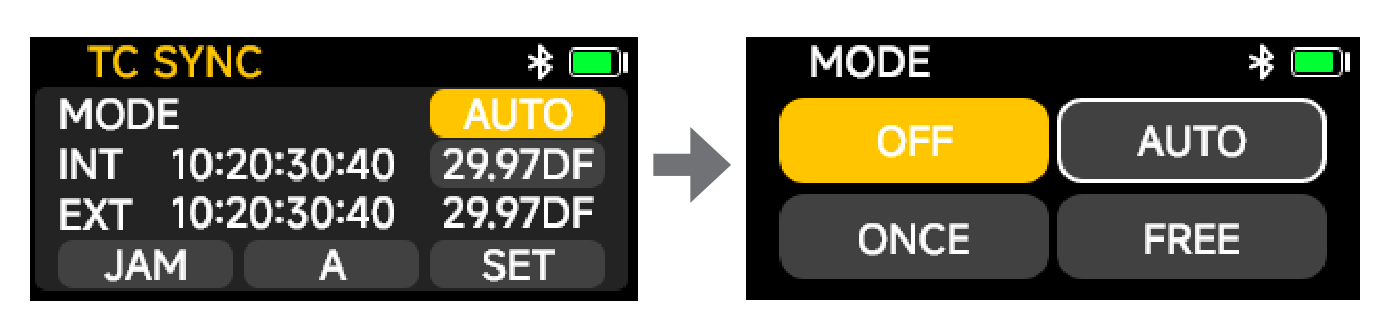
| OFF | Timecode is off. |
| AUTO | The default setting. Automatically recognizes the wired or wireless timecode for synchronization. |
| ONCE | Synchronizes the timecode once and then locks it. The lock is released by switching modes. |
| FREE | The device runs its own timecode. It does not restart and does not accept external timecode signals. |
| REC | The timecode follows the recording start and stop. Starting a recording starts the timecode, and stopping the recording stops it. |
Frame Rate
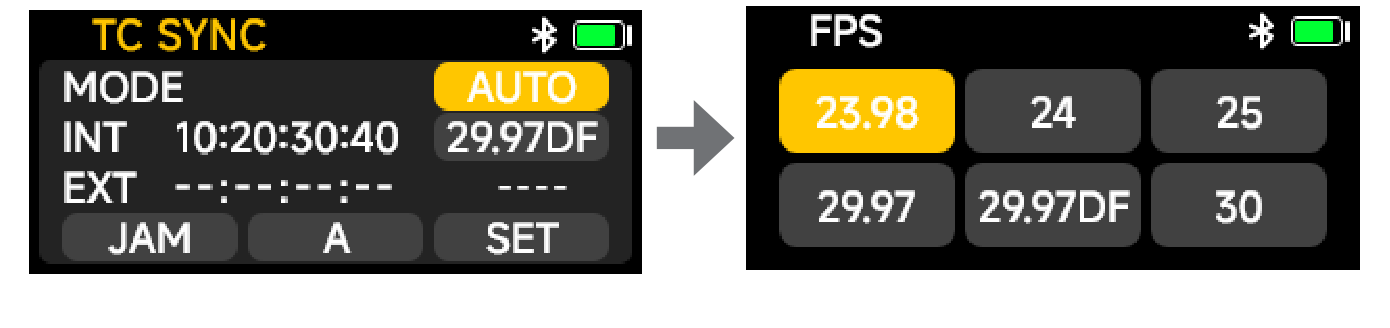
Set the recording frame rate to match your camera. Options are 23.98, 24, 25, 29.97, 29.97DF, and 30. DF stands for drop frame. The system default is 25, so it is best to set the correct frame rate in advance.
Jam Synchronization
If you do not have a DEITY wireless timecode device nearby, you can jam the DXTX by cable. In AUTO or JAM mode, the device automatically identifies and synchronizes the timecode signal from the XLR input port. In FREE mode or synchronized JAM mode, the system can recognize external signals.
Note: Cable jam only works when the microphone power supply is set to 5V or LINE mode. It cannot be used when the microphone power supply is set to 48V.
Sync Group
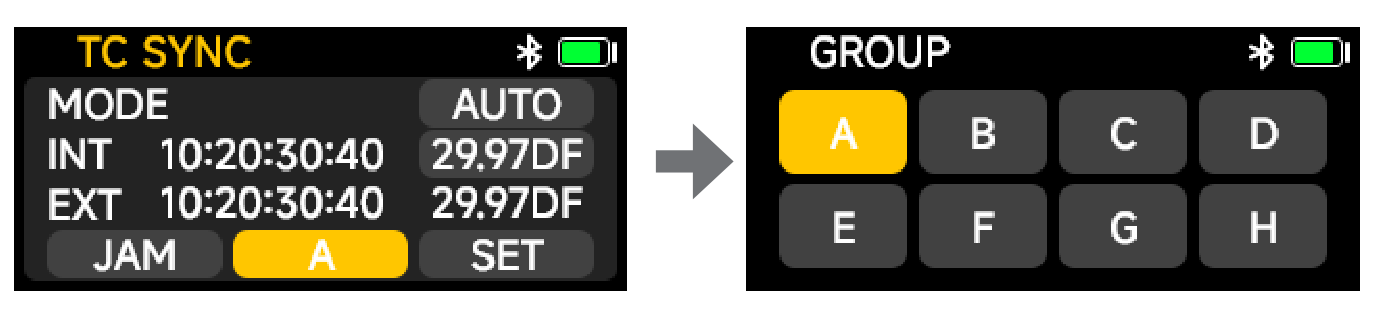
To help manage timecode, DEITY provides A to H synchronization groups. Only devices in the same group can synchronize, except for Bluetooth synchronization.
Manual Start Value
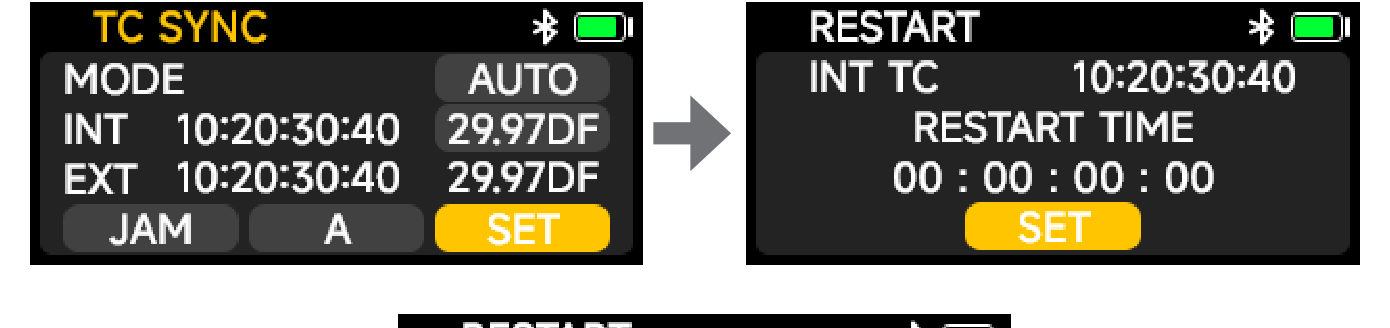
Select SET to manually enter a starting timecode and start it running. Use the Up and Down buttons to adjust each field.
For a full walkthrough of jamming to a camera or timecode box, see [DXTX] How to Set Up Timecode.