
The Zoom F8 and F8n multitrack recorders accept external timecode so your audio locks to camera on the timeline. This guide walks through wiring a Deity timecode generator to the F8 and setting its timecode mode to jam and hold sync.
Step-By-Step User Guide
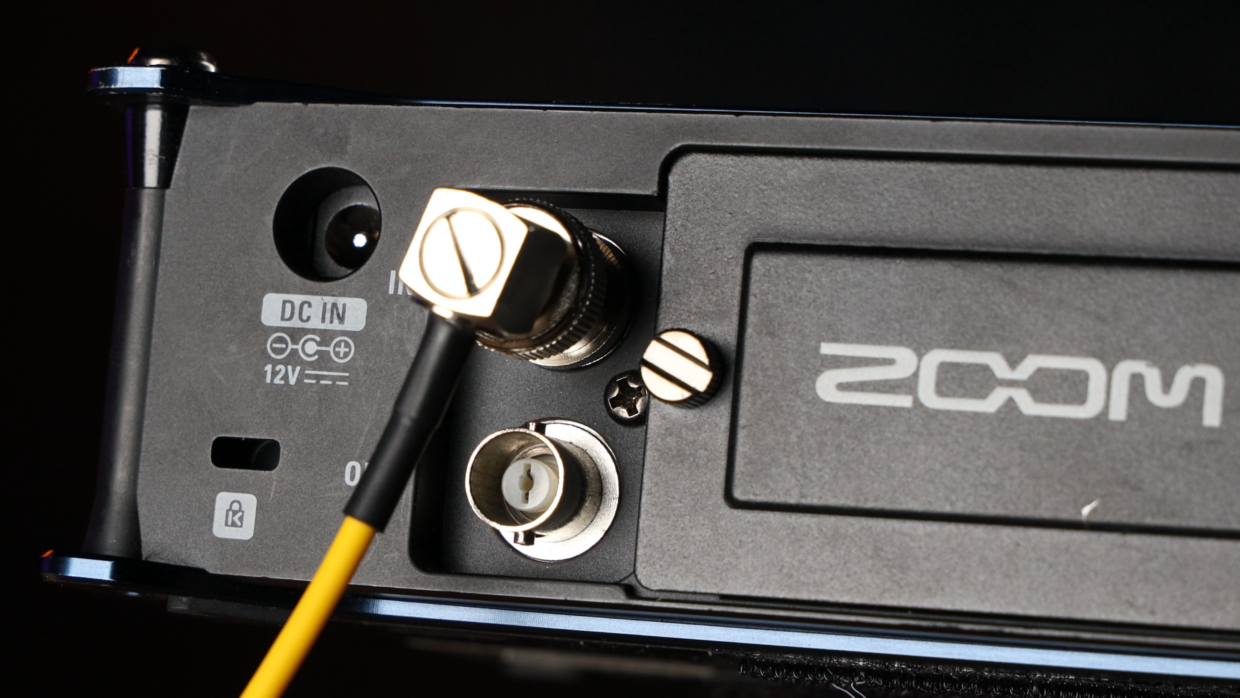
Step #1
First things first, grab a BNC to 3.5 TRS cable. Next, locate the timecode port on the back of the Zoom F8 and plug it in.
Step #2
Really quickly, confirm your frame rate with your Cinematographer, in this case we’re using “24.”
On your TC-1, scroll over to the frame rate section and match it to the camera.
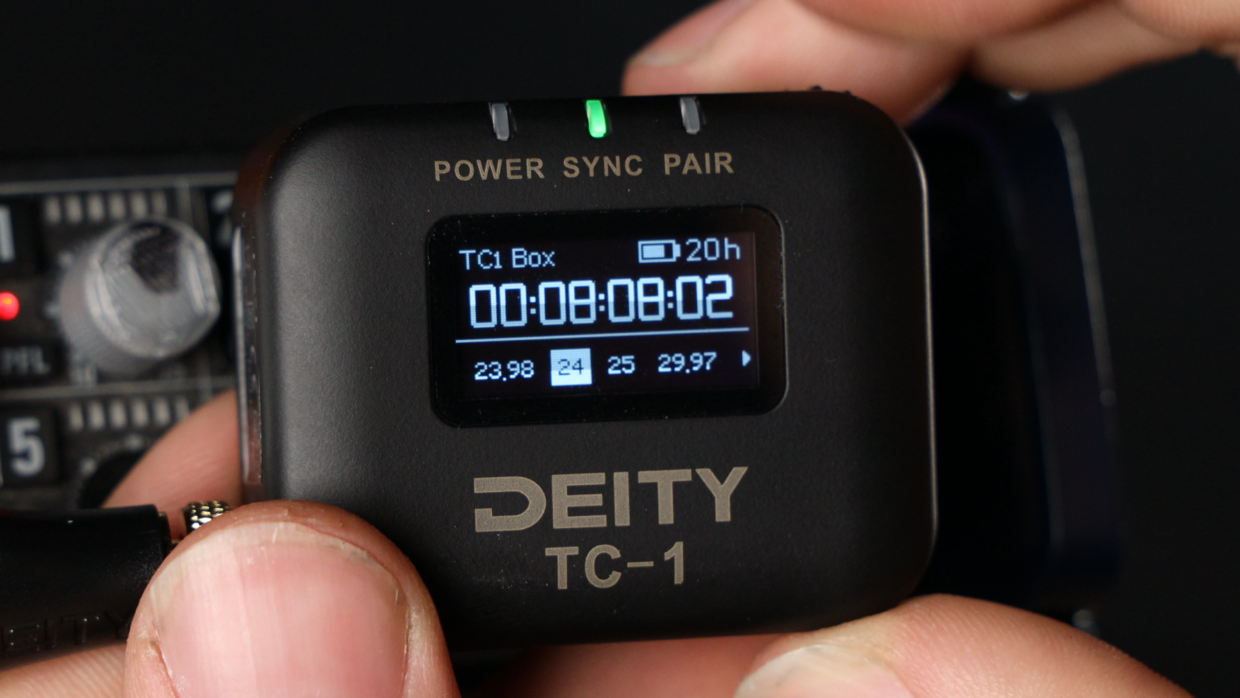
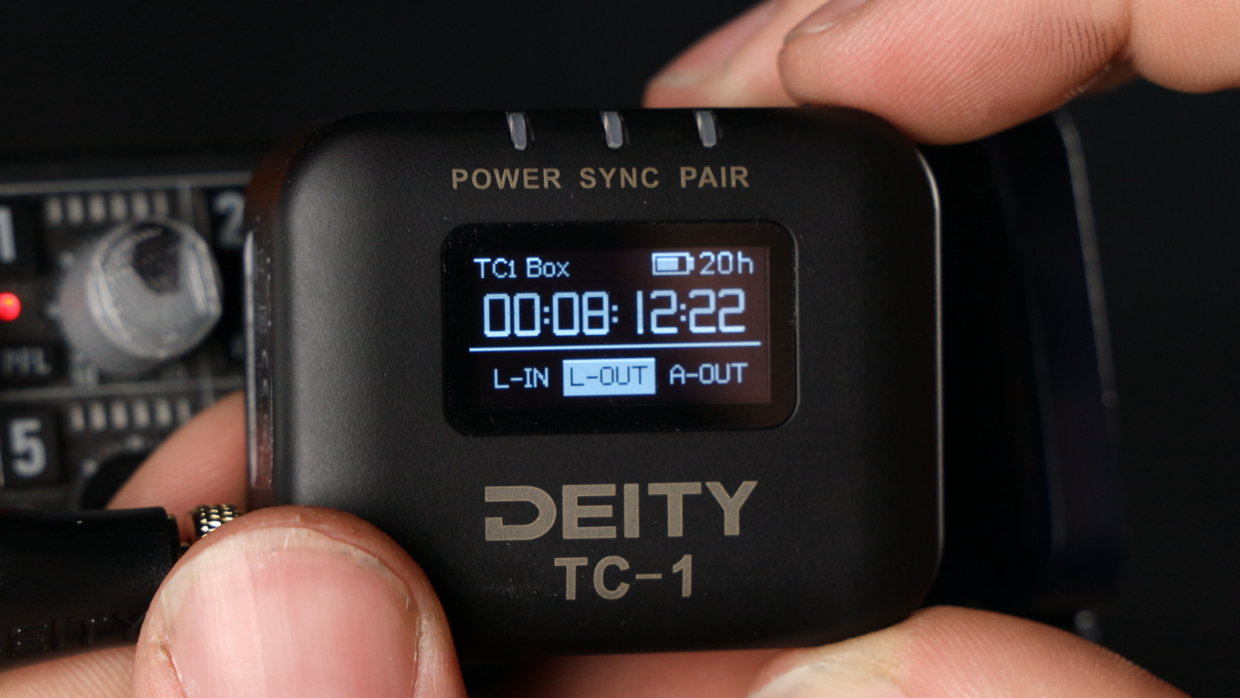
Step #3
Next, scroll over to the out type section and select “L-Out.”
Step #4
Open the Zoom F8 menu and scroll down to the timecode tab, inside that go to your mode setting and make sure “External” is selected.
Back in the timecode tab, make sure your frame rate is matching your camera.
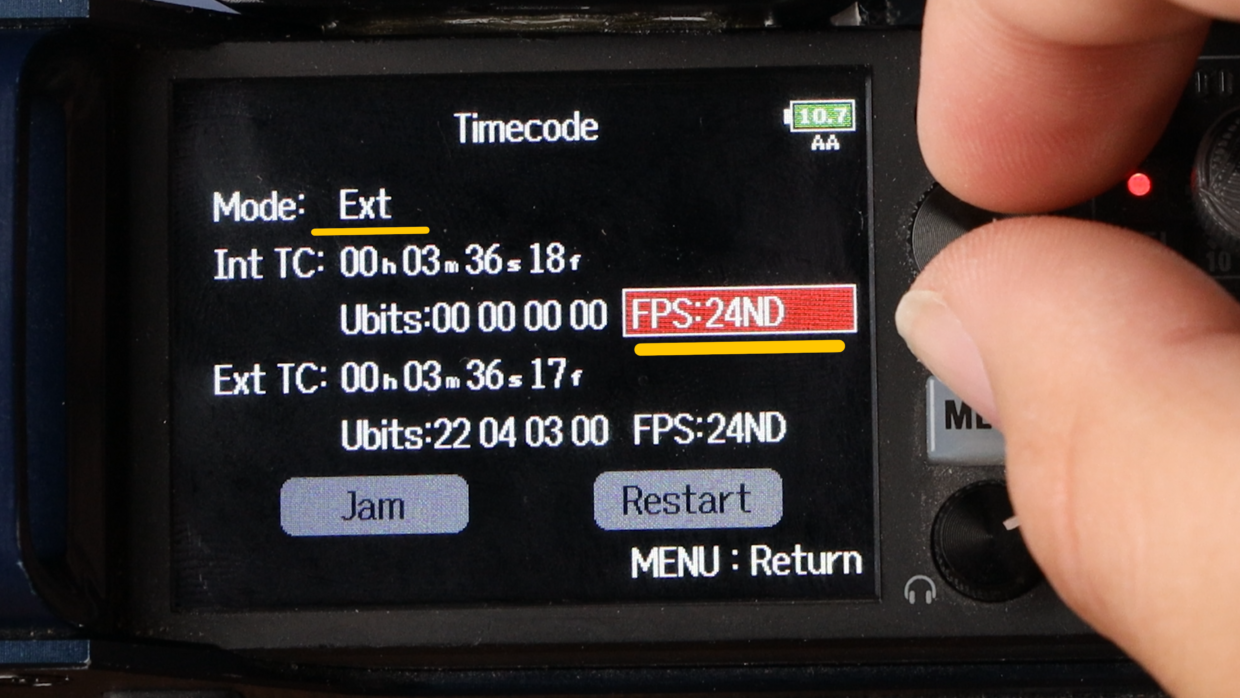
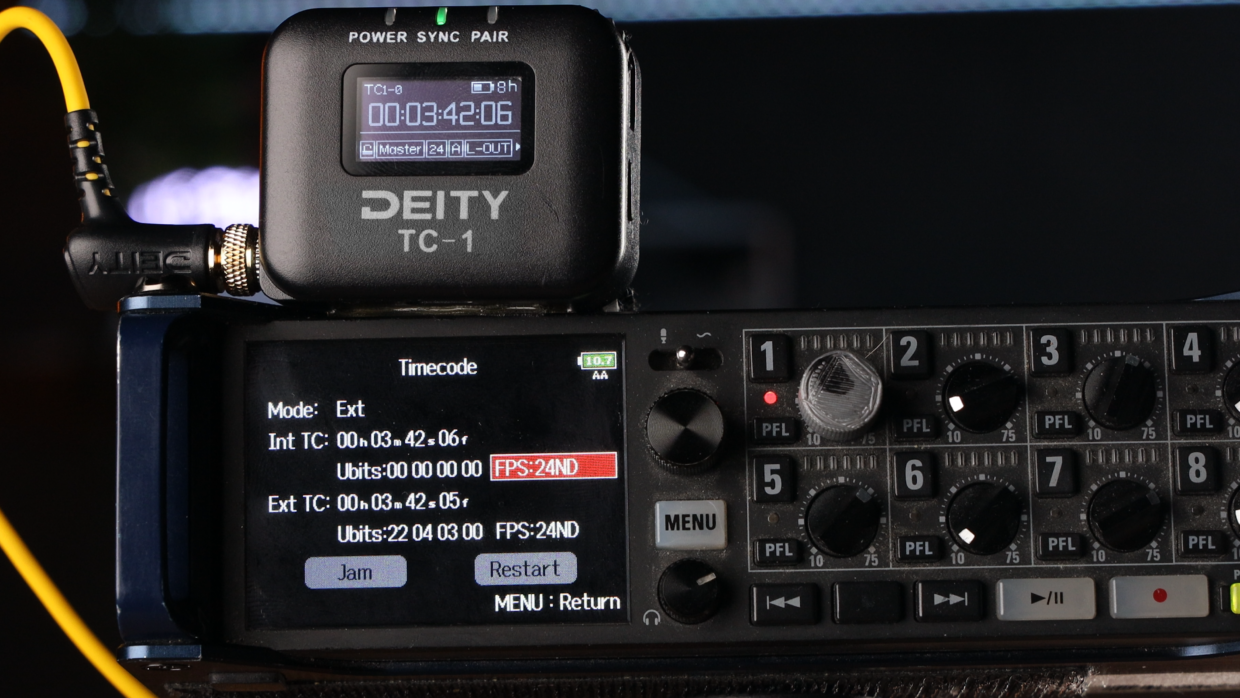
You’re Connected!
With that your Zoom F8 is now ready to be synced with the rest of your set!
If you need help syncing your Deity TC-1 to your other Deity TC-1 timecode generators, here is a User Guide!