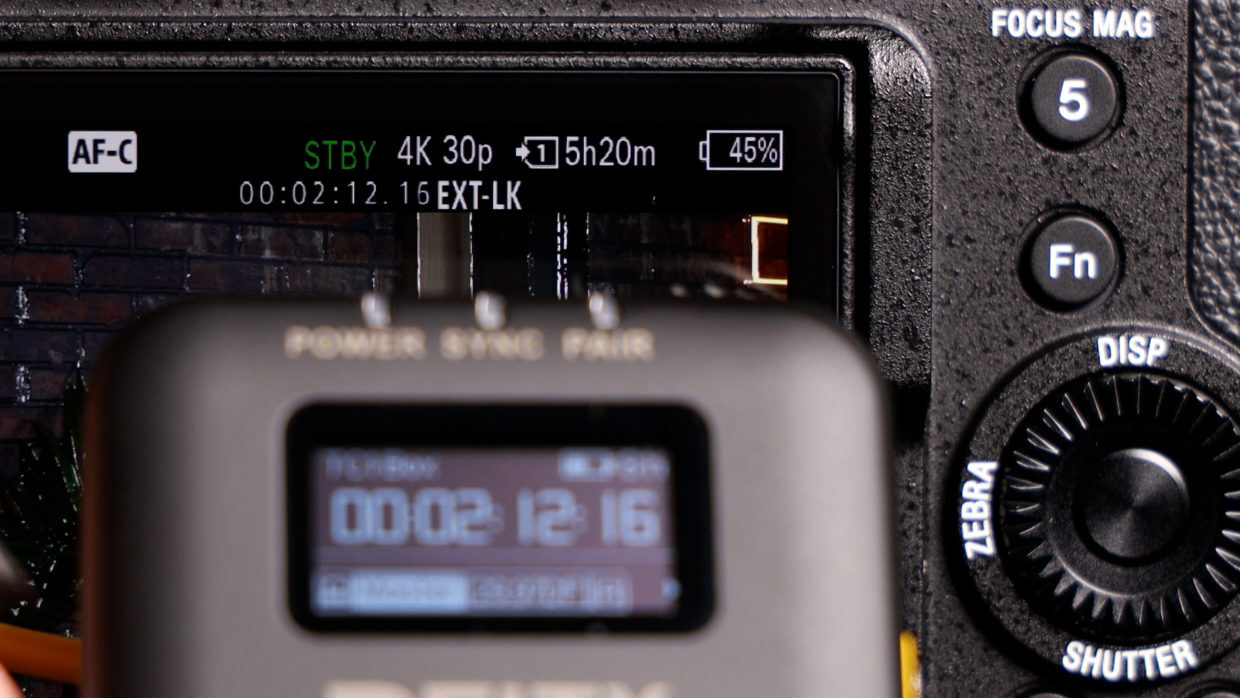
Sony mirrorless bodies like the FX3, FX30, A1, and A7S III accept external timecode through the Multi Terminal port when paired with the right cable and firmware. This guide shows how to feed a Deity TC-1 into these cameras and confirm they are reading synced timecode.
As of now, the following Sony mirrorless cameras are confirmed to be compatible with the Deity C23 TC adapter:
- Sony FX3
- Sony FX30
- Sony A1 (ILCE-1), Requires firmware version 2.01 or later.
- Sony A7S III (ILCE-7SM3), Requires firmware version 3.0 or later.
These models support timecode input through the Multi-Terminal port when used with the Deity C23 TC cable, allowing for synchronization with external timecode generators.
Step-By-Step User Guide
Step #1
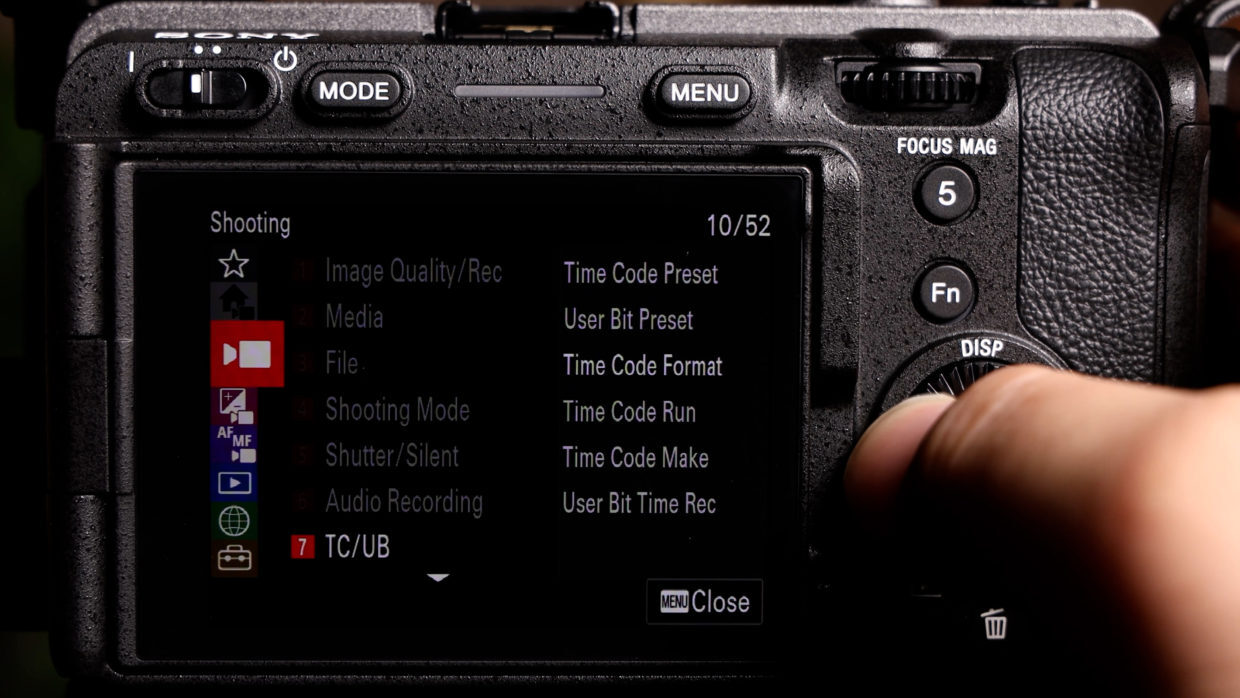
Power on your camera and go into the menu of your camera.
The inputs and menus of these Sony cameras are nearly identical, so this tutorial will apply to all of them.
Step #2
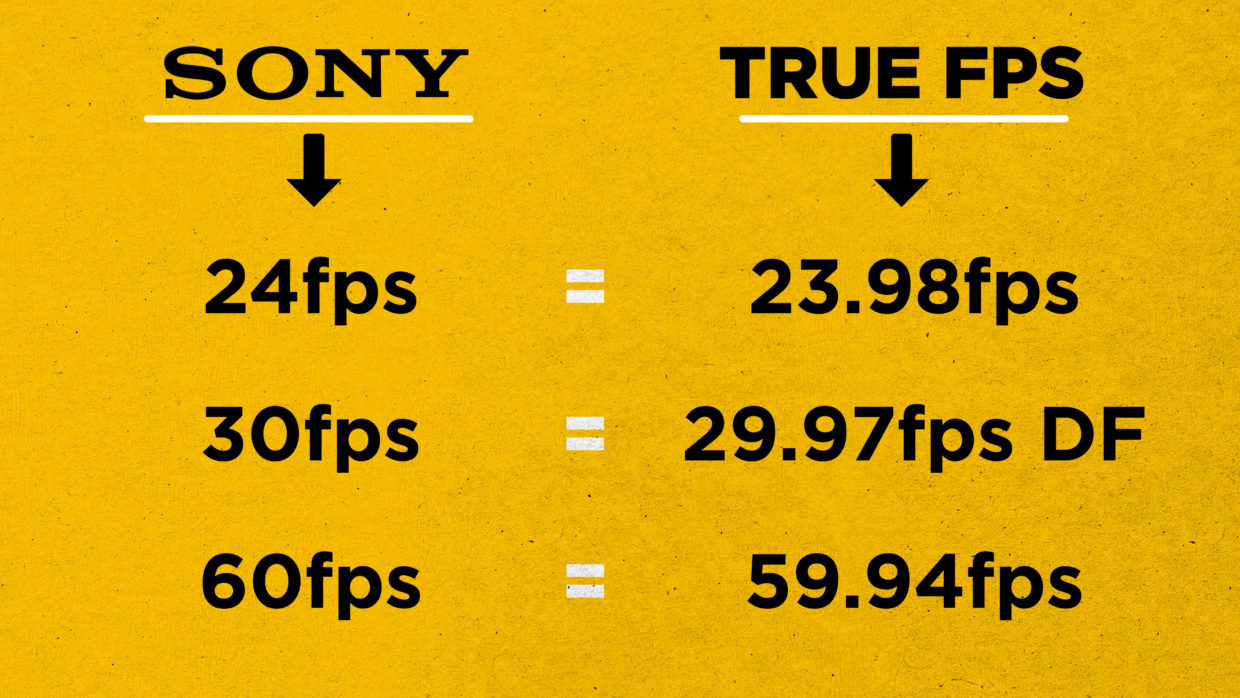
First, confirm your frame rate. Note that the frame rates listed in the Sony menu are inaccurate. Here is a helpful conversion chart.
Conversions:
• 24fps = 23.98fps
• 30fps = 29.97fps DROP FRAME
• 60fps = 59.94fps
Some Sony cameras do shoot true 24 fps, confirm that beforehand.
Step #3
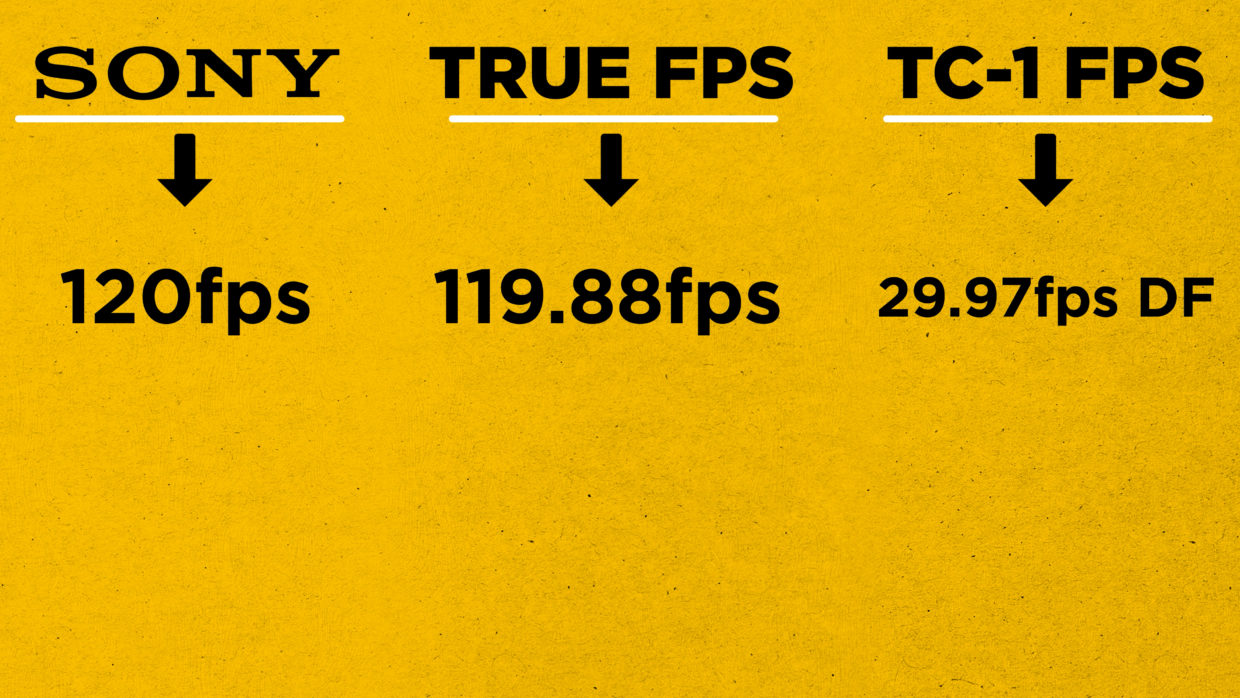
Additionally, if you’d like to shoot at a high frame rate like 120fps (which is really 119.88) and still have timecode, use a common denominator frame rate.
For 119.88fps the matching frame rate would be 29.97DF.
Step #4
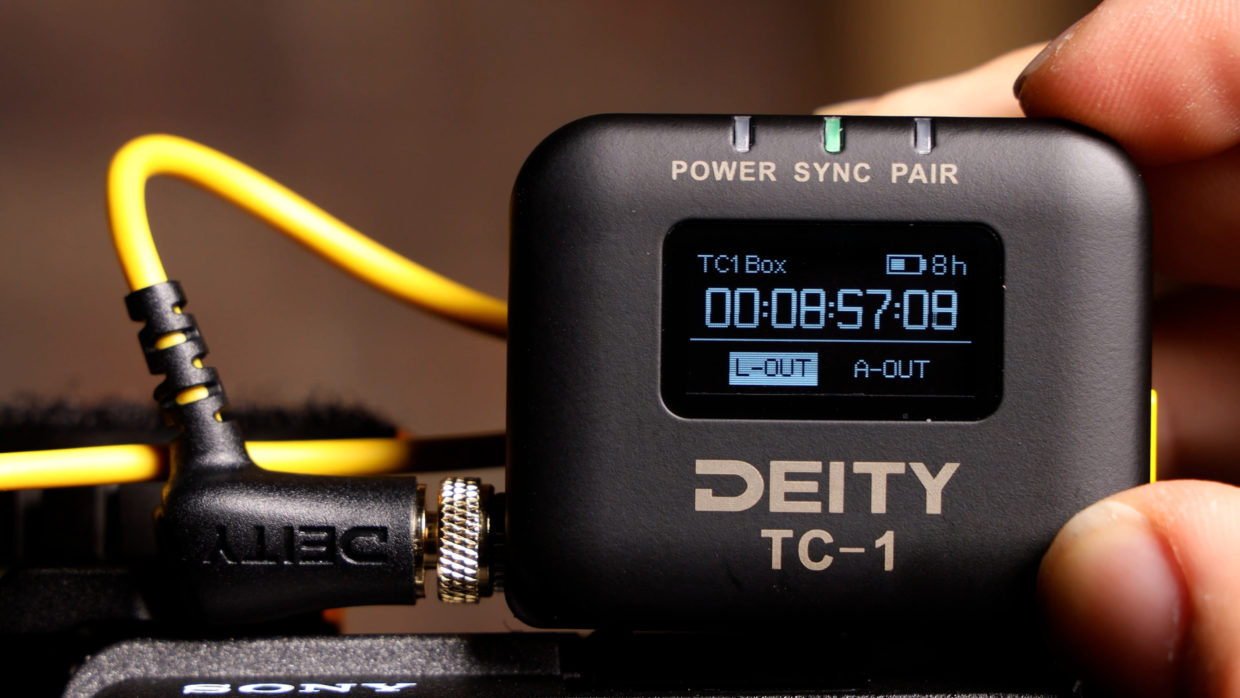
On your Deity TC-1, scroll over to the frame rate section and match it to the camera.
Next, scroll over to the out type section and select “L-Out.”
Step #5
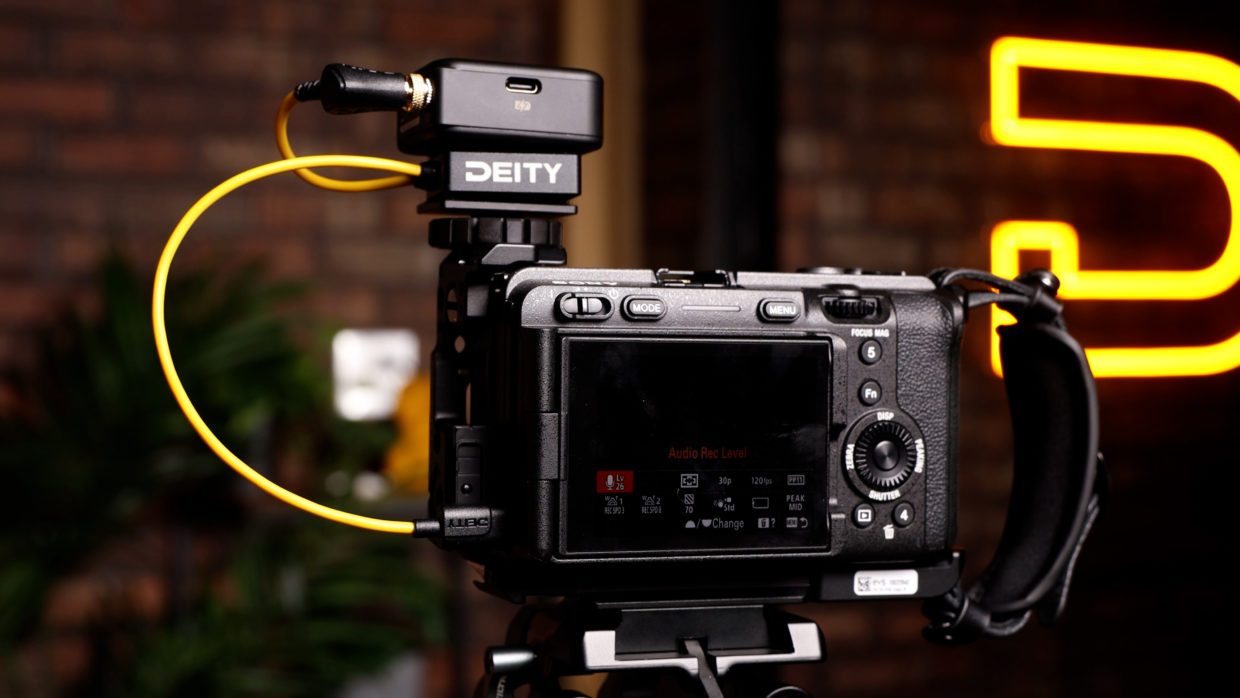
These Sony cameras use a proprietary multiport so to connect the TC-1 you will need a Deity C23 cable.
Using the included hook-n-loop, sandwich it between the TC-1 and cold shoe mount, and then plug everything in.
Step #6
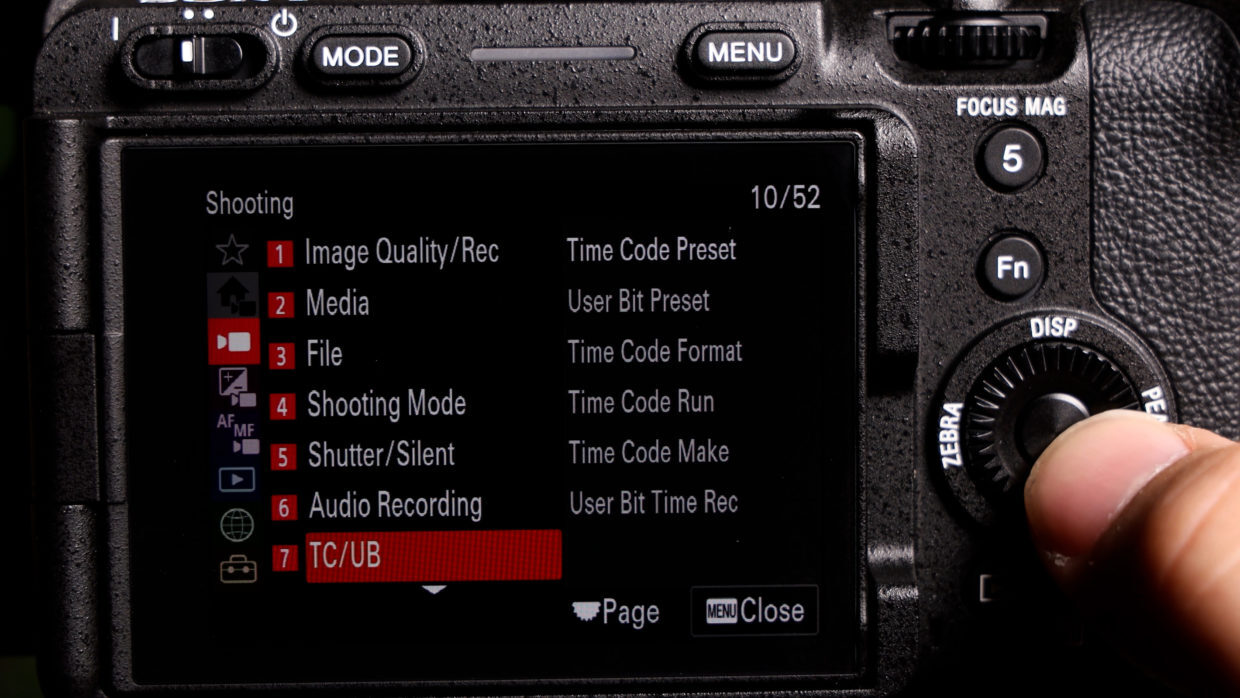
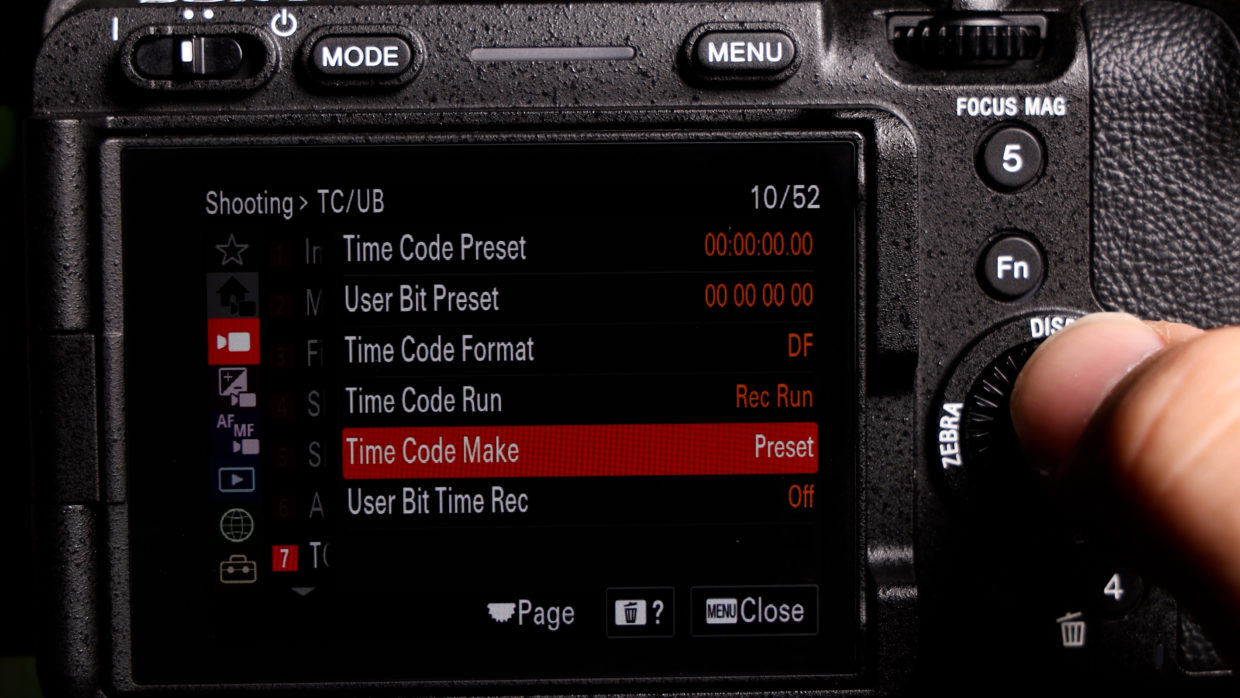
In your camera’s menu, scroll down to the camera icon and then scroll down to the “TC/UB” menu.
Step #7
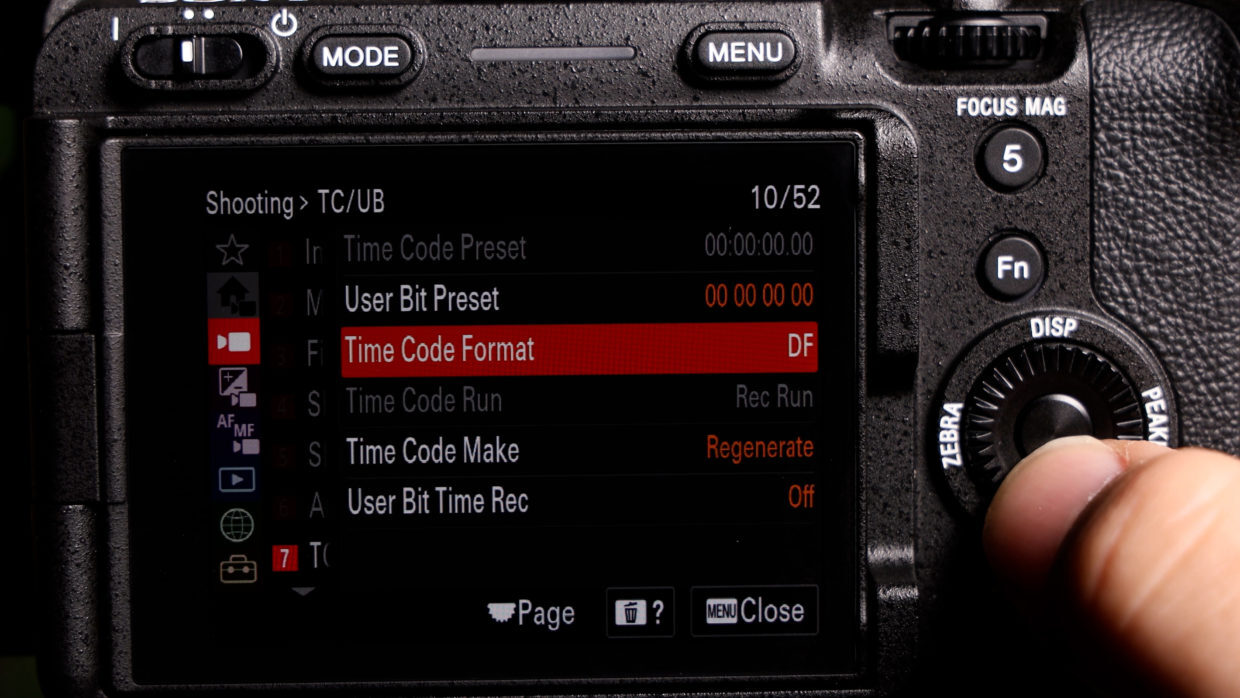
Set your “Time Code Format” to “drop frame” or “non-drop frame” depending on your frame rate choice.
Step #8
Next, set your “Time Code Make” to “Preset.”
Step #9
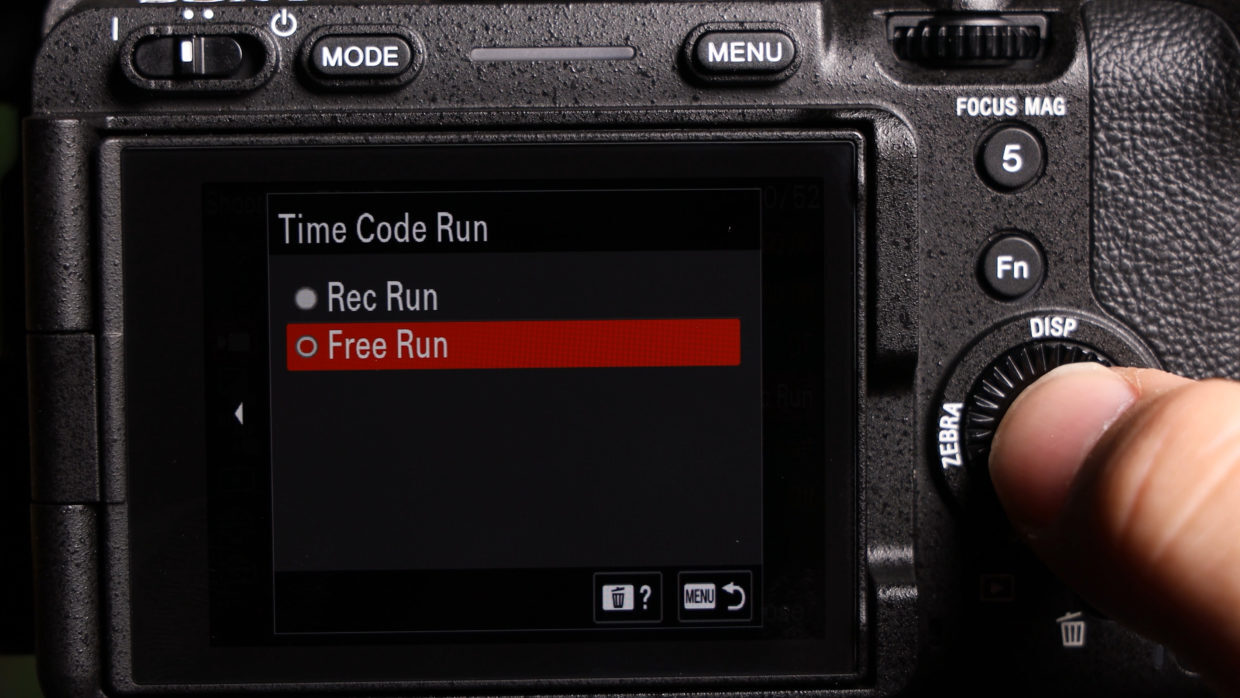
Finally, set your “Time Code Run” to “Free Run.”
You’re Connected!
Your camera is ready to be synced with the rest of your devices!
If you need help syncing your Deity TC-1 to your other Deity TC-1 timecode generators, here is a User Guide!