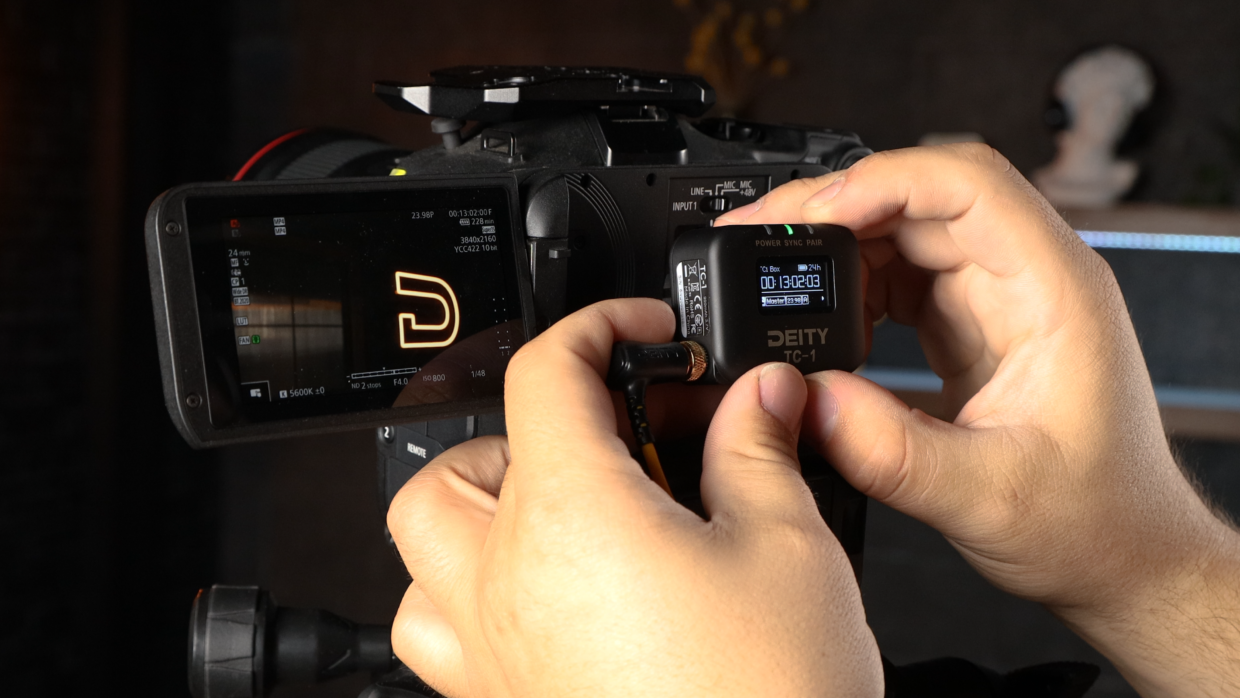
The Canon C70 accepts external timecode through its 3.5mm TC input, so a single cable from a Deity TC-1 is all you need to jam-sync. This guide covers the cable, the frame rate match, and the C70 menu settings that put the camera into Free Run.
Step-By-Step User Guide
Step #1
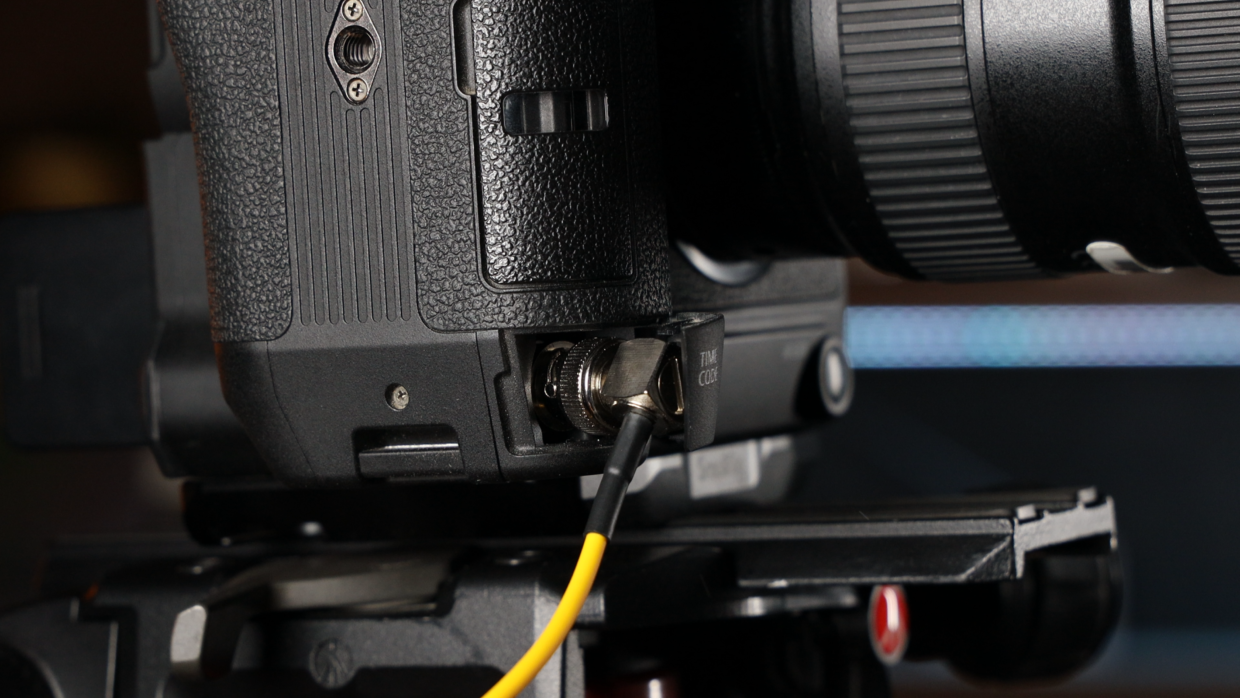
First things first, grab a BNC to 3.5 TRS cable. Next, locate the timecode port on the front right of the C70, plug it in and then we can dive into the camera menus.
Step #2
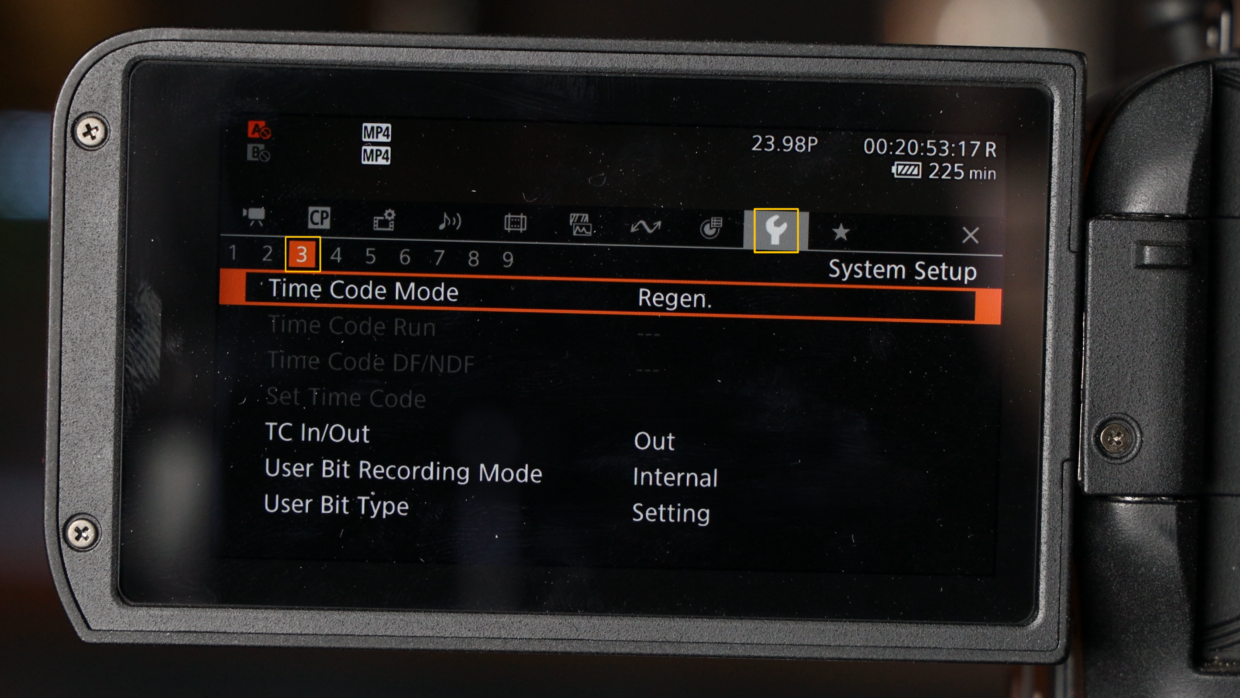
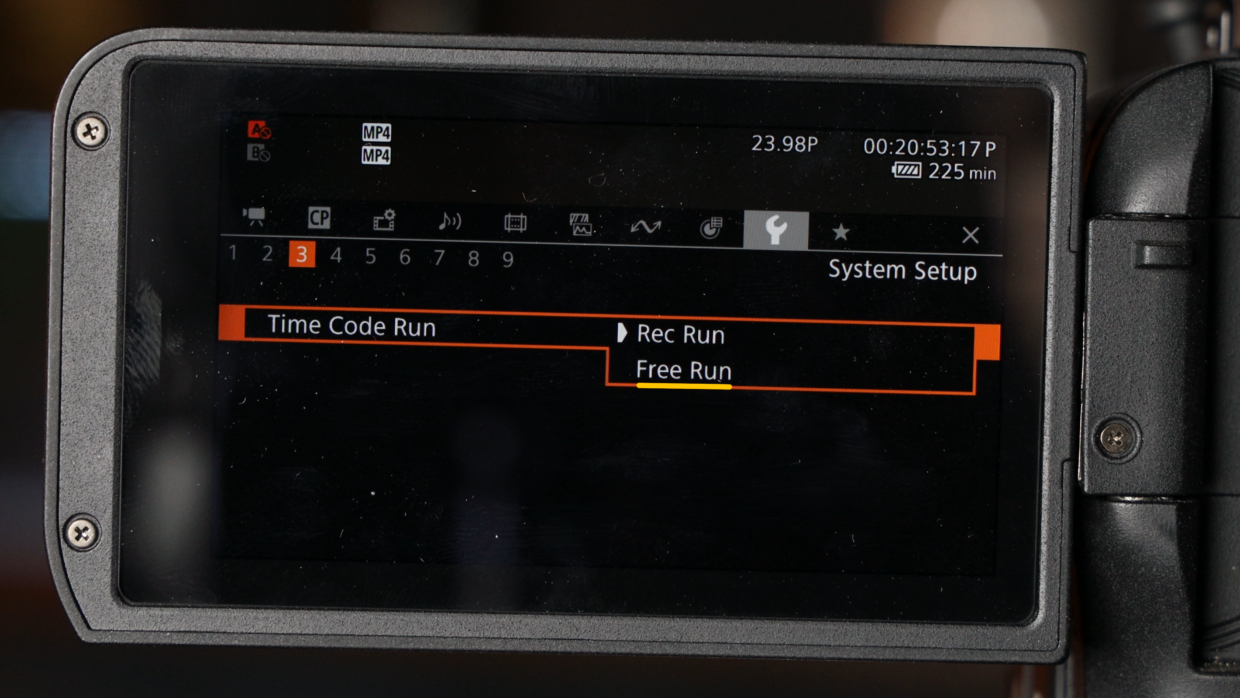
Scroll over to the “Wrench Icon” which is your system setup. Inside that you’re gonna go to “Section 3.” This is where all your timecode settings live.
Step #3
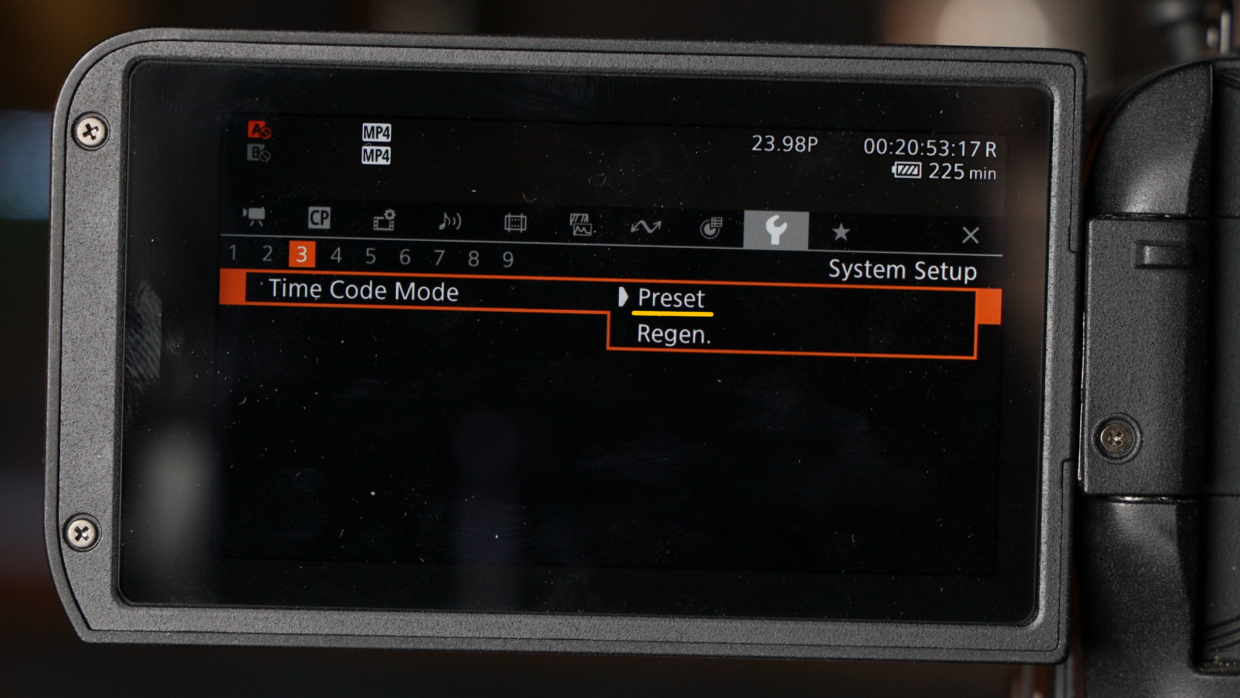
To receive a signal from the DEITY TC-1 set Timecode Mode to “Preset.”
Step #4
Next, set the Timecode Run to “Free Run.”
Step #5
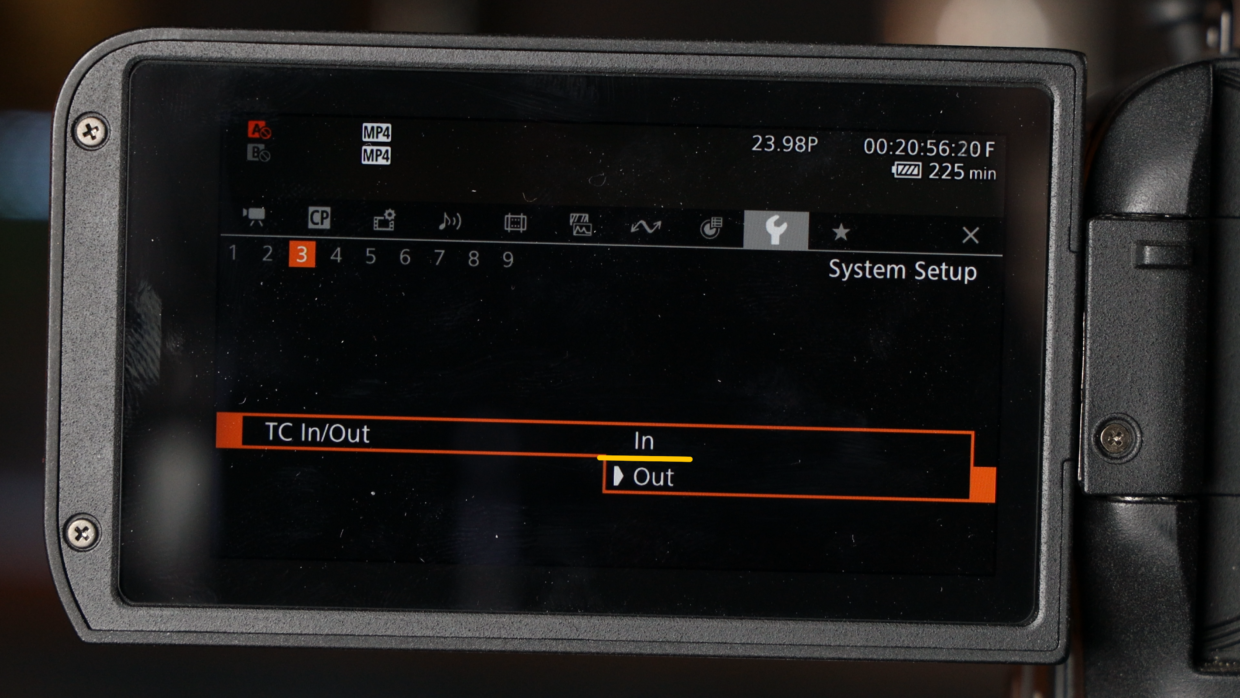
Finally, set the the TC in/out to “In.” You’re now ready to receive a signal!
Step #6
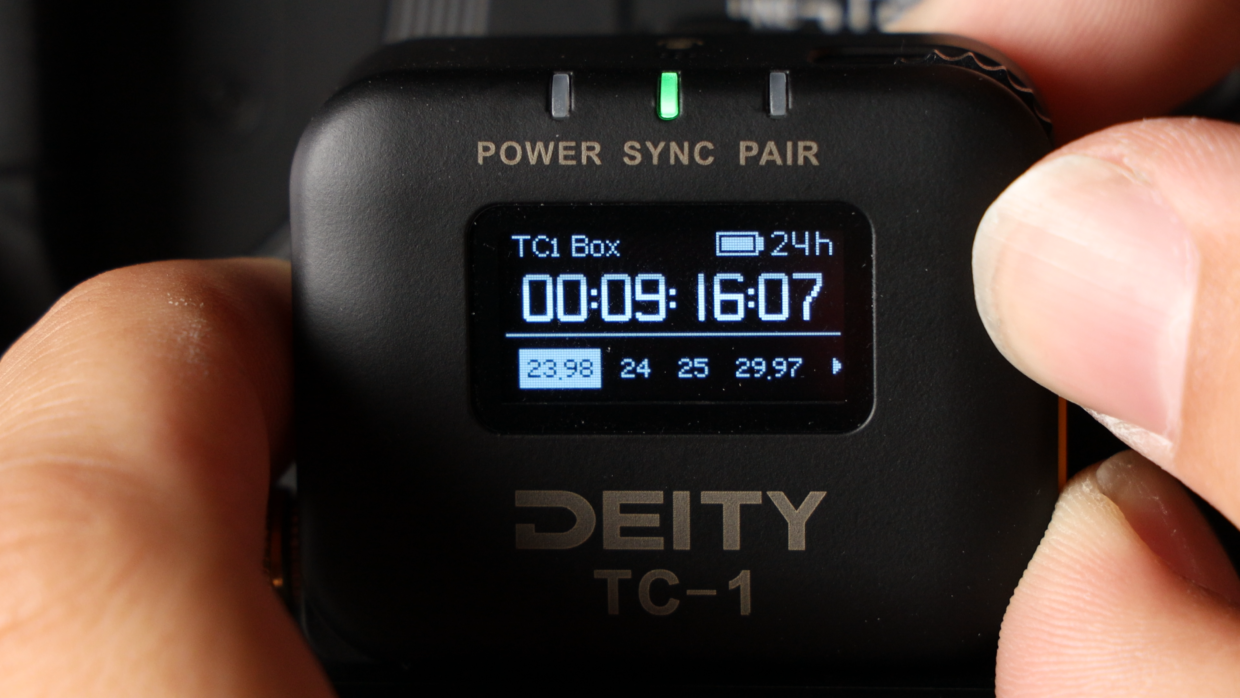
Really quickly, confirm your frame rate, in this case I’m using “23.98.“
On your TC-1, scroll over to the frame rate section and match it to the camera.
Step #7
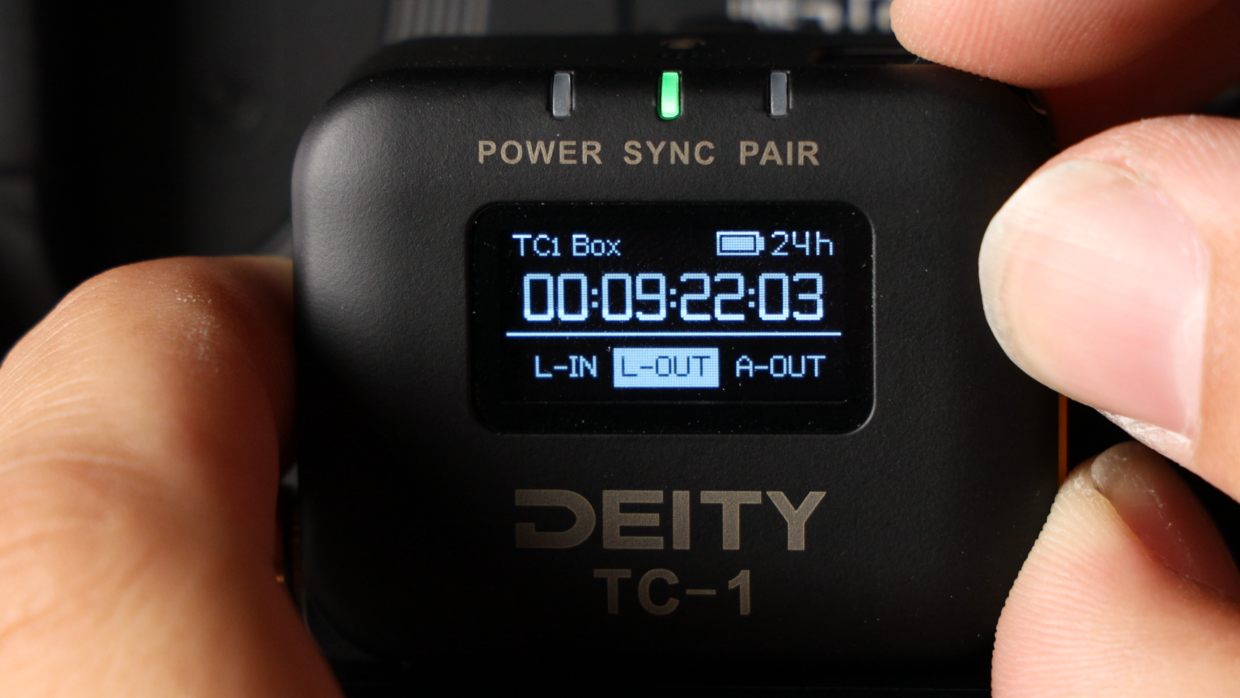
Next, scroll over to the out type section and select “L-Out.”
You’re Connected!
With that your C70 is now reading external timecode and is ready to be synced with the rest of your set!
If you need help syncing your Deity TC-1 to your other Deity TC-1 timecode generators, here is a User Guide!