
This guide covers how to power the DQC2, how to charge smart batteries, how to splice multiple chargers together, and how to use the special charging modes (forced charging for over-discharged batteries and half-charge mode). Read [DQC2] Getting Started first if you need a tour of the charger's parts.
Connecting Power
Use the original data cable and adapter, or a standard USB-C cable. Plug the USB-C connector into one of the USB-C power input ports on the rear of the DQC2, making sure it is seated firmly.
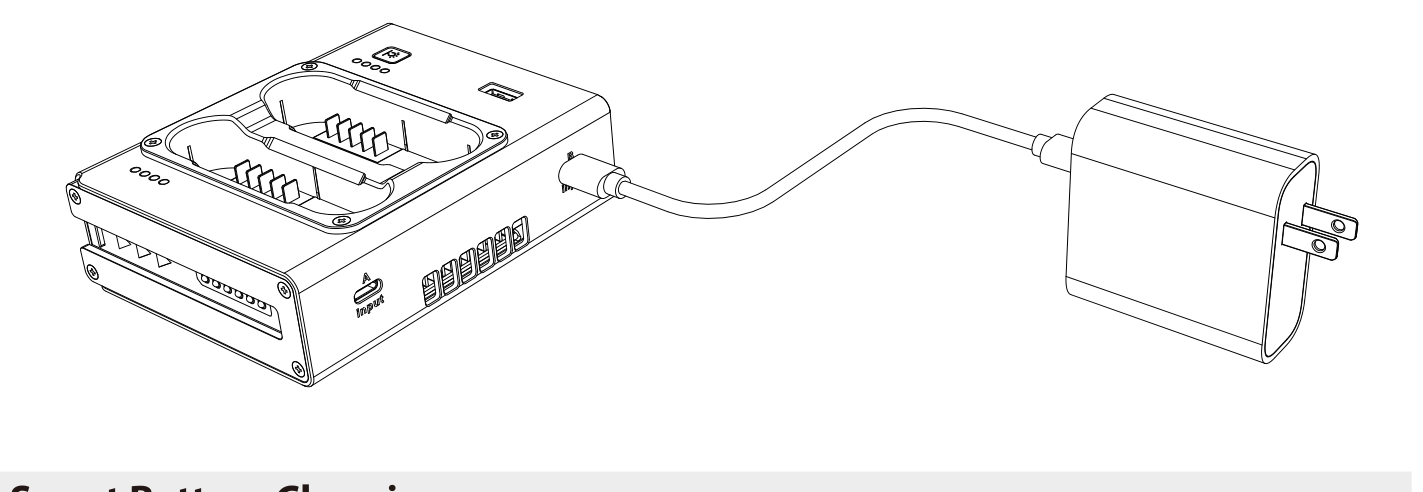
The DQC2 has two USB-C input ports (A Input and B Input) on the back, and together they support up to 100W of power input. The two ports are backups for each other:
- A single 100W power supply on one port can run the charger on its own.
- If you do not have a single high-power fast-charging adapter, you can connect two adapters at the same time (one to each port) to increase the input power and charge at full power.
- When both ports are connected at once, the charger still accepts a maximum of 100W total. Both charging plugs need to support the same protocol.
Charging a Smart Battery
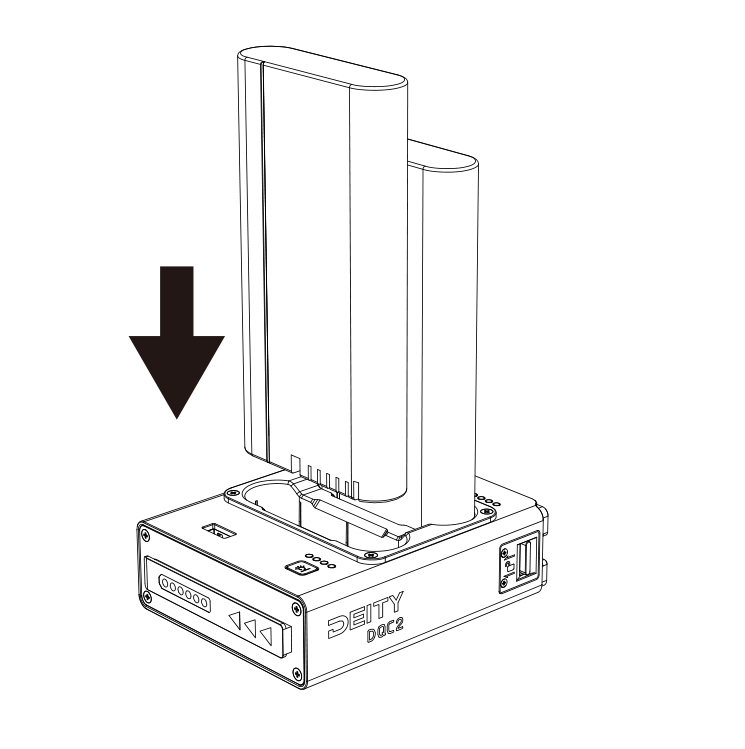
To charge a DEITY S-95 smart battery, insert it into a DQC2 slot, aligning it with the charging pins, then let charging begin. When a battery is inserted, the charger automatically recognizes its current charge level and displays the charging progress on the four-segment battery indicator as it fills.
High-temperature protection: when the device temperature reaches 65C, high-temperature protection stops charging, turns off the output on all ports, and flashes all charging indicators. When the temperature drops below 45C, the software resets and normal operation resumes.
Note: after a battery is inserted, the charger takes about 3 seconds to calculate the battery's charge, then shows the corresponding indicator light. This is normal.
Splicing Chargers Together
Multiple DQC2 chargers can be connected to each other through the chute structure on the side. The chute has energized contacts that pass power between chargers, and a locking structure on top that locks two chargers together so they do not slide or shift during use (which would cause a poor connection and charging failure). Up to 3 chargers can be spliced together at most.
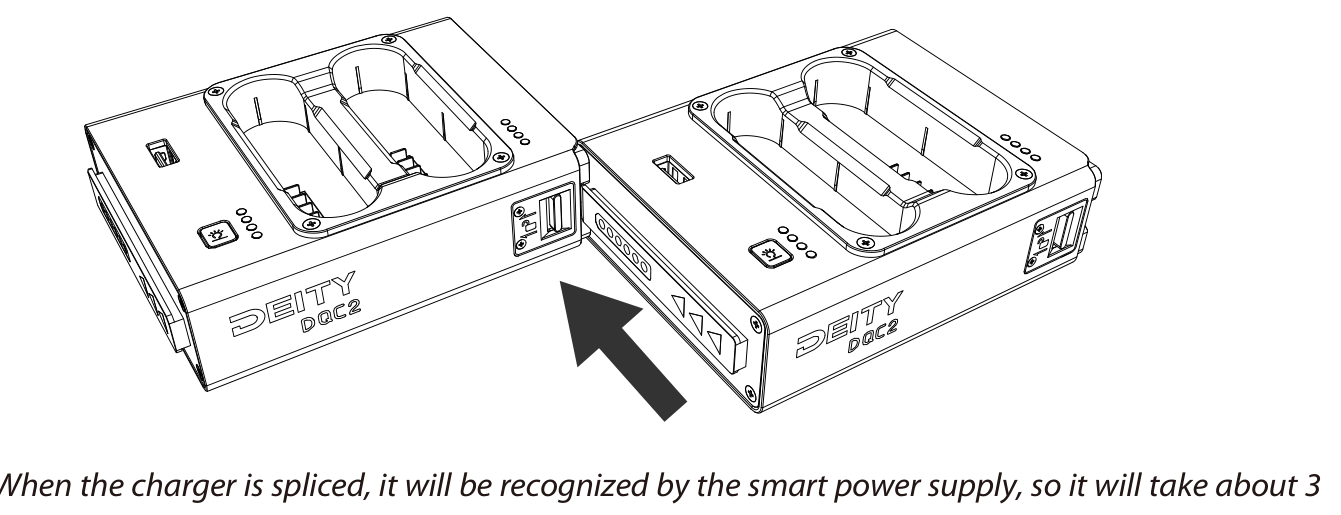
How splicing works in use:
- In the spliced state, a full 100W power input works for one DQC2 charger at a time. The spliced chargers are queued in order: when the first DQC2 has fully charged its batteries, power is intelligently switched to the next spliced charger.
- When spliced, the USB-A output of each charger can be used simultaneously.
- If you splice more than 3 units, the fourth unit cannot be used. To power subsequent spliced chargers, connect an additional set of 100W charging plugs.
Splicing and unlocking
To separate spliced chargers, push the splicing unlock button on the charging base to release the lock, then slide the base apart to unlock the splicing.
Note: when a charger is spliced, it is recognized by the smart power supply, so it takes about 3 seconds for the power indicator light of the later-spliced charger to light up after connection. This is normal.
Charging Indicator Switch and Special Modes
The button on the DQC2 is the charging indicator switch. It controls the indicator lights and unlocks two special charging modes.
Turning the indicator off
You can turn the battery indicator off while a battery is powered on. After the indicator is turned off, the battery still charges normally. Press the button briefly again to light the battery indicator back up.
Forced charging (for over-discharged batteries)
If a battery is over-discharged and its power indicator does not show any charge for a long time after it is inserted, press and hold the button for 5 seconds. The battery power indicator flashes to show it has entered forced charging mode. Over-discharged batteries have to be activated in this mode before they can charge normally.
If a battery is completely discharged, forced activation charging may not succeed on the first try. In that case, press and hold the button again to re-enter forced charging mode.
Half-charge mode
Short press the button 5 times to enter half-charge mode. In this mode the charging power of a single battery is 23W. Half-charge mode is used to charge smart batteries with a capacity of about 50Wh, and it can also be entered during forced charging. When the DQC2 enters half-charge mode, the LED flashes green three times.
Note: once in half-charge mode, the charger stays in this mode and cannot be exited on the fly. To exit, power the DQC2 off and then reconnect it to the power supply.